Analog Way Di-VentiX - DVX8022 Manuel d'utilisation
Page 29
Di-VentiX™
Chapter 3 : OPERATING MODE (continued)
PAGE 29
3-1. OPERATING WITH THE REMOTE CONTROL SOFTWARE (continued)
3-1-5. EMBEDDED EDGE BLENDING MODE (continued)
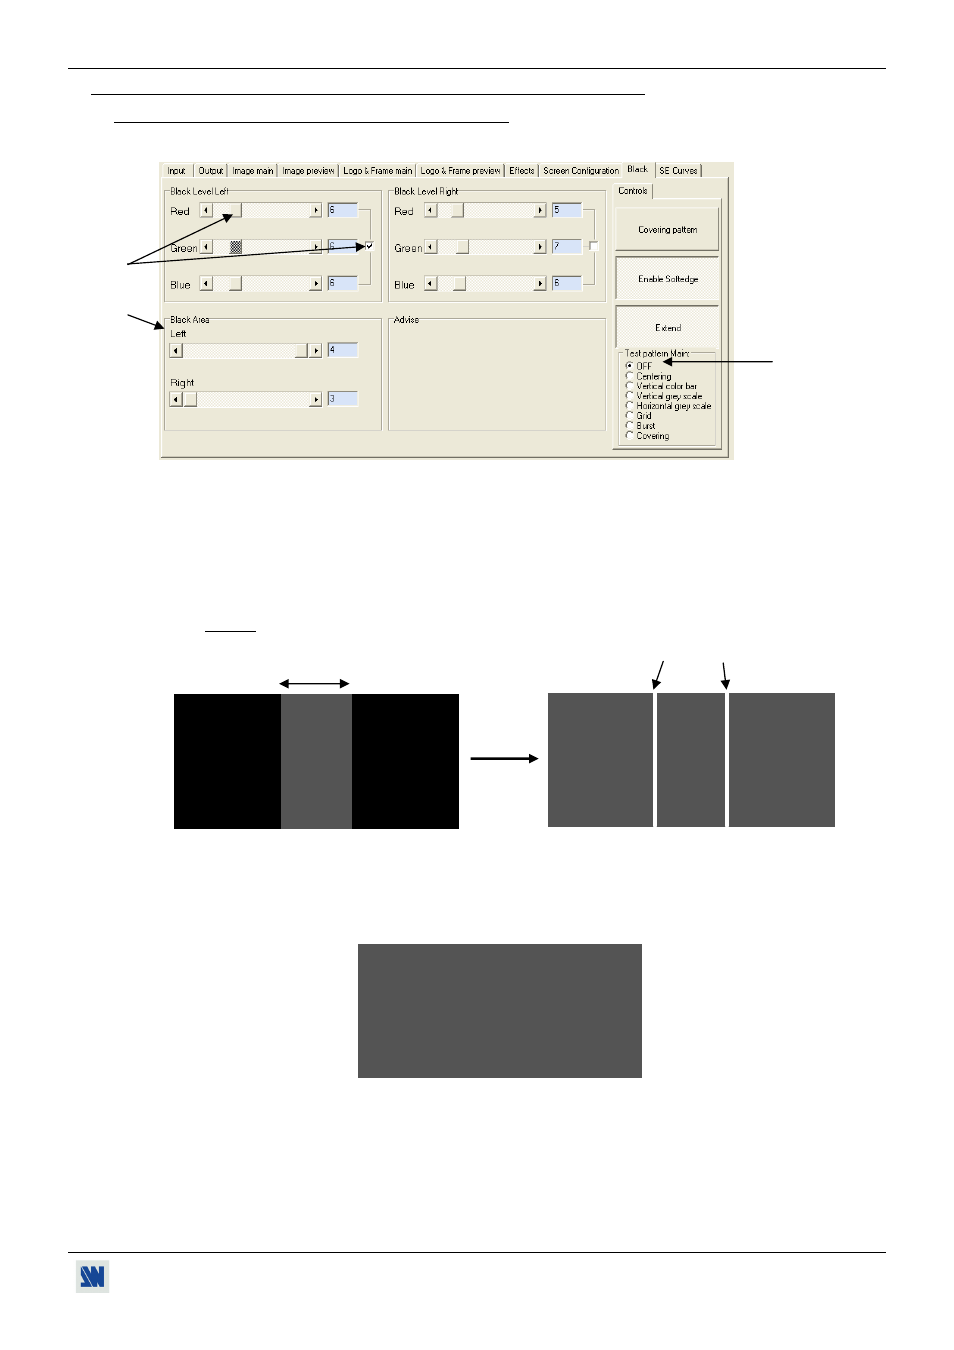
11) Select the Black tab to display the following windows:
Figure 33
11-1) Turn OFF the test pattern (Test pattern > off).
11-2) The covering area will appear brighter than the non-covering areas. With the Black level function adjust
the 2 non-covering areas (Left and right) to obtain a uniform dark grey on all the screen: Select the 3
colors and adjust the black level. As required, you can also separately adjust the colors of each projector
with the Red, Green & Bleu adjustments.
NOTE: Two white lines may appear at the junctions of the covering areas.
Projected image (before black level adjustment)
Projected image (after black level adjustment)
Figure 34
Figure 35
11-3) Use the Black Area function to remove the 2 white lines: adjust the Right & Left function (Top or
Bottom in vertical SE) to remove the white lines. A uniform dark grey image is then displayed.
Uniform projected image. Figure 36
Covering
area
White lines
11-3
11-2
11-1