Analog Way Di-VentiX - DVX8022 Manuel d'utilisation
Page 23
Di-VentiX™
Chapter 3 : OPERATING MODE (continued)
PAGE 23
3-1. OPERATING WITH THE REMOTE CONTROL SOFTWARE (continued)
3-1-3. OPERATING IN MIXER MODE (continued)
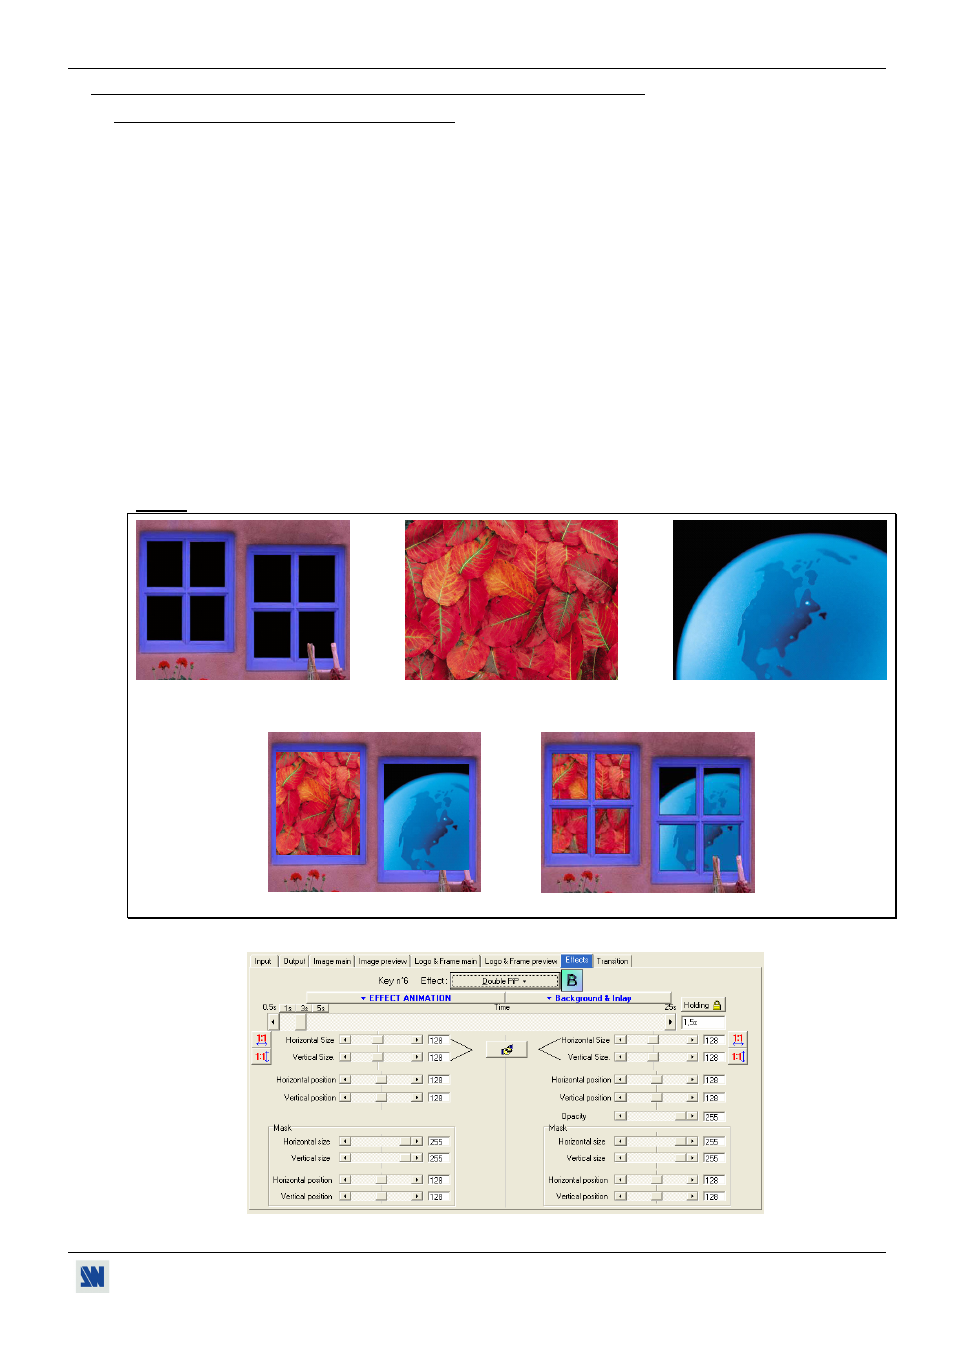
Double PIP transition:
• Create a frame with 2 black areas with a standard drawing software. The 2 black areas will be receiving the PIP
sources.
• Connect to the Di-VentiX the source providing the frame to be stored, and select the source.
• Click on the Logo & Frame tab, then click on the record frame tab: the device displays a white rectangle
corresponding to the frame selection area. As required adjust the position and size of the frame selection area with
the position & size functions.
• Adjust the Luma Key level to get to the desired Luma Keying.
• Click on STORE and select a frame memory (Up to 6). The memorization starts and will take about 2 minutes.
• Display onto the MAIN & PREVIEW outputs, the 2 sources to be used for the PIPs.
• Select an EFFECT key. Then click on the Effect tab and select Double PIP type. Then select the holding
duration.
• Click on the Background and Inlay button and select a frame.
• Click on TAKE: the frame store is displayed onto the MAIN output together with the 2 PIP.
• Adjust the position & size of each PIP.
• Adjust the mask size & position of each PIP in such manner that the 2 PIP will not be superposed into the black
areas.
• Click on the Background and Inlay button and select inlay = yes if you want to set the PIP in background.
NOTE: You can change the background frame during a double PIP.
Frame store
Main source Preview
source
The 2 PIP & the frame store are displayed onto the MAIN output
Inlay = no
Inlay = yes
Figure 25: Double PIP.
Figure 26: Double PIP effect window.