Analog Way Di-VentiX - DVX8022 Manuel d'utilisation
Page 15
Di-VentiX™
Chapter 2 : CONNECTING (continued)
PAGE 15
2-2. CONNECTING A CONTROL DEVICE FOR USING THE REMOTE CONTROL SOFTWARE
Your Di-VentiX is shipped with a Windows compatible Remote Control Software (3.5" disk). This software allows you
to control and do all adjustments by a simple mouse click.
NOTE: Preferably use Windows NT, 2000, or XP for LAN operation.
2-2-1. CONNECTING TO THE RS-232 PORT
- Connect the serial port of your control device to the RS-232 port (DB9 Female connector) of the Di-VentiX with
a straight cable (DB9 Female / DB9 Male).
- Speed transmission: 9600 bauds, 8 data bits, 1 stop bit, no parity bit, no flow control.
- Pin-out:
PIN #
FUNCTIONS
2
TRANSMIT DATA (Tx)
3
RECEIVE DATA (Rx)
5 GROUND
(Gnd)
2-2-2. CONNECTING TO THE LAN PORT
- Connect the LAN port (RJ45 connector) of the Di-VentiX to your network according to your installation.
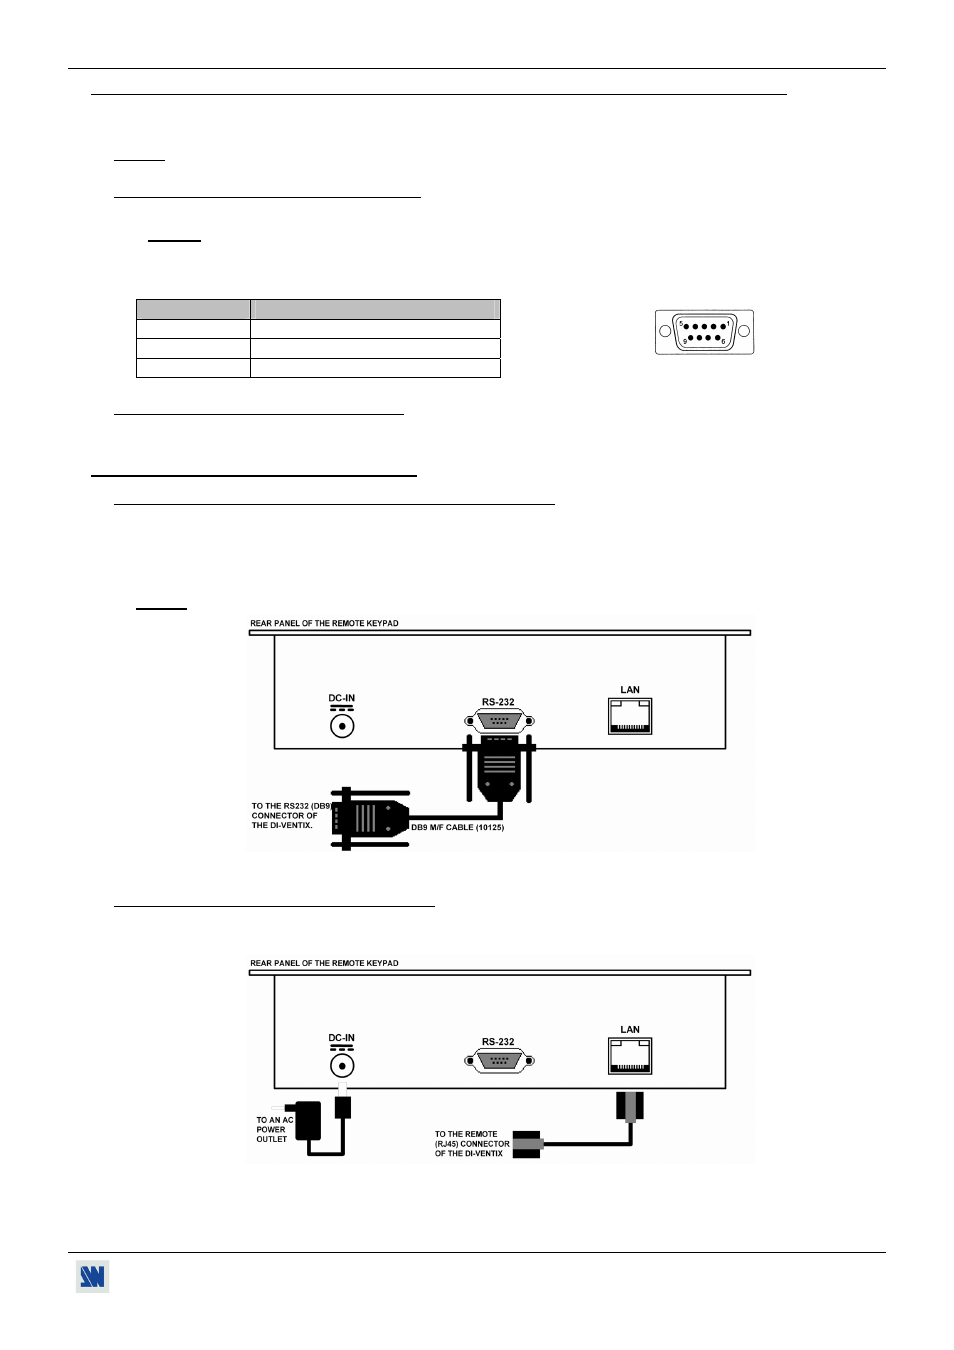
2-3. CONNECTING THE REMOTE KEYPAD
2-3-1. CONNECTING TO A Di-VentiX WITH THE RS-232 PORT
Turn OFF your Di-VentiX (rear panel switch).
Connect the RS-232 connector (DB9 female) of your Di-VentiX to the DB9 male connector of the REMOTE
KEYPAD with the supplied DB9 M/F cable.
Turn ON your Di-VentiX (REAR panel switch).
NOTE: The REMOTE KEYPAD is powered by the Di-VentiX via its DB9 (RS-232) connector.
Figure 12
2-3-2. CONNECTING TO A NETWORK (LAN)
Connect the power supply to a power outlet and to the DC-IN connector (rear panel).
Connect the REMOTE KEYPAD to your network according to your installation.
Figure 13
DB9 female (Rear panel of the DVX8022)