Title title – Analog Way Di-VentiX - DVX8022 Manuel d'utilisation
Page 24
Chapter 3 : OPERATING MODE (continued)
Di-VentiX™
PAGE 24
3-1. OPERATING WITH THE REMOTE CONTROL SOFTWARE (continued)
3-1-3. OPERATING IN MIXER MODE (continued)
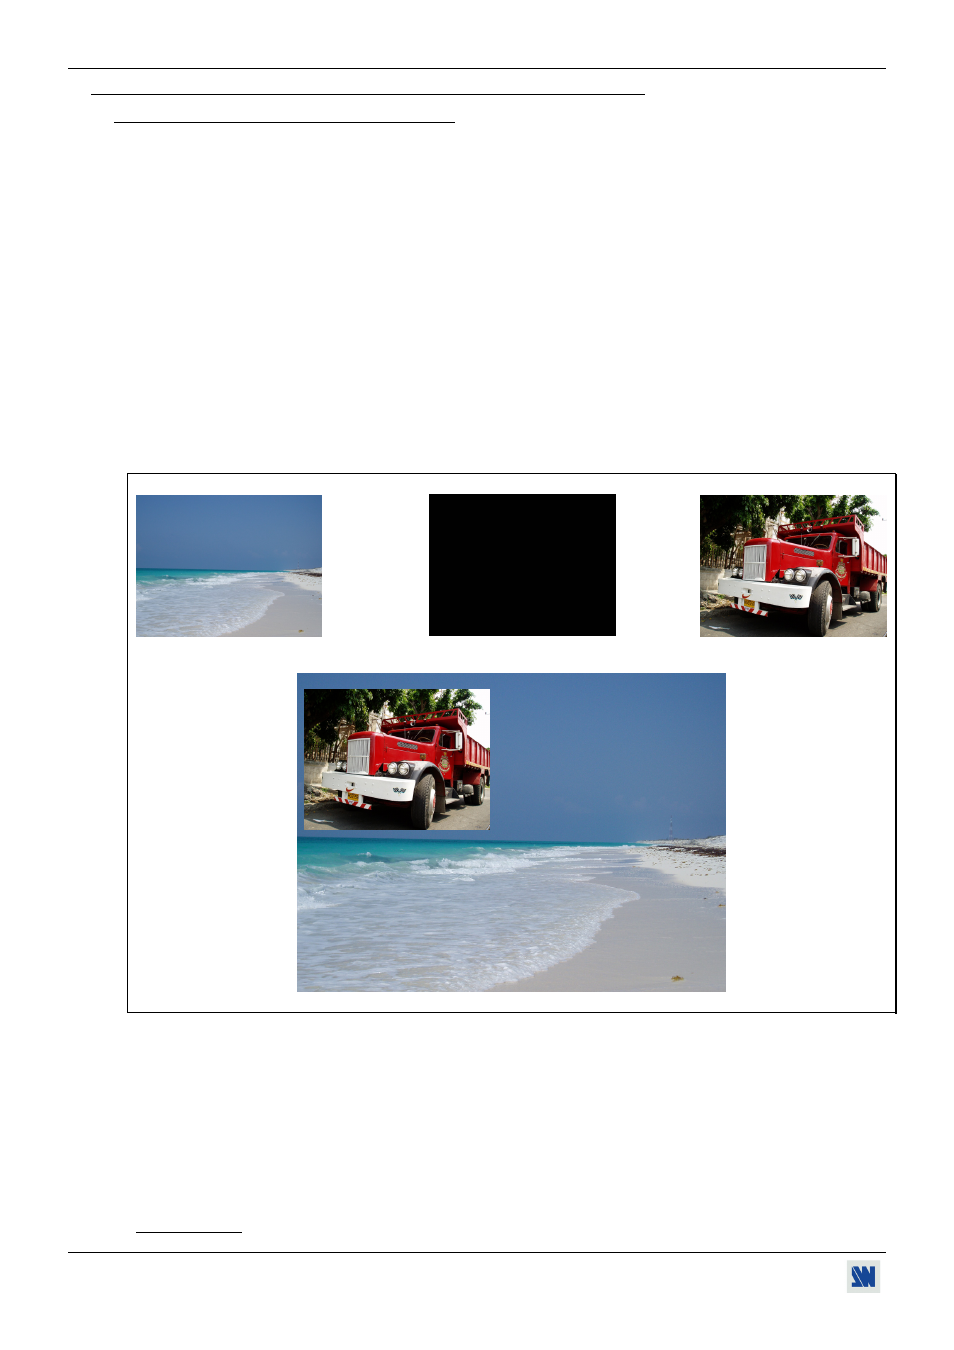
Titling a PIP (Double PIP effect):
• Store a frame: Connect to the Di-VentiX the source providing the frame to be stored, and select the source. Click
on STORE and select a frame memory (Up to 6). The memorization starts and will take about 2 minutes.
• Create the text to be displayed with a computer, using software such as PowerPoint®: the text should be bright
(yellow, white...) on a black background.
• Pre-select the source needed for the PIP and display it onto the MAIN output though a transition effect.
• Pre-select the source used to display the text file created above.
• Select an EFFECT key. Then click on the Effect tab and select Double PIP type. Then select the holding
duration.
• Click on the Background and Inlay button and select a frame.
• Click on TAKE: the frame stored is displayed onto the MAIN output together with the 2 PIP.
• Adjust the position & size of the main PIP.
• Adjust the Opacity of the preview PIP: this will make the black part of the PIP more or less transparent to the
image behind. The opacity can be adjusted from 0 to 100%.
• Adjust the position & size of the preview PIP to display the text onto the PIP and/or background frame.
• As required, adjust the position & size of the mask of the preview PIP. The mask adjustment allows limiting the
text area of the preview source.
Frame store
Title source (Preview)
PIP source (MAIN)
DISPLAYED IMAGE
Figure 27: Titling a PIP.
• AUDIO ADJUSTMENTS
Click on the Audio tab, and do for each AUDIO output the following adjustment:
Adjust the master volume.
Select the mono or stereo audio mode.
Select an AUDIO input (breakaway mode) or automatic (auto follow mode):
- auto follow = the audio switching follows automatically the video switching.
- breakaway = the selected audio input is permanently diffused.
For each audio input, adjust the level (audio level) and the balance (audio balance).
IMPORTANT: If the auxiliary audio input (AUX) is used, don't forget to activate it (AUX input = ON).
TITLE
TITLE