Analog Way CentriX - CTX8022 Manuel d'utilisation
Page 25
CENTRIX™ & EVENTIX™
Chapter 3 : OPERATING MODE (continued)
PAGE 25
3-1. OPERATING WITH THE REMOTE CONTROL SOFTWARE (continued)
3-1-4. OPERATING IN MATRIX MODE
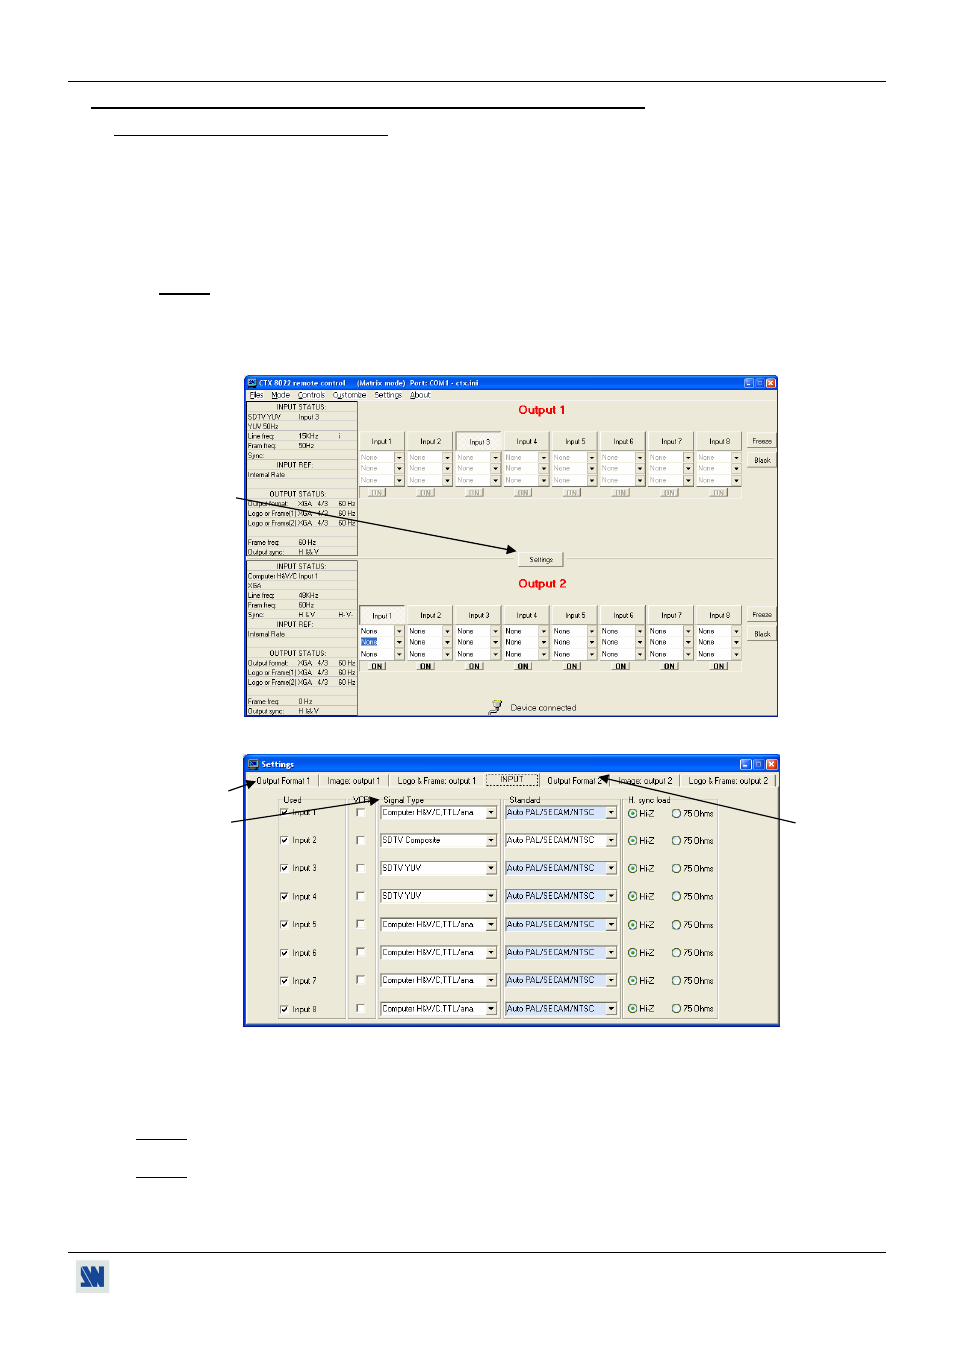
• SETTINGS
c We recommend resetting the device to its default values (Controls menu > default value) before proceeding.
d Set the CENTRIX
™
/ EVENTIX
™
in MATRIX MODE (Mode menu > matrix).
e Click on Settings then click on the Input tab and select the signal type of each source connected to the inputs.
f Click on the Output 1 tab and select the output sync according to your display device.
g Select the output rate mode (Internal rate or follow input...). Then select the frame rate.
h Select one of the output formats.
NOTE: For fixed pixels display device (DMD, LCD, PLASMA…), always select the output format
corresponding to the native resolution of your display device. Thus, the display device will not have to
scale the image and the result will be better.
i Select the type of screen (4/3 or 16/9), according to your wall mounted projection screen shape.
j Click on the Output 2 tab. Then renew the steps g to i for the display device connected to the OUTPUT 2.
Figure 27
Figure 28
• INPUT SELECTION
c Pre-select an input with the INPUT SELECT keys of the corresponding OUTPUT. The key starts blinking.
d Press on TAKE to display the pre-selected input onto the output. The transition operates with a fading to black.
NOTE: You can switch simultaneously on the OUTPUT 1 & 2: pre-select an input for the OUTPUT 1, then pre-
select an input for the OUTPUT 2, finally press the TAKE key.
NOTE: To switch directly from the input select key (without pressing the TAKE key), you should activate the auto
TAKE function (Controls menu > auto TAKE: ON).
e
f
j
e