Analog Way CentriX - CTX8022 Manuel d'utilisation
Page 17
CENTRIX™ & EVENTIX™
Chapter 3 : OPERATING MODE (continued)
PAGE 17
3-1. OPERATING WITH THE REMOTE CONTROL SOFTWARE (continued)
3-1-2. COMMUNICATION SETUP (continued)
• CASE OF LAN PORT:
c Connect the control device to the CENTRIX
™
/ EVENTIX
™
with the RS-232 port as indicated in the previous
page, then configure the LAN communication port (local address & port, remote address & port, netmask and
gateway) of the device with the Remote Control Software (CONTROL menu > CENTRIX LAN setup).
d Connect the LAN port (RJ45 connector) of the device to your network according to your installation.
e Select the LAN communication port of the device with the remote control software (CONTROL menu >
RS232/LAN setup >LAN setup) and configure the control device (Local port, Remote IP address & Remote
Port). Click on Apply to setup the new values. The software will also display Device connected. Then you can
disconnect the RS232 cable.
NOTE: If the communication doesn't work (CENTRIX
™
only), you need to reconnect the RS-232 communication port
to your control device, and restart the device. The device will also automatically detect and activate the RS232
communication port.
Figure 15
IMPORTANT: The CENTRIX
™
& EVENTIX
™
can be used in two different modes: the MIXER MODE and the
MATRIX MODE. The MIXER MODE allows switching seamlessly, fading and titling between all the
inputs. The MATRIX MODE allows displaying the inputs onto two independents display devices. The
default mode is the MIXER MODE. To set the CENTRIX
™
/ EVENTIX
™
in MATRIX MODE, please
refer to the section: 3-1-4.
3-1-3. OPERATING IN MIXER MODE
• SETTINGS
c We recommend resetting the device to its default values (Controls menu > default value) before proceeding.
d Verify the device
is set in MIXER MODE (Mode menu > Mixer).
e Click on the Input tab and select the signal type of each source connected to the inputs.
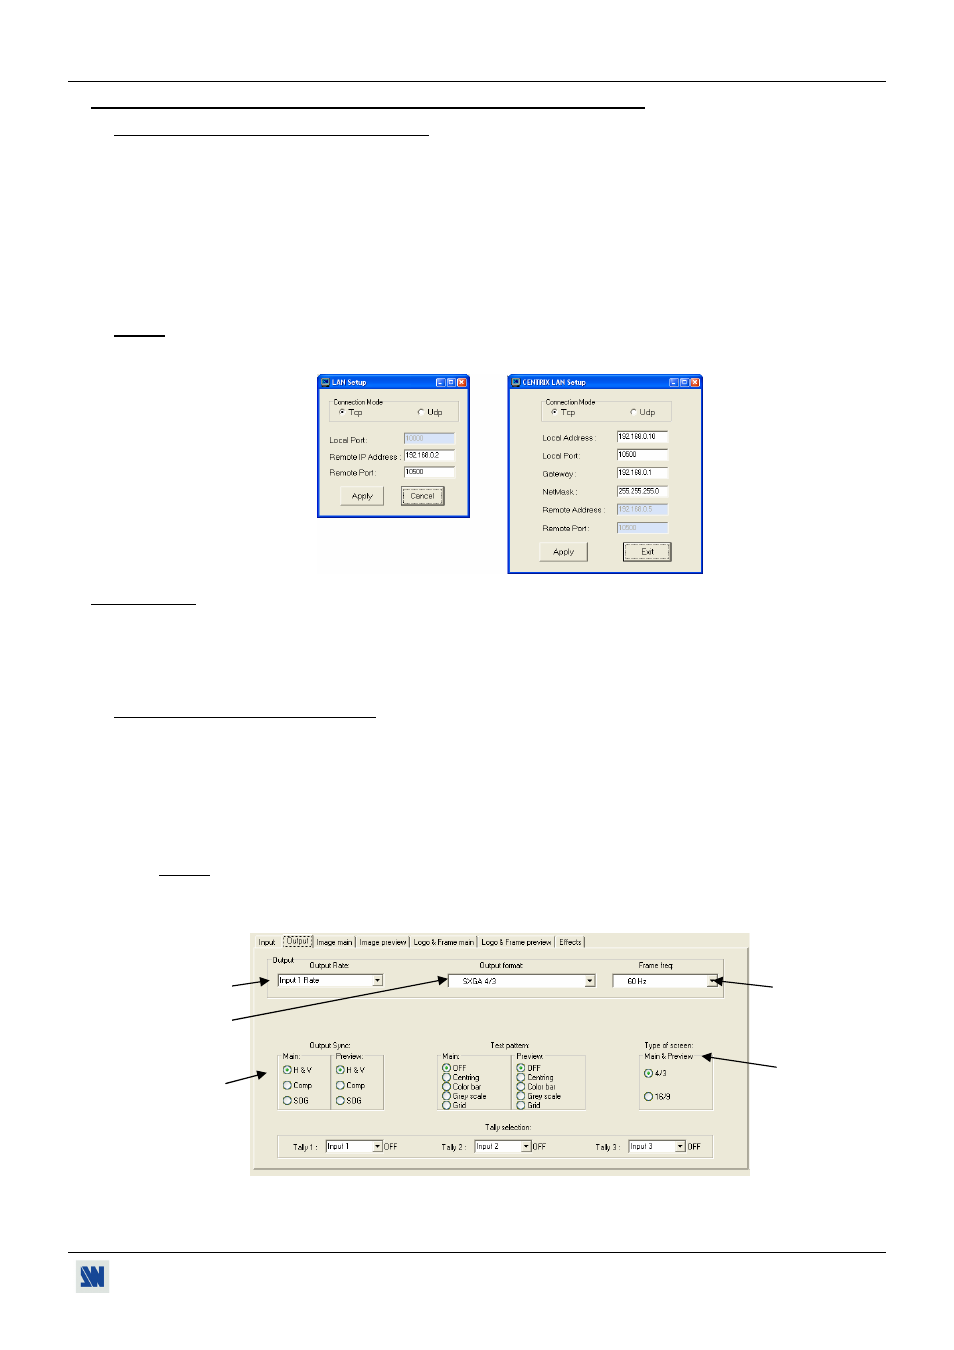
f Click on the Output tab and select the output sync. according to your display device.
g Select the output rate mode (Internal rate or follow input...). Then select the frame rate.
h Select one of the output formats.
NOTE: For fixed pixels display device (DMD, LCD, PLASMA…), always select the output format
corresponding to the native resolution of your display device. Thus, the display device will not have to
scale the image and the result will be better.
i Select the type of screen (4/3 or 16/9), according to your wall mounted projection screen shape.
Figure 16
g
f
h
i
g