Casio FX-CG10 Manuel d'utilisation
Page 567
20100801
20100801
ε
-21
Using a Custom Probe
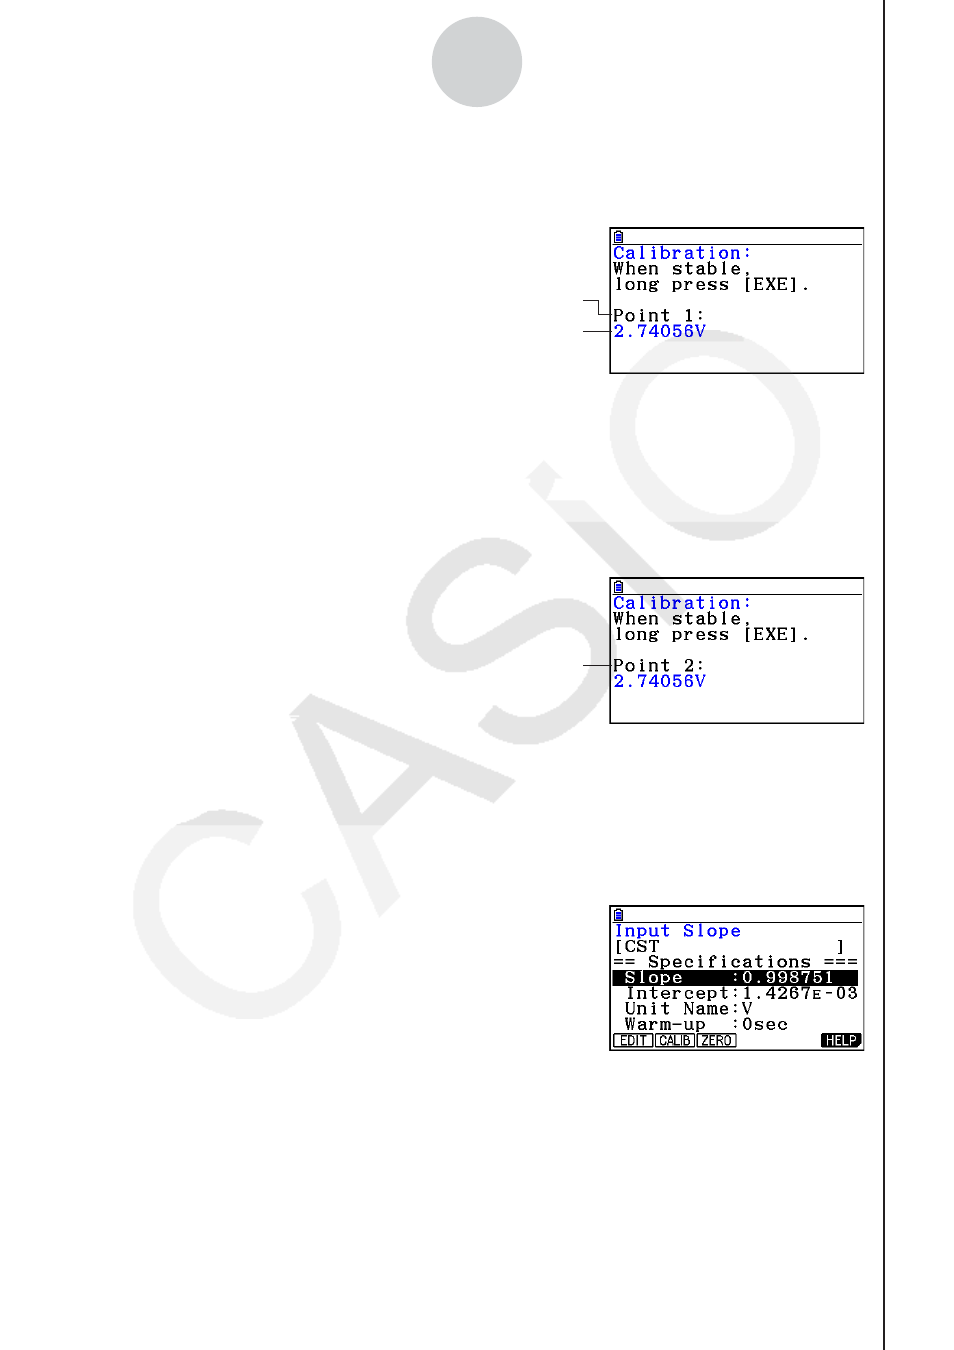
3. Press
2(CALIB).
• This will start the first sampling operation with the sensor connected to EA-200’s CH1,
and then display a screen like the one shown below.
First sampling operation
Real-time display of sampled values
4. After the sampled value stabilizes, hold down
w for a few seconds.
• This will register the first sampled value and display it on the screen. At this time the
cursor will appear at the bottom of the display, ready for input of a reference value.
5. Use the key pad to input the reference value for the first sampled value, and then press
w.
• This cause sampling of the second value to be performed automatically, and display the
same type of screen that appeared in step 3.
Second sampling operation
6. After the sampled value stabilizes, hold down
w for a few seconds.
• This will register the second sampled value and display it on the screen. The cursor will
appear at the bottom of the display, ready for input of a reference value.
7. Use the key pad to input the reference value for the second sampled value, and then
press
w.
• This will return to the custom probe setup screen.
• The E-Con2 will calculate the slope and intercept
value based on the two reference values that you
input, and configure the settings automatically. The
automatically configured values will appear on the
custom probe setup screen, where you can view
them.
8. Press
w, and then input a memory number from 1 to 99.
• This saves the custom probe setup and returns to the custom probe list.