Analog Way CentriX - CTX8022 Manuel d'utilisation
Page 34
Chapter 3 : OPERATING MODE (continued)
CENTRIX™ & EVENTIX™
PAGE 34
3-3. OPERATING WITH THE REMOTE KEYPAD (continued)
3-3-2. OPERATING IN MIXER MODE (continued)
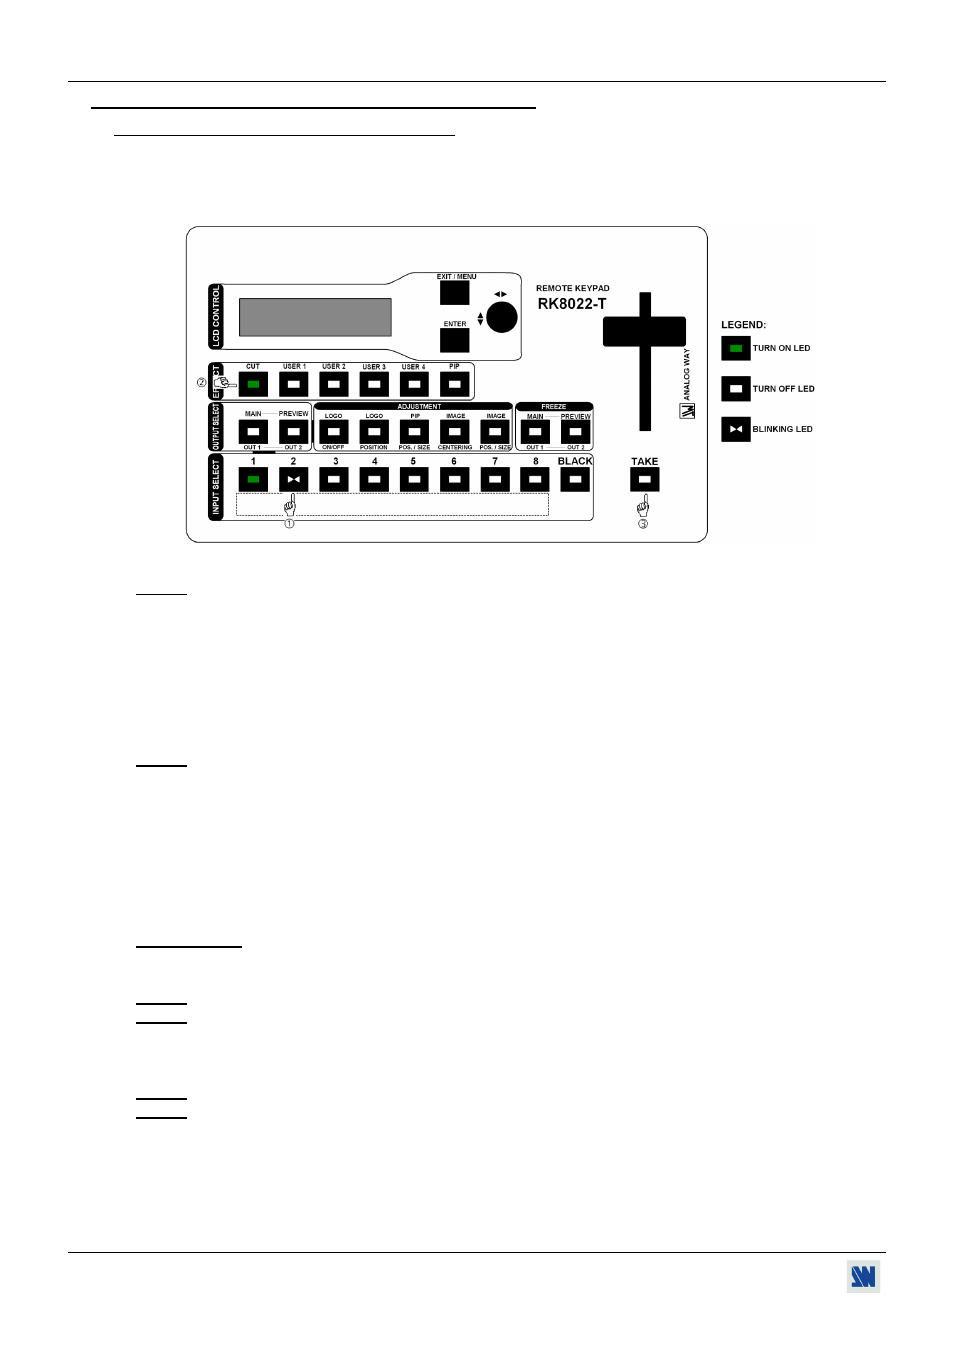
• INPUT SELECTION
c Pre-select an input with the INPUT SELECT keys. The key starts blinking.
d Select an effect with the EFFECT keys.
e Press on TAKE or move manually the T-BAR to do the transition.
Figure 31
NOTE: According to the selected effect the TAKE key may turn ON or blink during the transition. When the
TAKE key is turned ON you should wait for the end of the transition before doing another selection. When
it is blinking, you should press the TAKE key to stop the transition.
• DISPLAY DEVICES ADJUSTMENTS
c Select the MAIN centering pattern with the LCD menu (OUTPUT > test pattern > main > centering pattern).
d Adjust directly the display device itself, using its controls, to fill the centering pattern in full screen.
See Figure 18: Centering pattern. Page 18.
e Renew the same process to adjust your PREVIEW display device.
NOTE: Now the display devices are identically adjusted, you can also make the image adjustments on the display
device of your choice. When you are in a live display, you can make corrections on the PREVIEW monitor
only, without disturbing the MAIN display device.
• IMAGE ADJUSTMENTS
For each input source connected to the CENTRIX
™
/ EVENTIX
™
make the following adjustments:
c Select the source you want to adjust.
d Select the aspect ratio of your input source with the LCD menu (IMAGE > aspect ratio).
e Use the Centering function with the LCD menu (IMAGE > centering) or with the front panel IMAGE
centering key to automatically position the image in the Centering pattern.
IMPORTANT: For best results, display a full size bright image (no black border) to perform a centering. If
necessary, correct the adjustment the position & size with the IMAGE POS/SIZE key or with the
LCD menu (IMAGE > pos settings).
NOTE: The centering function is only available for computer sources.
NOTE: In case of same Input/Output resolution, the centering also achieves automatic pixel clock adjustments. It
may be useful, to improve manually the pixel clock and phase using the LCD menu (IMAGE > optimize
> clock or phase).
f If needed, make the others adjustments, available in the LCD IMAGE menu (color, brightness…).
NOTE: To set the image adjustments to the factory settings, use the Preset function (IMAGE > preset > yes).
NOTE: The adjustments are automatically stored in NON-volatile memories. The CENTRIX
™
& EVENTIX
™
are
provided with 40 NON-volatile image memories. Each of these memories contains the input channel
number, the input and output format parameters and all of the image adjustments (position, size,
brightness...). When the 40 memories are used, each new memorization erases the oldest record.