Complete installation checklist – Maytag MHWC7500YW Manuel d'utilisation
Page 21
21
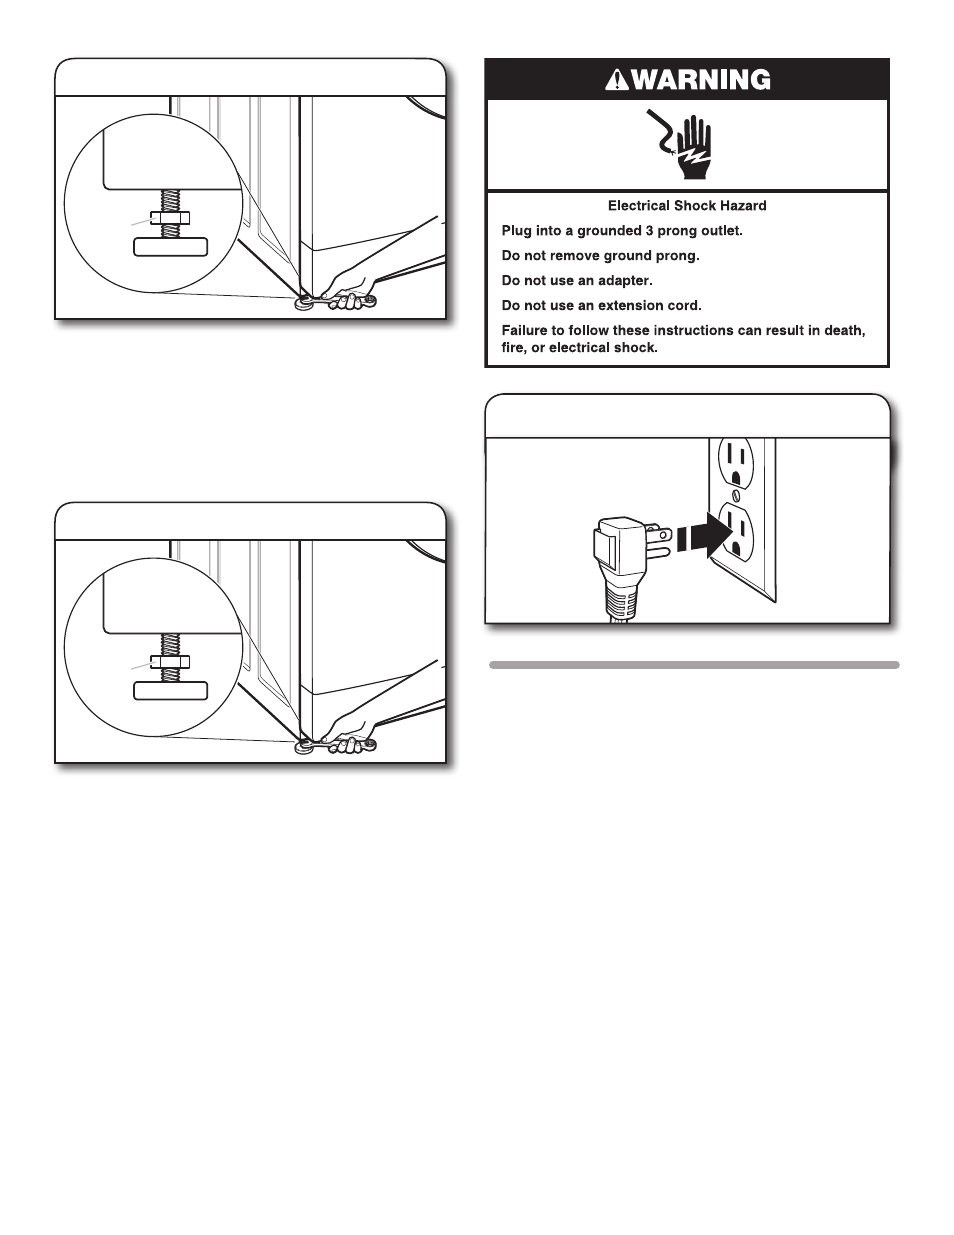
19.
Plug into a grounded 3-prong outlet
COMPLETE INSTALLATION
CHECKLIST
q
Check electrical requirements. Be sure you have correct
electrical supply and recommended grounding method.
q
Check that all parts are now installed. If there is an extra
part, go back through steps to see what was skipped.
q
Check that you have all of your tools.
q
Check that transport materials were completely
removed from back of washer.
q
Check that both hot and cold hoses are attached and water
faucets are on.
q
Check for leaks around faucets, valves, and inlet hoses.
q
Remove protective film from console and any tape
remaining on washer.
q
Check that washer is plugged into a grounded
3-prong outlet.
q
Dispose of/recycle all packaging materials.
q
Read “Using Your Washer.”
q
To test and clean your washer, turn on the washer and
choose the Normal cycle and run it without clothes. Use only
HE detergent. Use 1/2 the manufacturer’s recommended
amount for a medium-size load.
If washer is not level, use a 1/2" or 13 mm open-end or
adjustable wrench to turn jam nuts clockwise on feet until they
are about 1/2" (13 mm) from the washer cabinet. Then turn the
leveling foot clockwise to lower the washer or counterclockwise
to raise the washer. Recheck levelness of washer and that all
four feet are firmly in contact with the floor. Repeat as needed.
HELPFUL TIP: You may want to prop up front of washer
about 4" (102 mm) with a wood block or similar object that
will support weight of washer.
When washer is level and all four feet are firmly in contact
with the floor, use a 15/32" or 12 mm open-end or adjustable
wrench to turn jam nuts counterclockwise on leveling feet
tightly against washer cabinet.
HELPFUL TIP: You may want to prop washer with
wooden block.
17.
Adjust leveling feet
Jam nut
18.
Tighten leveling feet
Jam nut