English – Pit Boss 64 Inch Freestanding Wood Pellet Grill Assembly Guide Manuel d'utilisation
Page 8
ENGLISH
8
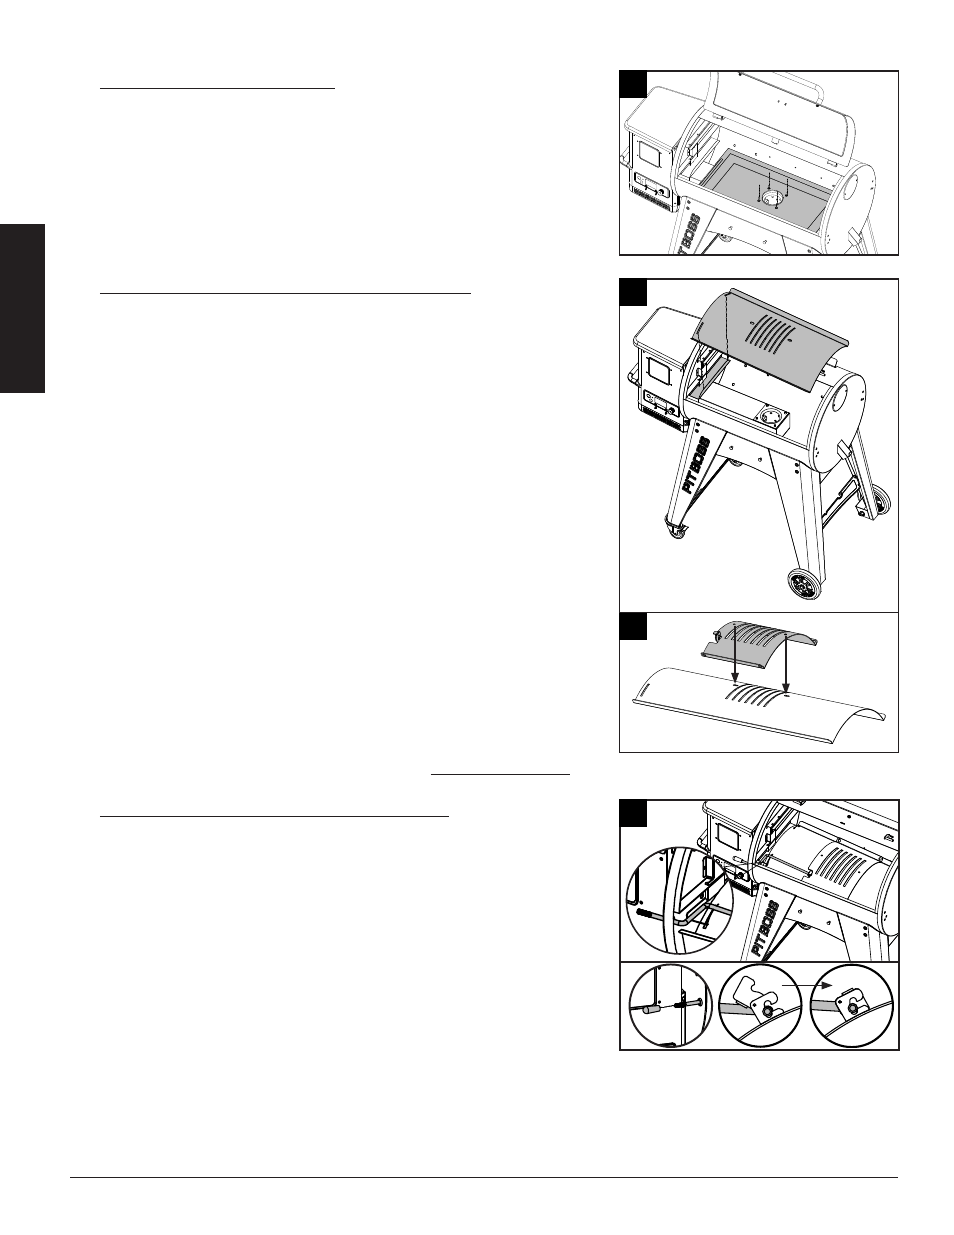
10. PLACING THE DIFFUSER PLATE
Parts Required:
1 x Diffuser Plate
(#23)
Installation:
• Replace the Diffuser Plate in Main Barrel.
NOTE: Make sure the four holes of the Diffuser Plate are aligned
properly with four screws of the burn pot.
11. INSTALLING THE FLAME BROILER COMPONENTS
Parts Required:
1 x Flame Broiler Main Plate
(#8)
1 x Flame Broiler Slider
(#7)
Installation:
• Insert the Flame Broiler Main Plate into the main grill. Rest the Flame
Broiler Main Plate on the built-in ledge (on the inside right) of the
Main Grill that directs grease towards the grease bucket spout. Slide
the entire piece to the left side, and the two slots on the Flame Broiler
Main Plate will fit into the rounded ledge above the burn pot. It will sit
slightly at a downward angle. Note illustration 11A.
IMPORTANT: If the Main Plate is resting on the base of the Barrel,
it is installed incorrectly. Poor installation may result in damage to
your Main Grill Barrel.
• Place the Flame Broiler Slider on top of the Flame Broiler Main Plate
covering the slotted openings. Ensure the raised tab is on the left
and the two pins at the bottom of the Flame Broiler Slider place into
the holes of the Flame Broiler Main Plate to easily adjust for direct and
indirect flame when cooking. Both flame broiler parts are lightly
coated with oil to avoid rusting when shipped. Note illustration 11B.
NOTE: To maintain the searing and grilling performance of your cooking
grids, regular care and maintenance Is required. See Owner's Manual.
12. INSTALLING FLAME BROILER ADJUSTING BAR
Parts Required:
1 x Flame Broiler Adjusting Bar
(#5)
1 x Flame Broiler Adjusting Bar Handle
(#6)
Installation:
• Insert the Flame Broiler Adjusting Bar through the opening hole on
the left side of the Main Barrel. Add the Flame Broiler Adjusting Bar
Handle on the end outside the Barrel. Next, slide the notched end of the
Adjusting Bar into the locking tab on the Flame Broiler Slider, giving you
adjustable access to the Flame Broiler Slider on the Main Plate.
11B
7
8
11A
8
10
23
12
A
C
B
6
5
5
C
B