English, Adding wheels to the cart, Mounting the cart to the barrel – Louisiana Grills Black Label Series 57 Inch Freestanding Smart Wood Pellet Grill Assembly Guide Manuel d'utilisation
Page 4: Installing the front shelf brackets
LOUISIANA GRILLS
4
ENGLISH
ENGLISH
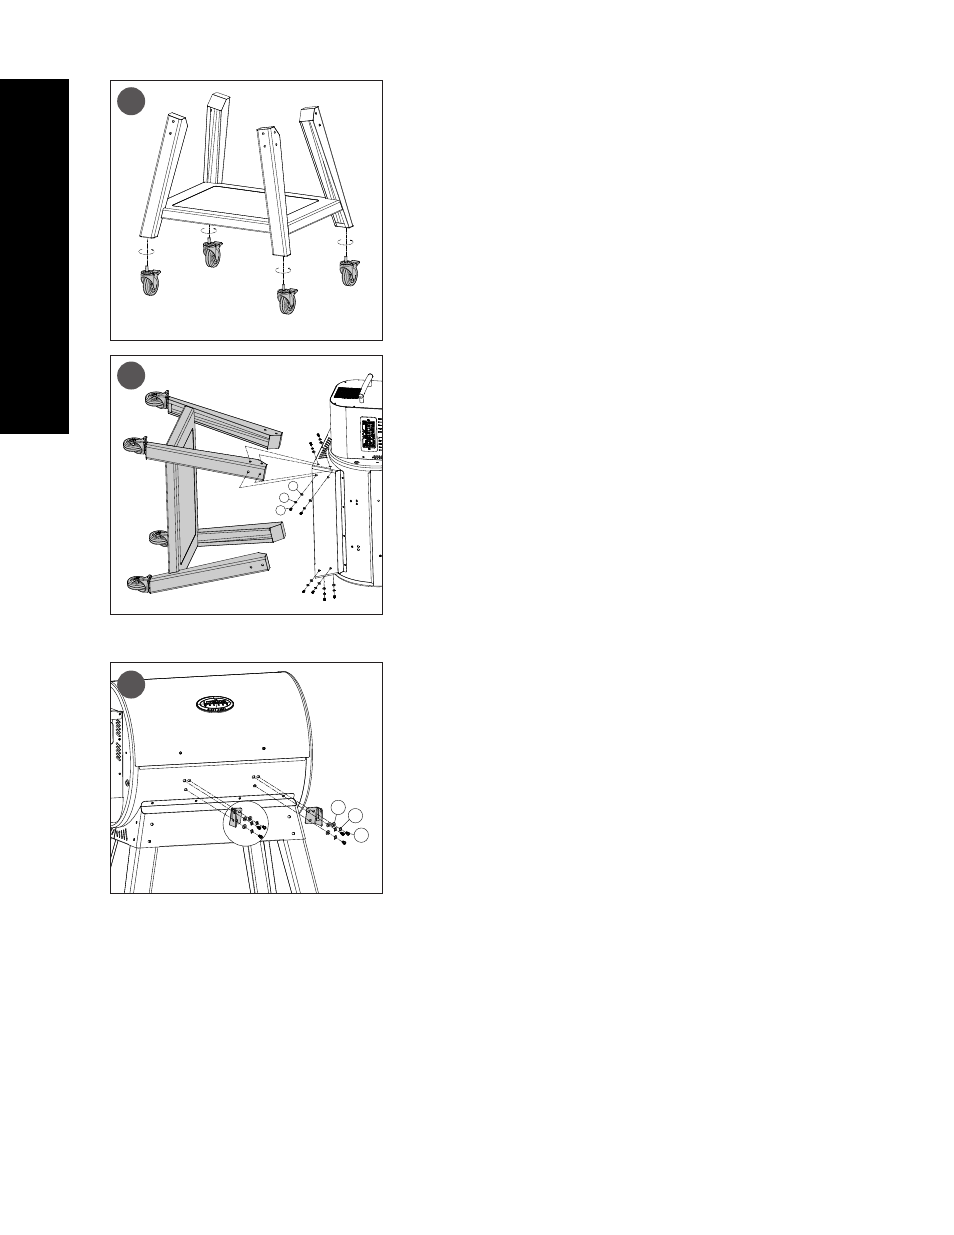
ADDING WHEELS TO THE CART
PARTS REQUIRED:
4
x
Locking Caster Wheel (#20)
INSTALLATION:
•
Insert each Locking Caster Wheel into the bottom of each Support Leg by
hand-tightening into the hole. Ensure that each Locking Caster Wheel is
inserted completely so that the cart sits level on the ground. Lock each Caster
Wheel.
MOUNTING THE CART TO THE BARREL
PARTS REQUIRED:
1
x
Main Barrel (#5)
16
x
Screw (#A)
16
x
Washer (#C)
16
x
Locking Washer (#D)
INSTALLATION:
•
Insert the assembled cart into the Main Barrel brace. Secure each Support
Leg to the brace using four Washers, Locking Washers and Screws.
TIP: USING A LOW TABLE IS USEFUL FOR THIS INSTALLATION STEP.
•
Repeat the same installation of the other three Support Legs to the Main
Barrel brace.
TIP: TO EASE INSTALLATION OF THE FINAL SIDE, CAREFULLY TURN THE UNIT
TO LIE ON ITS BACK TO SECURE THE LAST FOUR SCREWS TO THE MAIN BARREL
BRACE.
•
Once the cart is secure, carefully lift the grill into an upright position.
INSTALLING THE FRONT SHELF BRACKETS
PARTS REQUIRED:
1
x
Front Shelf Bracket / Left (#15)
1
x
Front Shelf Bracket / Right (#16)
6
x
Screw (#A)
6
x
Washer (#C)
6
x
Locking Washer (#D)
INSTALLATION:
•
Install one Front Shelf Bracket to the front of the Main Barrel by using three
Washers, Locking Washers and Screws. Note illustration for proper positioning.
•
Repeat the same installation for the other Front Shelf Bracket.
2.MOUNTING THE WHEELS TO THE CART
4 x Locking Caster Wheel (#5)
Insert each locking caster wheel into the bottom of each support leg by hand-tightening into
the hole. Ensure the locking caster wheel is inserted completely.
A
16x
C D
16x 16x
A
D
C
3.INSTALLING THE CART TO THE BARREL
1 x Main Barrel (#1)
16x 1/4-20x5/8" Screw (#A)
16x 1/4
washer
(#C)
16x 1/4
spring washer
(#D)
Find a low table and place cardboard on it. Lay the main barrel on its side, hopper end pointed
upward, on the prepared low table. Note illustration.
Insert the assembled cart into the main barrel brace, and secure each leg to the brace using
four washers,
spring washer
and screws. Repeat same installation for the other three
support legs. Note illustration To ease installation of the final side, carefully turn the grill to lie
on its back to secure the last four screws to the main barrel brace.
A
A
6x
C D
6x 6x
C D
4.INSTALLING THE FRONT SHELF BRACKETS
1x Front Shelf Bracket /L (#6)
6x Front Shelf Bracket /R (#7)
6x 1/4-20x5/8" Screw (#A)
6x 1/4
washer
(#C)
6x 1/4
spring washer
(#D)
Attach one front shelf bracket to the front of the grill barrel by using three screws.
Install each screw half-way , then tighten completely when all three screws are mounted and
aligned properly.
Repeat the same installation for the other front shelf bracket.
2
3
4
20
20
20
20
5
16
15