Assembly instructions, Assembly preparation, English – Pit Boss 40 Inch Freestanding Wood Pellet Grill Owners Manual Manuel d'utilisation
Page 7
ENGLISH
7
ASSEMBLY INSTRUCTIONS
IMPORTANT: It is advised to read each step entirely before starting assembly on instructions. Do not tighten screws
completely until all screws for that step have been installed. Hardware combination involving a locking washer and
washer should be installed with the locking washer closest to the head of the screw.
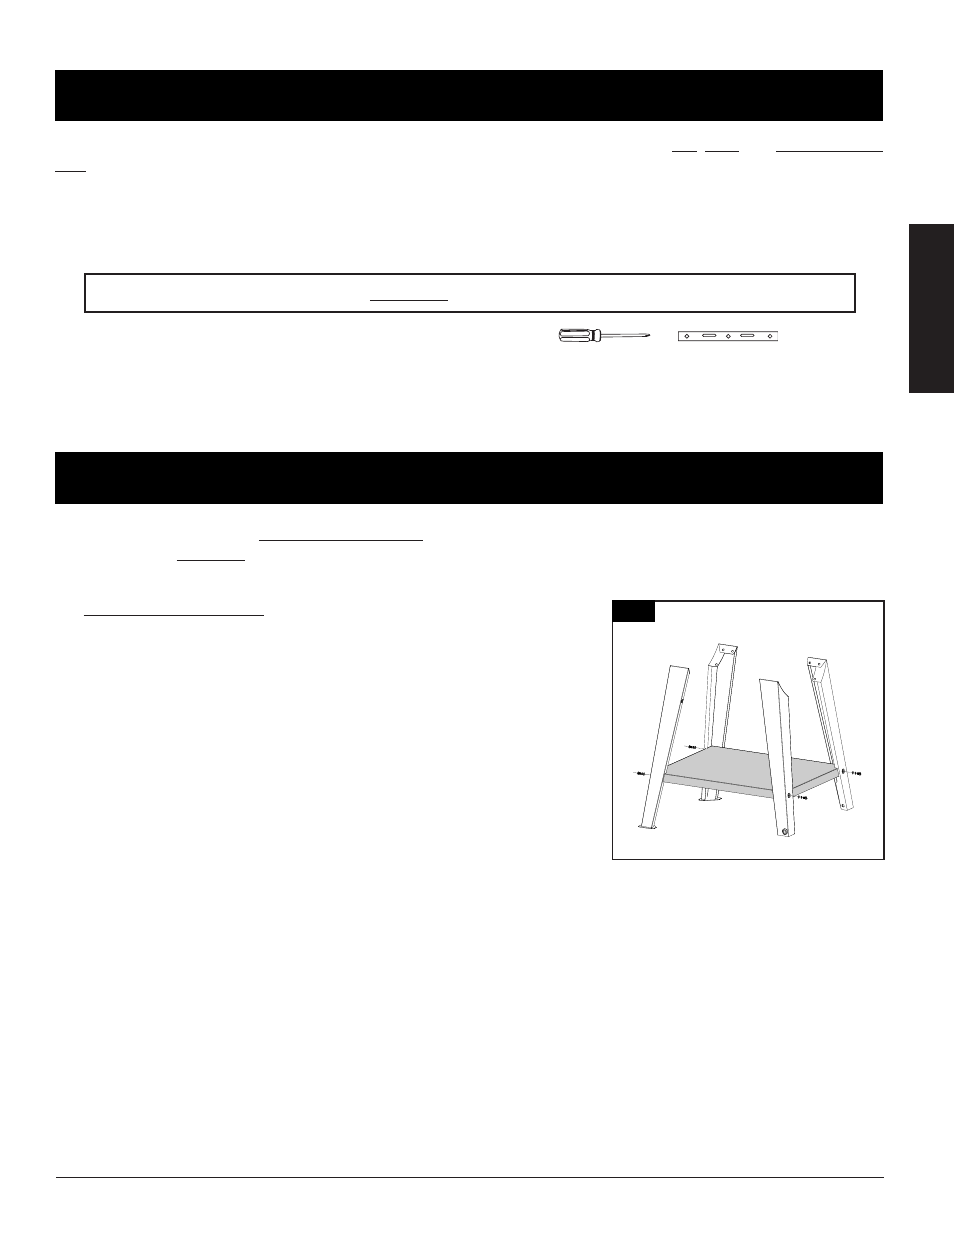
1. ASSEMBLING THE CART
Parts Required:
1 x Left Support Leg - Front (#14)
1 x Left Support Leg - Back (#15)
1 x Right Support Leg - Front (#16)
1 x Right Support Leg - Back (#17)
1 x Bottom Shelf (#21)
4 x Screw (#A)
4 x Washer (#B)
4 x Locking Washer (#C)
Installation:
• Place a piece of cardboard on the floor to prevent scratching the unit
and parts during assembly.
• Mount the Bottom Shelf to each Support Leg using a screw, locking
washer, and washer. Ensure the flat surface of the shelf is facing up.
TIP: Fasten the screws of the Support Legs on half-way to allow easier
installation of Main Barrel in the third step.
ASSEMBLY PREPARATION
Parts are located throughout the shipping carton, including underneath the grill. Inspect the grill, parts, and hardware blister
pack after removing from the protective shipping carton. Discard all packaging materials from inside and outside of the grill
before assembly, then review and inspect all parts by referencing the parts list. If any part is missing or damaged, do not attempt
to assemble. Shipping damage is not covered under warranty. Contact your dealer or Pit Boss® Customer Care for parts.
USA: (480) 923-9630 | Canada (Toll Free): 1-877-942-2246
www.pitboss-grills.com
IMPORTANT: To ease installation, using two people is helpful (but not necessary) when assembling this unit.
Tools required for assembly:
screwdriver and level.
Tools not included.
1
14
15
17
16
BCA
BCA
ACB
ACB