Recording, Timer recordings, Review scheduled timer recordings – Curtis DRC8335 Manuel d'utilisation
Page 17: Edit scheduled timer recordings
17
EN
Recording
Timer recordings
This feature allows you to schedule recordings from TV
programming or components you have connected to the
unit. At maximum, 25 timer recording schedules can be
created. In order for Timer recordings to work, you must set
the clock to the correct time and date.
1. Press TIMER and then OK on the remote control to add a
new timer recording.
2. Press
to navigate through the menu. When an
input field (e.g. Date, Quality) is highlighted, press OK
and then
or
to set value (or input with numeric keys
for numeric fields) and
or
to shift to the next field.
When selection is made, press OK again. If an item
appears in “grey”, it means that the function is not
available.
•
Time – select the start and end time or the length of the
recording.
•
Date – select the date of the recording in MM.DD.YYYY
format.
•
Recurrence – select the recurrence (once, daily or
weekdays) of the recording. If “weekdays” is chosen, you
may further select the days of the week (i.e. Mon - Sun)
by pressing OK while highlighting the checkboxes under
the desired weekdays. Recording will be repeated on the
selected days.
•
Source – select the input jack from where the signal
comes (AV1, AV2 or tuner).
•
Channel – select the TV channel of the recording if TV
signal is selected in the Source field.
•
Destination – select the location (disc or tape) where the
recording will be saved.
•
Quality – select a recording quality. For DVD: HQ (1 hour
recording time), SP (2 hours), LP (3 hours), EP (4 hours),
EP+ (7 hours), SLP (8 hours). For VCR: SP = standard play,
SLP = super long play (around x2 to x3 the recording time
as the tape indicates).
•
Chaptering – only available if destination is set as disc.
Select the interval time to add chapter makers during
DVD recording. Refer to page 21 for details on chapters.
3. Highlight “Confirm” and then press OK to save the new
timer. Highlight “Cancel” and then press OK to exit
without saving.
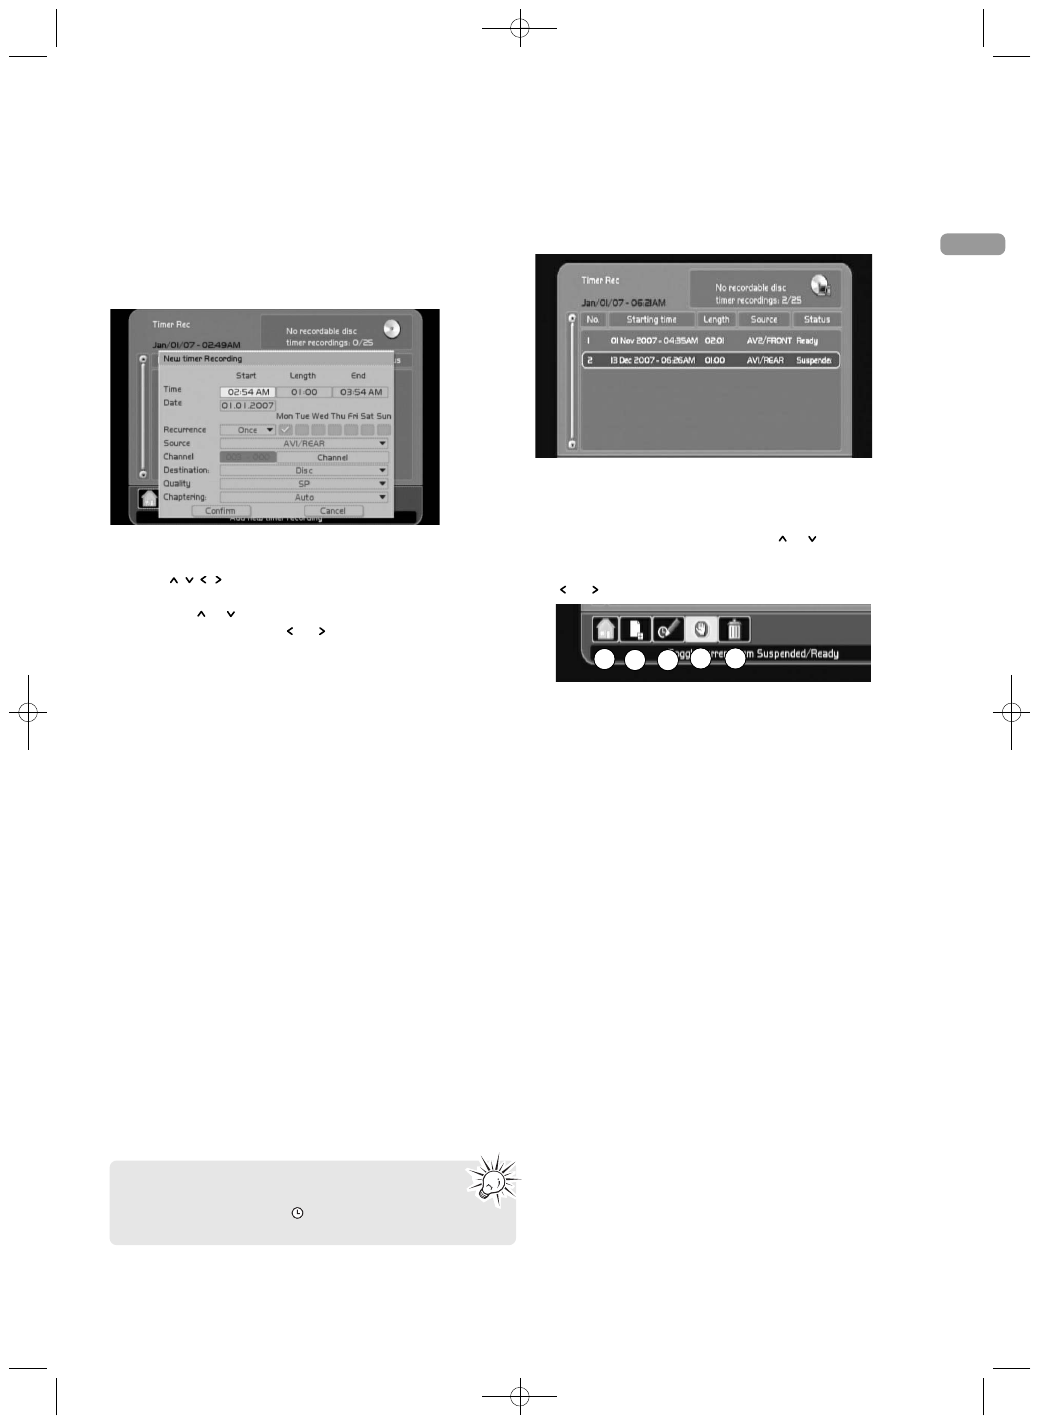
Review scheduled timer recordings
Press TIMER on the remote control to display the scheduled
timer recordings.
Edit scheduled timer recordings
1. Press TIMER on the remote control to display the
scheduled timer recordings. Press
or
to highlight a
scheduled timer recording.
2. Action bar appears at the bottom of the TV screen. Press
or
to highlight an icon and press OK to select.
a. Returns to the main page of the player menu.
b. Adds a new timer recording.
c. Edits the currently highlighted timer recording.
d. Changes the status (suspend or ready) of the highlighted
timer recording. Suspended recording will not be carried
out.
e. Removes the highlighted timer recording.
a
b
c
d
e
The timer recording icon will display when there
are schedules created in the list of timer recordings
(refer to the next section to review the list). The icon
continues to display until no schedule remains in the list.
DRC8335_EN(verB) 7/23/07 3:36 PM Page 19