Multi-Contact MA213-01 Manuel d'utilisation
Page 10
Advanced Contact Technology
10 / 12
www.multi-contact.com
42
43
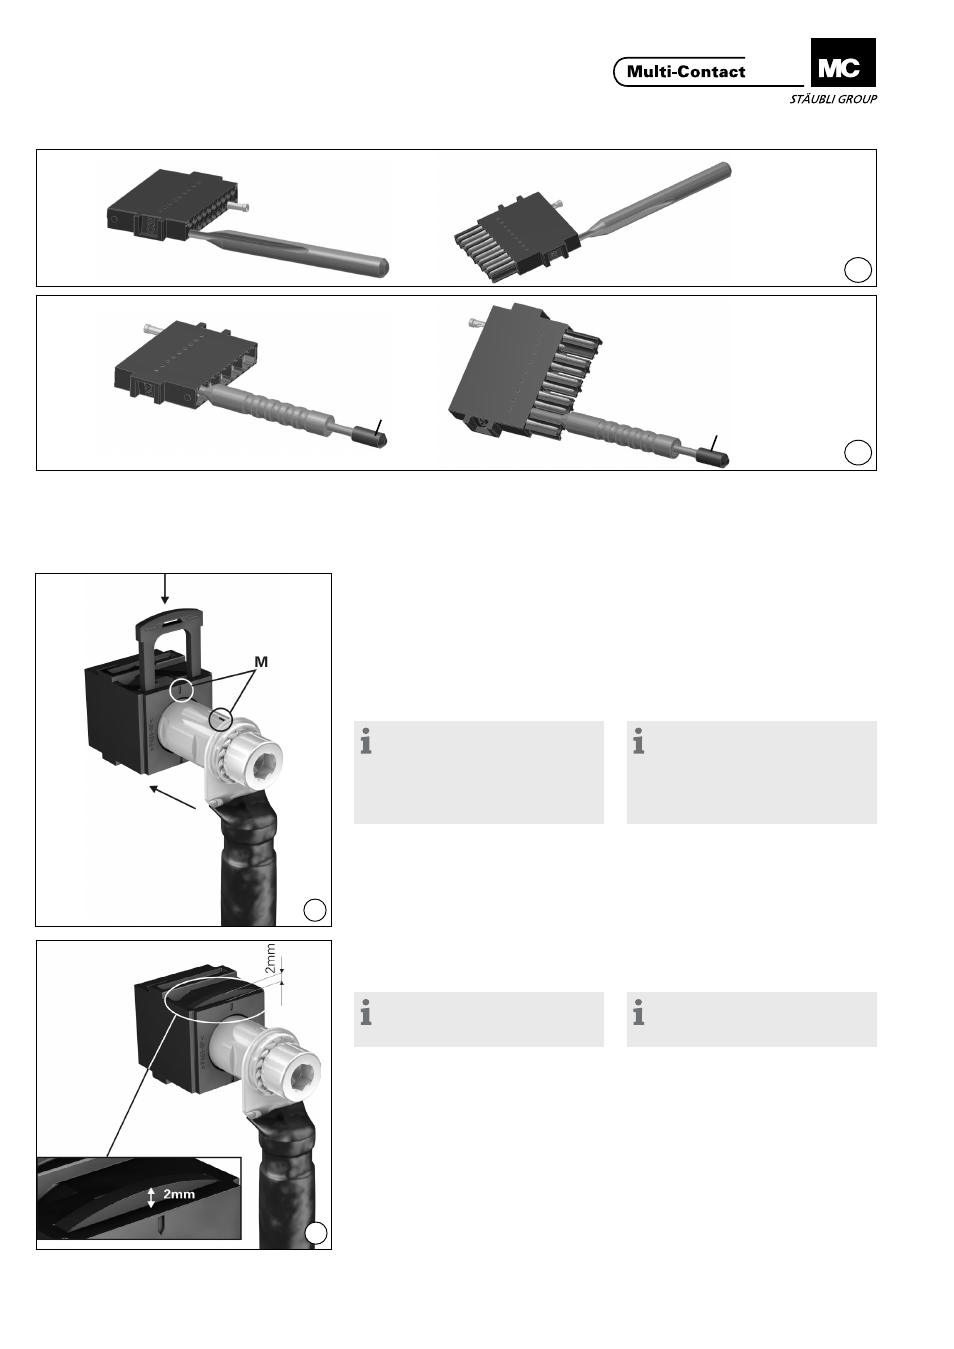
41a
41b
D
D
(ill. 41a)
Montage CT-0,6
A l’aide de l’outil CT-E-WZ0,6, insérer
les contacts par la face arrière numé-
rotée, jusqu’en bûtée�
(ill. 41a)
Installation CT-0.6
Using the assembly tool CT-E-WZ0,6,
press the contacts into the contact
inserts from the numbered back side
as far as the stop�
(ill. 41b)
Démontage CT-0,6
Insérer l’outil CT-A-WZ0,6 dans l’avant
du support de contact, jusqu’au clic
audible� Ensuite, si nécessaire, ap-
puiyez sur la goupille (D) pour extraire
le contact du support�
(ill. 41b)
Removal of CT-0.6
Insert dismantling tool CT-A-WZ0,6
into the contact insert from the front
until a click is heard� Then, if neces-
sary, push the pin (D) to extract the
contact from the carrier�
Remarque:
Pour garantir une fixation sûre
des contacts dans les supports de
contacts, les contacts ne doivent
pas être démontés plus de 2 fois et
montés plus de 3 fois.
Note:
In order to quarantee a firm
fixation of the contacts in the contact
carriers, the contacts may not be
extracted more than 2 times and
inserted more than 3 times.
(ill. 42)
Lors du montage des contacts
12 mm, les 2 marquages (M) doivent
être alignés� Le contact est inséré
jusqu’en bûtée et fixé avec un clip de
verrouillage (pouvant être inséré des
deux côtés et est en place lors du clic
audible)�
(ill. 42)
When mounting the 12 mm contact
with external thread, the markings on
both the carrier and the contact must
be aligned� The contact is then insert-
ed to the end position (can be inserted
in both side) and secured with retain-
ing clip� Engaging by audible clic�
Remarque:
Hauteur après engagement: 2 mm
(ill. 43)
Note:
Height in inserted condition: 2 mm
(ill. 43)
Le clip de verrouillage s’enlève à l’aide
d’un tournevis (No� 2)�
The retaining clip can be removed
with a commercial screwdriver
(size 2)�