English – Pit Boss 57 Inch Freestanding Wood Pellet Grill Owners Manual Manuel d'utilisation
Page 9
ENGLISH
9
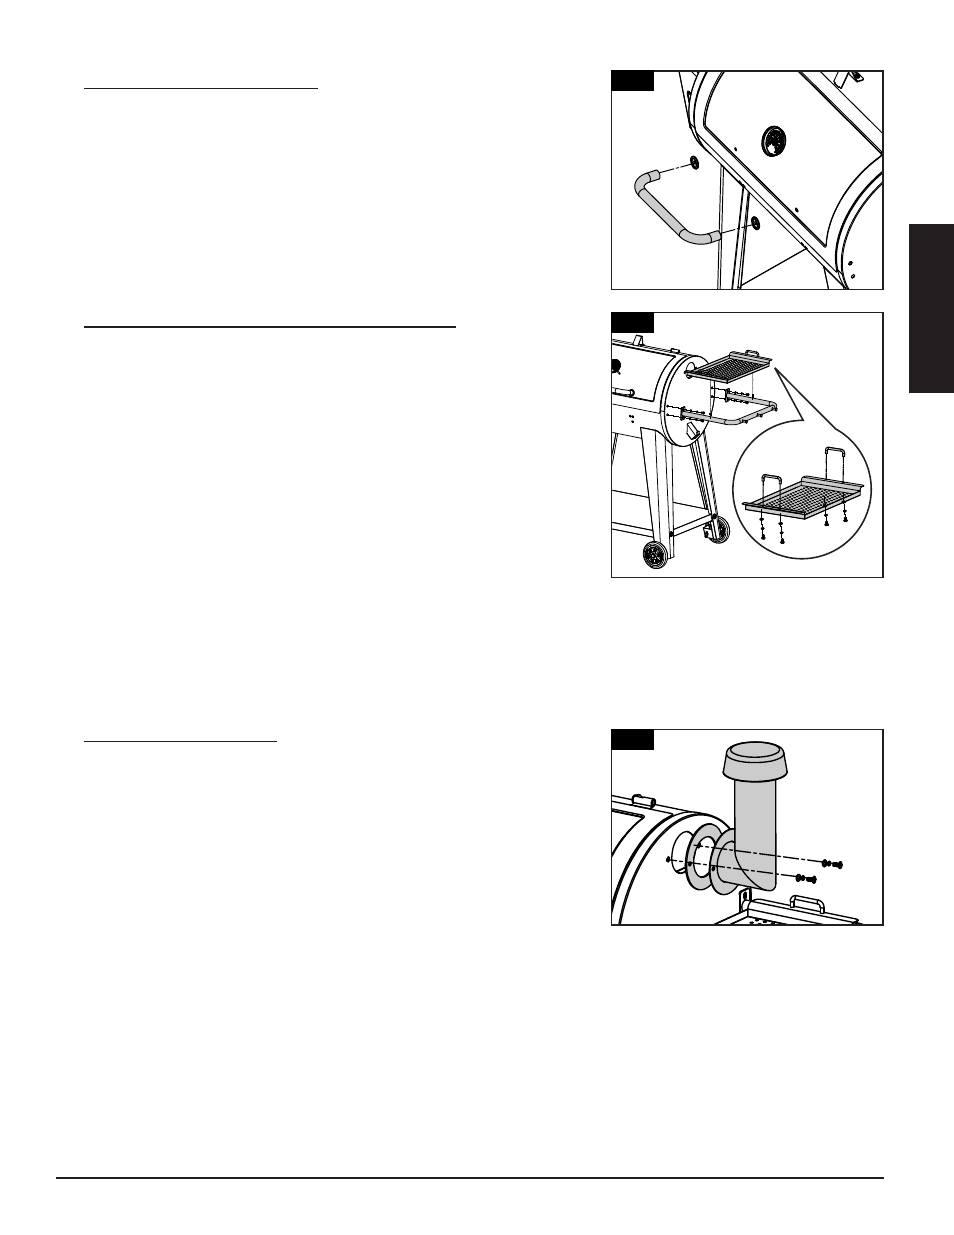
4. ASSEMBLING THE LID HANDLE
Parts Required:
2 x Lid Handle Bezel (#15)
1 x Lid Handle (#16)
Installation:
• Remove the pre-installed screws from the lid handle. From inside the
barrel lid, insert one screw to protrude to the outside. Add a bezel on
the screw, then hand-tighten the screw (from the inside) into the lid
handle.Repeat same installation for other end of lid handle.
5. MOUNTING SIDE SHELF HANDLE, SERVING TRAY
Parts Required:
1 x Side Shelf Handle (#11)
1 x Serving Tray (#10)
2 x Serving Tray Handle (#9)
4 x Screw (#A)
4 x Washer (#B)
4 x Locking Washer (#C)
Installation:
• Mount the side shelf handle onto the main barrel using four screws,
locking washers, and washers.
• Mount serving tray handles to serving tray using the two pre-installed
screws on each handle. Place the serving tray onto the side shelf
handle. It will rest directly on the frame of the side shelf handle.
IMPORTANT: Avoid using the side shelf handle to move or lift the
grill. The weight of the unit will cause the side shelf handle to bend
or break, which is not covered by warranty.
6. SECURING THE CHIMNEY
Parts Required:
1 x Chimney Gasket (#6)
1 x Chimney (#7)
2 x Screw (#A)
2 x Washer (#B)
2 x Locking Washer (#C)
Installation:
• Locate the chimney opening on the side of the main barrel. From the
outside, secure the chimney and chimney gasket to the side panel
using two screws, locking washers, and washers. The screw will fasten
to the pre-mounted nut on the inside of the barrel.
NOTE: Ensure the chimney cap allows for air to escape.
14
13
16
15
15
4
7
5
9
10
11
9
6
A
7
6
C
B