Multi-Contact MA253 Manuel d'utilisation
Page 9
Advanced Contact Technology
www.multi-contact.com
9 / 12
24
25
26
27
A
Variante B:
Montage mural
Variant B:
Wall mount
InsérerRobiFix-B...-MTBdans
RobiFix-S���-MTB en appuyant forte-
ment jusqu’en butée� (ill� 22)�
Connect RobiFix-B���-MTB and
RobiFix-S���-MTB together until they
perfectly engage� (ill� 22)�
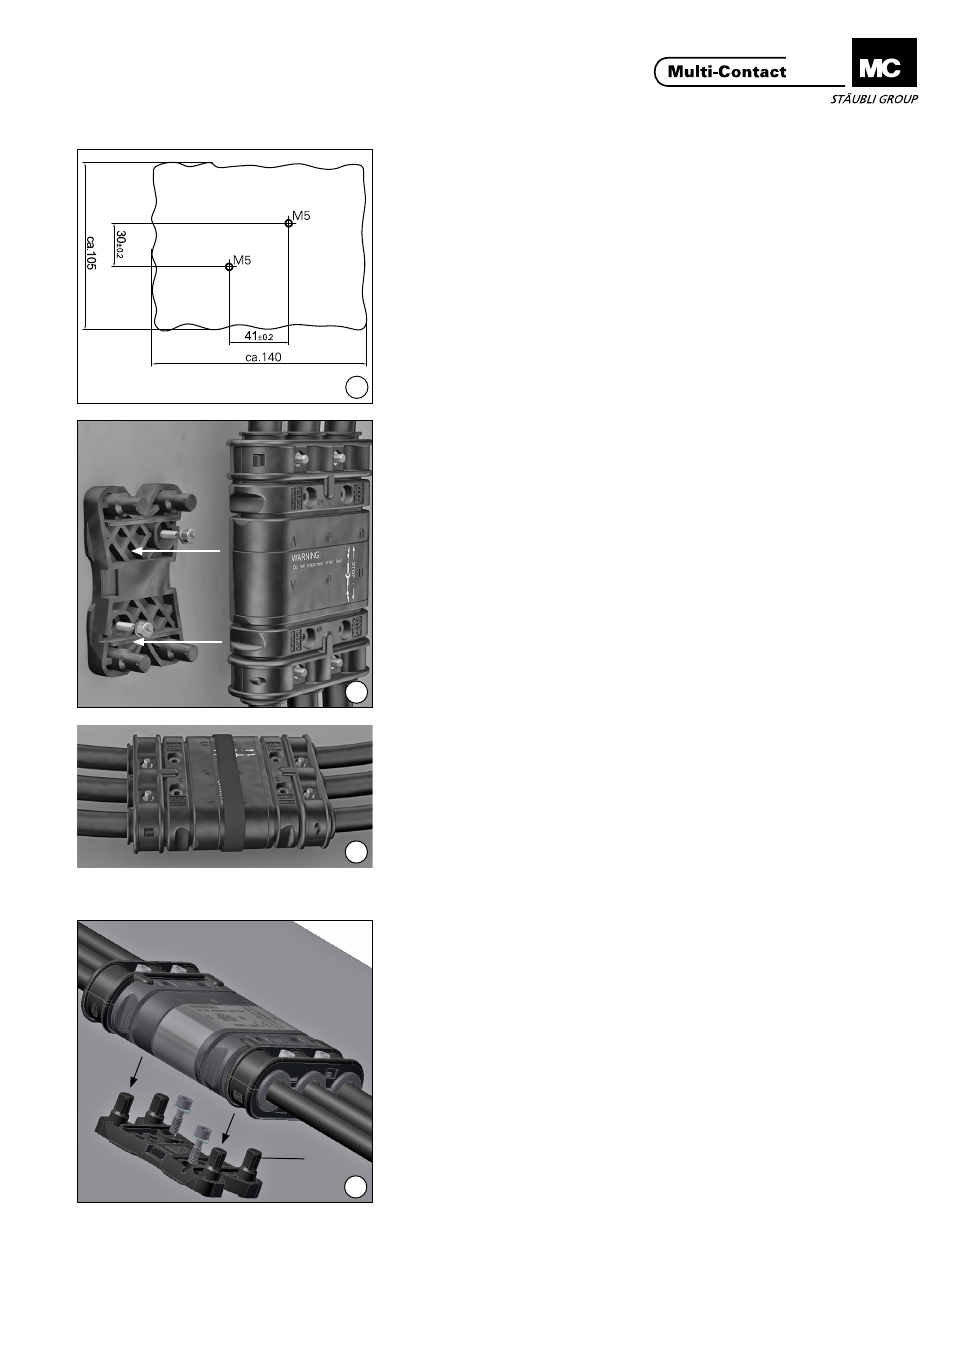
(ill. 24)
Effectuer les perçages suivant le plan
de perçage�
(ill. 24)
Drill mounting holes according to drill-
ing plan�
(ill. 25)
Fixer RobiFix-LOCK à l’aide des 2 vis
sur le support� Clipser RobiFix sur le
LOCK�
(ill� 25)
Mount RobiFix-LOCK with both
screwsontoaflatsurface.
Clip RobiFix on the LOCK�
(ill. 26)
Sibesoin(forceslatérales)enfilerle
velcro pour une sécurité suplémen-
taire�
Démontage:
Détacher le velcro et démonter le
RobiFix du LOCK�
(ill. 26)
Then if required (lateral forces) attach
the enclosed Velcro strip for additional
safety�
Disassembly:
Detach the Velcro and separate Robi-
Fix from the LOCK�
Variante C:
(RobiFix-TwinPower)
Variant C:
(RobiFix-TwinPower)
(ill. 27)
Pour ce faire, visser la pièce RobiFix-
TwinPower-E (A) sur le support à l’aide
de deux vis (même plan de perçage
que dans l’ill� 24)�
InsérerRobiFix-B…MTBdansRobi-
Fix-S…MTBenappuyantfortement
jusqu’en butée, puis clipser sur la
pièce RobiFix-Twin-Power-E (A)�
(ill. 27)
Mount RobiFix-TwinPower-E (A) onto a
flatsurfacewithtwoscrews(following
the same drilling plan as shown in ill�
24)�
MateRobiFix-B…-MTBandRobiFix-
S…-MTBtogetheruntiltheyperfectly
engage� Then clip them onto RobiFix-
TwinPower-E (A)�