Setting print bands – Avery Dennison 1160 Monarch Manuel d'utilisation
Page 4
SETTING PRINT BANDS
1
Pull knob until indicators point to desired band.
2
Turn knob until desired character appears.
n
A blank print character appears solid black
through the band window.
3
Set all bands and push knobs in all the way.
4
Print a sample label to verify correct characters are printing.
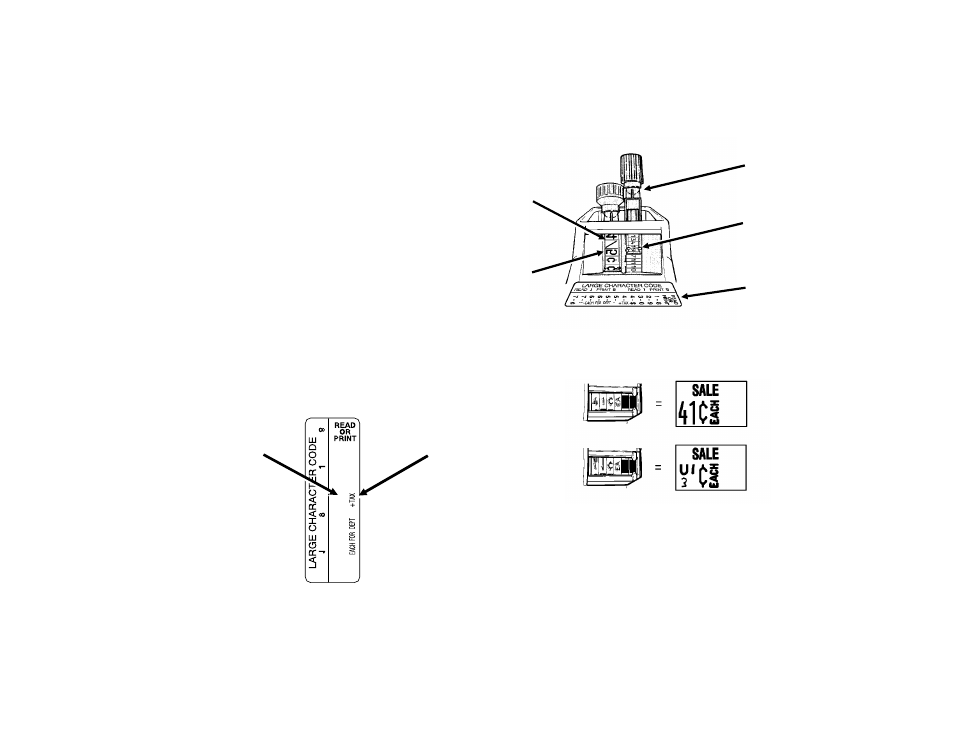
Some labelers have print bands with mirror images showing
through the band window. These labelers have a code sticker
located near the band window. The code sticker shows which
character should appear through the band window in order to
print the character you want. For example, the code sticker
shown here indicates you must...
Some one-line labelers have print bands with small characters
and large mirror images. Do not select the large mirror
images in this case.
Correct
setting
Incorrect
setting
Code
Sticker
Indicator
Knob
Band Window
Mirror Image
R
EAD
1 - 8
2 - 9
3 - 0
4 - $
4 -
5 - .
5 -
6 -
6 -
7 - /
7 - ¢
READ
set the band to a
mirror image of this
to print this
.