Multi-Contact MA063 Manuel d'utilisation
Page 5
Advanced Contact Technology
www.multi-contact.com
5 / 8
9
10
11
12
Montage
Assembly
(ill. 9)
Introduire le corps de contact dans
le boîtier isolant� Tourner et pousser
en même temps jusqu’à ce que le
corps s’engage. Vérifier le montage en
exerçan t une traction sur le câble�
(ill. 9)
Slip the contact insert into the insula-
tion� Turn and at the same time push
until the contact insert engages�
Check the correct engagement by
pulling on the cable�
(ill. 10)
Pour le montage de la douille, une
bague de centrage est nécessaire,
fixée lors de la livraison, avec un ruban
adhésif jaune� Après le montage de
la douille, enlever l’étiquette jaune et
extraire la bague de centrage� Conser-
ver la bague de centrage pour les
montages ultérieurs�
(ill. 10)
For assembling the socket insert a
centering sleeve is required (secured
with a yellow label)� After engaging
the socket insert, remove the yellow
label and the centering sleeve� Keep
the centering sleeve for further as-
semblies�
(ill. 11)
Serrer le presse-étoupe� Pour serrer
et contrer, MC recommande l’utili-
sation de deux outils GS��� (voir ill� 3)
identiques pour éviter d’endommager
le filetage.
(ill. 11)
Tighten the cable gland. For tighten-
ing and fixing with the locknut, MC
recommend using two identical GS���
see ill� 3 tools to prevent overtighten-
ing of the thread�
Remplacement du corps de
contact
Replacement of the contact
insert
(en cas de dégradation du câble par
exemple)
(e�g� in the event of cable damage)
Remarque:
Pour le remplacement, un
outil spécial et des instructions de
montag e sont nécessaires, voir
MA064. (www.multi-contact.com).
Note:
For replacement a special tool and
assembly instructions ar required,
see MA064.
(www.multi-contact.com).
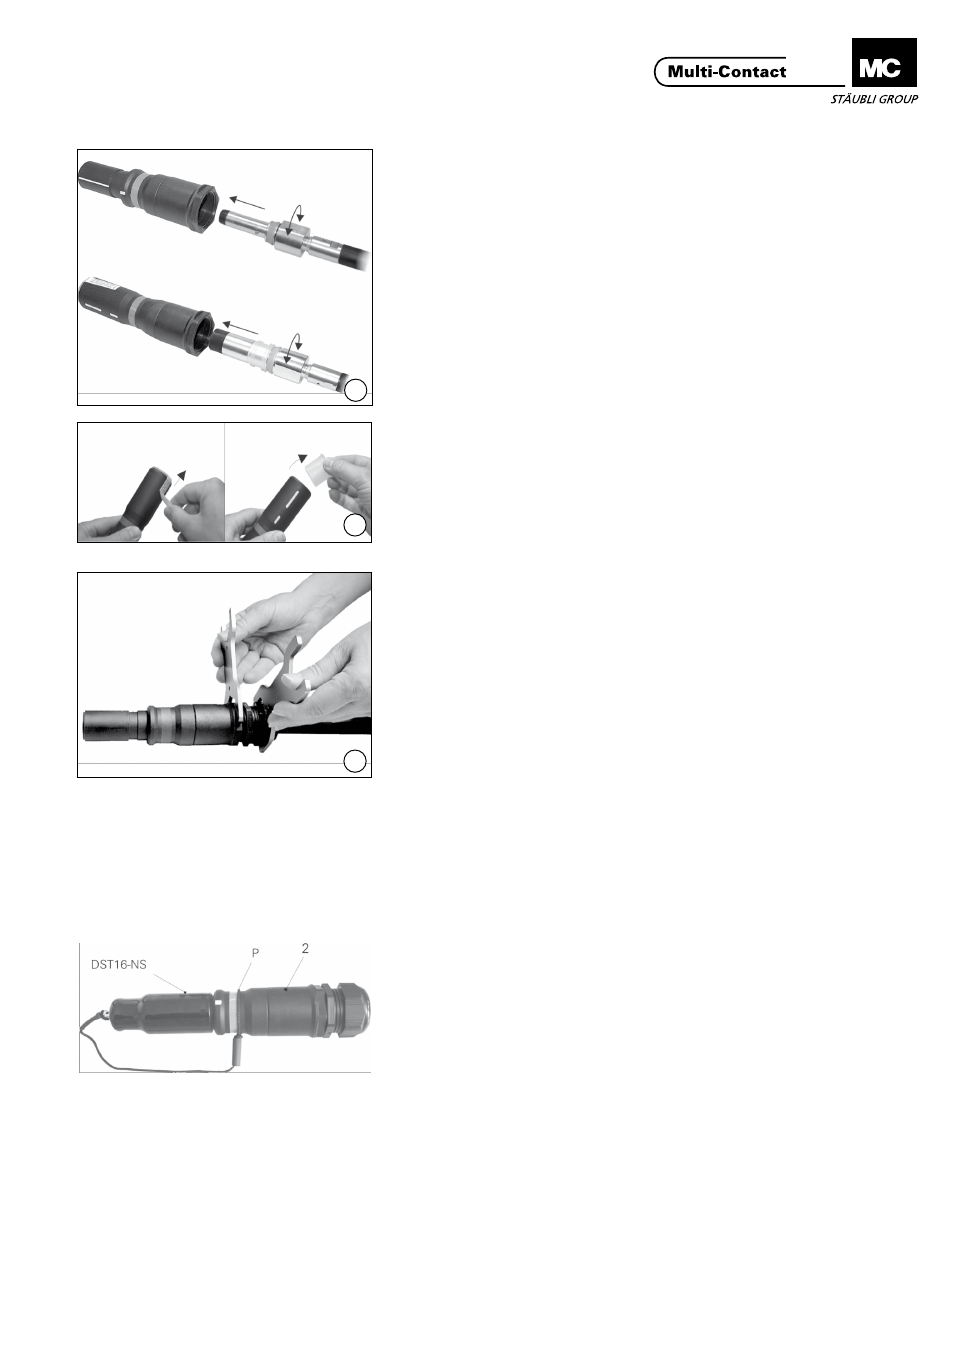
Montage du bouchon de
protectio n (KST...)
Fitting the protective cap
(KST...)
(ill. 12)
Engager le bouchon de protec-
tion (DST16-NS) sur la broche 2�
Positionne r la cordelette en P et la
serrer. Pour fixer le noeud, il suffit de
chauffer la gaine thermorétractable�
(ill. 12)
Push protective cap (DST16-NS) over
plug� Pull loop over plug 2 and fasten
cord at position P� Warm the supplied
heat-shrinkable tubing to lock the
knot�