Multi-Contact MA063 Manuel d'utilisation
Page 4
Advanced Contact Technology
4 / 8
www.multi-contact.com
6
Tab. 4
Tab. 5
8
7
Raccordement du câble avec
AxiClamp
Cable termination with
AxiClamp
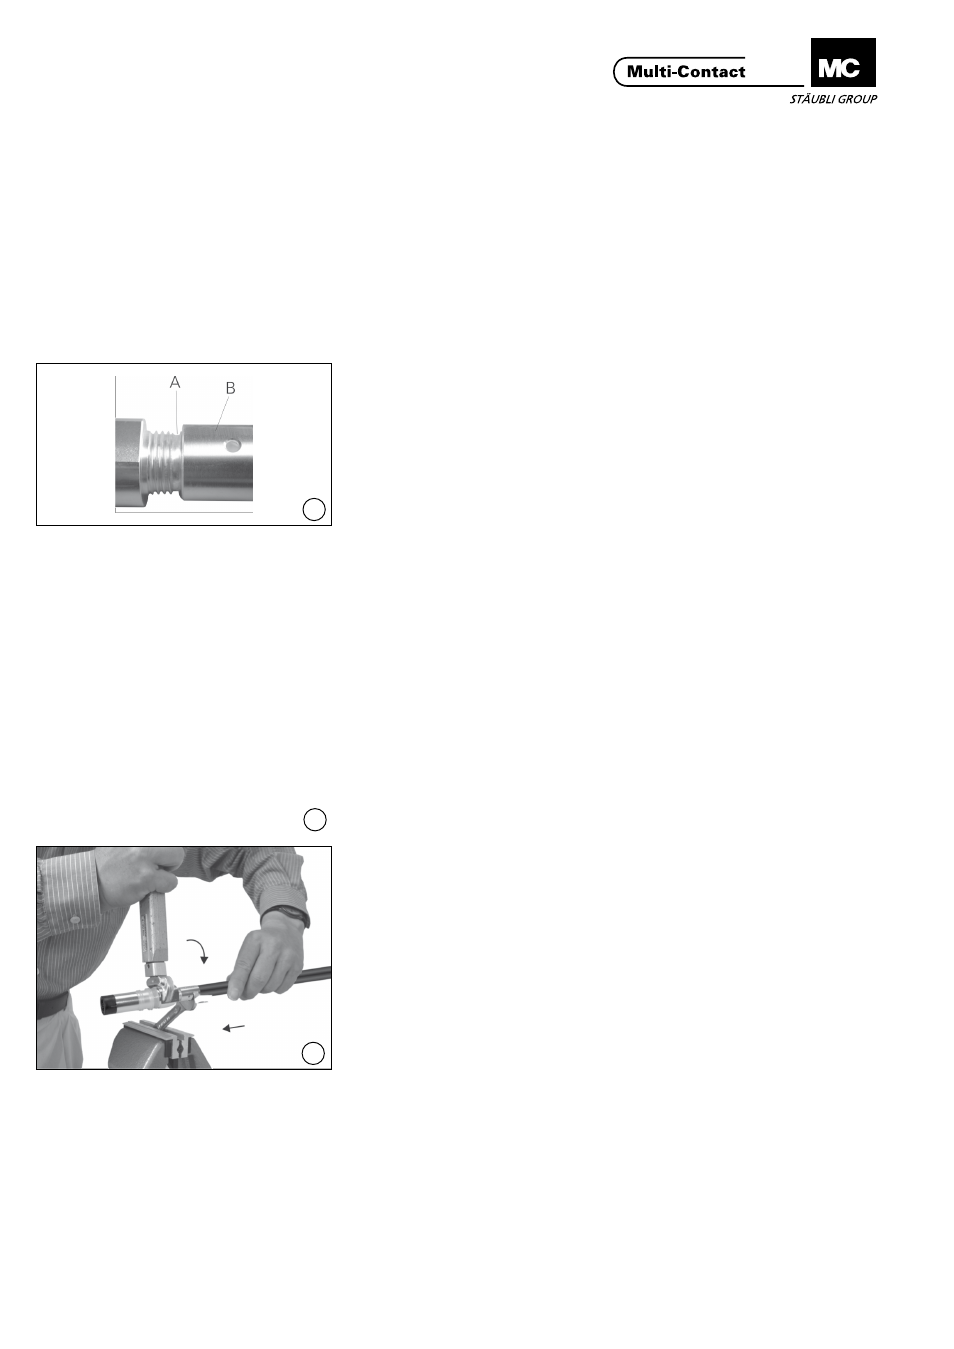
(ill. 6)
Positionner le manchon AxiClamp B à
fleur de la face avant de la gorge A.
(ill. 6)
Screw AxiClamp sleeve B onto thread
as far as the front edge of the groove
A�
(ill. 7)
Introduire le câble dans le manchon
AxiClamp jusqu‘à ce que l’isolation
arrive en butée sur le manchon� Le
câble doit être visible dans l’orifice de
contrôle�
(ill. 7)
Firmly push lead into the AxiClamp
sleeve until the lead insulation comes
up against the AxiClamp sleeve and
the individual wire strands can be
seen in the sight hole�
(ill. 8)
Serrer l‘écrou avec une clé dyna-
mométrique 27 mm pour douilles et
26 mm pour broches en contrant avec
la clй а fourche (voir tab� 5)�
(ill. 8)
Screw on the AxiClamp with the
torque wrench A/F27 for socket,
A/F26 for plug and countertighten
with open-ended wrench (see tab� 5)�
Remarque:
Bloquer la clй а fourche dans un
étau, positionner le manchon avec le
câble inséré dans la clé et serrer avec
la clé dynamométrique en veillant
à respecter les couples de serrage
préconisés dans le tab. 5.
Note:
Clamp the open-ended wrench in
a vice, fit the Axi-Clamp with the in-
serted lead into the clamped wrench,
and tighten with the torque wrench.
(See tab. 5 for correct torque).
Important:
Tout en serrant, exercer une pres-
sion sur le câble.
Important:
Keep lead pressed into sleeve
while tightening.
Diamètre du câble
Conductor cross section
Longueur L
Length L
mm²
mm
50-70
19
95-120
26
150-185
32
240
33
Section du conducteur
Conductor cross section
Couple de serrage
Tightening torque
Dimension clé
Key size
mm²
Nm
mm
50-70
45
16
95-120
78
22
150-185
120
27
240
160
28