Warning, Make gas connection – Maytag GLT3057RB Installation Manuel d'utilisation
Page 8
8
6.
Tighten screws just enough to hold brackets in place when
cooktop is put in cutout.
7.
Using 2 or more people, turn the cooktop right side up and
place in cutout.
NOTE:
Make sure that the front edge of the cooktop is
parallel to the front edge of the countertop. If repositioning is
needed, lift entire cooktop up from cutout to avoid scratching
the countertop.
8.
Loosen the screws and rotate the brackets so that they are
perpendicular to the edge of the cooktop base and extend
beyond its edge. Securely tighten screws.
Installing Brackets After Placing Cooktop in Cutout
1.
Using 2 or more people, place cooktop right side up into the
cutout.
NOTE:
Make sure that the front edge of the cooktop is
parallel to the front edge of the countertop. If repositioning is
needed, lift entire cooktop up from cutout to avoid scratching
the countertop.
2.
Remove the attachment screws for the selected bracket
locations from the bottom of the cooktop base.
3.
Select bracket mounting holes that will allow the bracket to
extend far enough out from the cooktop for the installation of
2½" (6.4 cm) clamping screws.
4.
Attach brackets to cooktop base bottom with bracket
attachment screws using the bracket mounting holes
selected in Step 3. Securely tighten screws.
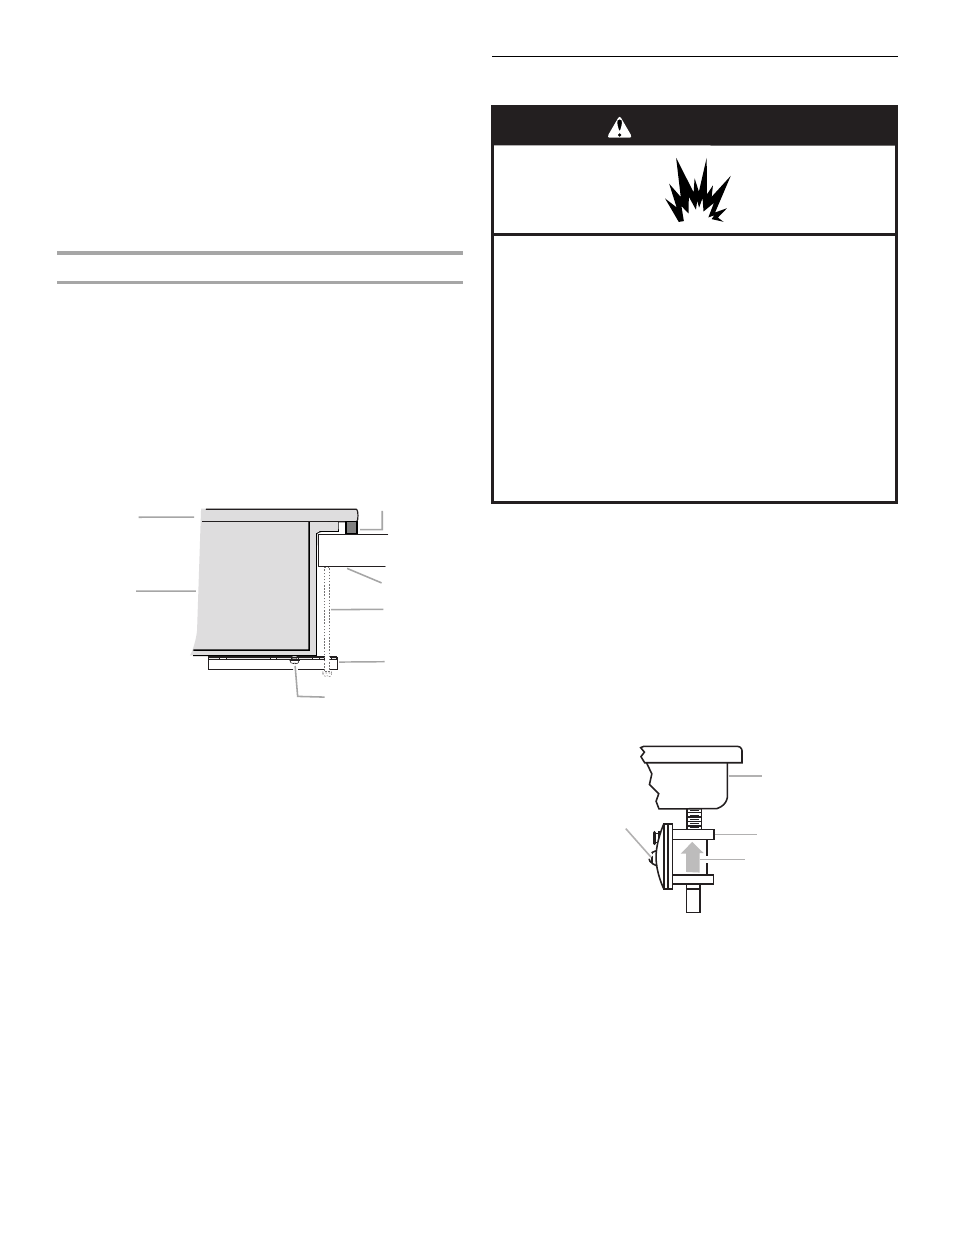
Make Gas Connection
To Assemble Pressure Regulator:
1.
Using 2 or more people, stand the cooktop on its side or
back.
2.
Connect the flexible stainless steel connector to the pressure
regulator using a ½" male pipe thread adapter and nipple.
A combination of pipe fittings must be used to connect the
cooktop to the existing gas line. Shown following is a typical
connection. Your connection may be different, according to
the supply line type, size and location.
3.
Install the pressure regulator with the arrow pointing up
toward the bottom of the cooktop base and in a position
where you can reach the regulator cap.
IMPORTANT:
All connections must be wrench-tightened. Do
not make connections to the gas regulator too tight. Making
the connections too tight may crack the regulator and cause
a gas leak. Do not allow the regulator to turn on the pipe
when tightening fittings.
Use only pipe-joint compound made for use with Natural and LP
gas.
Do not use TEFLON
®
tape. You will need to determine the fittings
required depending on your installation.
A. Cooktop
B. Cooktop base
C. Attachment screw
D. Clamping bracket (extends far enough beyond
cooktop base to allow installation of clamping
screws)
E. 2½" (6.4 cm) clamping screw (to be installed in
“Attach Cooktop to Countertop”)
F. Countertop
G. Foam seal
A
B
C
D
E
F
G
A. Access cap
B. Rear of cooktop
C. Gas pressure regulator
D. Up arrow. Regulator must be installed with
arrow pointing up to cooktop bottom.
WARNING
Explosion Hazard
Use a new CSA International approved gas supply line.
Install a shut-off valve.
Securely tighten all gas connections.
If connected to LP, have a qualified person make sure
gas pressure does not exceed 14" (36 cm) water
column.
Examples of a qualified person include:
licensed heating personnel,
authorized gas company personnel, and
authorized service personnel.
Failure to do so can result in death, explosion, or fire.
A
B
C
D