Maytag YMMV4203DB Installation Manuel d'utilisation
Page 5
5
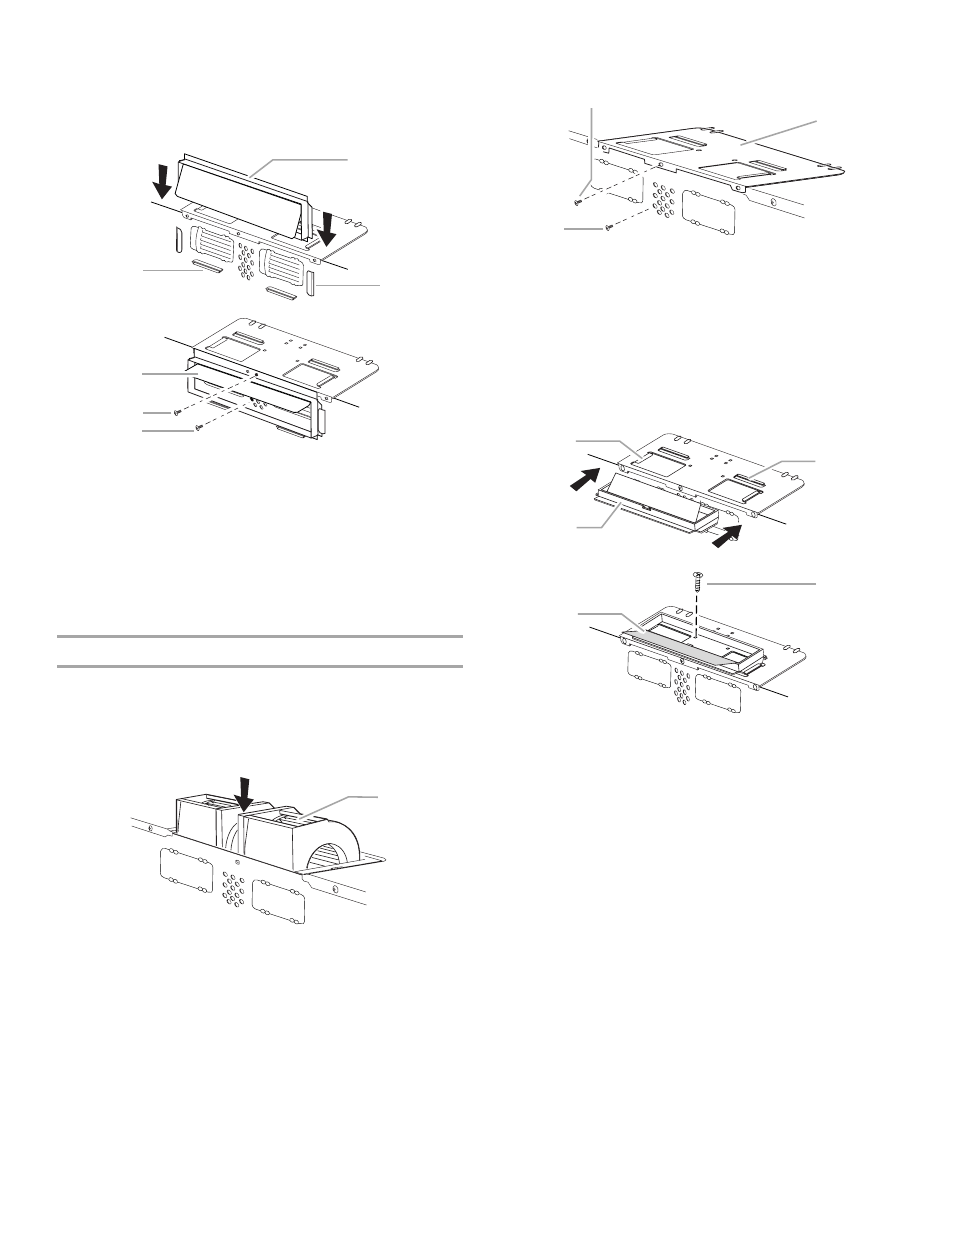
6. Attach damper assembly to the rear exhaust vent opening by
sliding it down into the guides on both sides of the opening,
and pushing it into the lower locking tabs.
NOTE: Make sure the assembly is oriented correctly, with the
hinge at the top, and the blade opening away from the microwave
oven.
7. Secure damper plate through damper assembly frame with
the damper plate screw removed in Step 1.
8. Open the damper blade, and reinsert the blower motor screw
removed in Step 2.
Roof Venting Installation Only
1. Repeat Step 1 from “Wall Venting Installation Only.”
2. Repeat Step 2 from “Wall Venting Installation Only.”
3. Rotate blower motor so that exhaust ports face the top of
microwave oven, and flat sides of blower motor face back of
microwave oven. Lower blower motor back into microwave
oven.
IMPORTANT: If blower motor is not positioned with flat sides
facing the back of the microwave oven (as shown), performance
will be poor.
4. Close damper plate and secure it with screw removed in
Step 1 of “Wall Venting Installation Only.”
5. Reinsert blower motor screw removed in Step 2 of “Wall
Venting Installation Only.”
6. Attach damper assembly to damper plate by sliding it into the
guides on both sides of the damper plate’s exhaust vent
opening, and pushing it onto the locking tabs.
NOTE: Make sure the assembly is oriented correctly, with the
hinge at the back, and the blade opening upward.
7. Open the damper blade, and secure the blower motor to the
microwave oven with the top blower motor screw removed in
Step 1 of “Wall Venting Installation Only.”
A. Damper assembly
B. Lower locking tabs
C. Guides
D. Damper blade (open)
E. Damper plate screw
F. Blower motor screw
A. Exhaust port
A
B
C
D
E
F
A
A. Damper plate screw
B. Damper plate
C. Blower motor screw
A. Guides
B. Locking tabs
C. Damper assembly
D. Top blower motor screw
E. Damper blade (open)
C
B
A
A
B
C
D
E