Warning, Install range hood – Maytag UXT2036AAB Manuel d'utilisation
Page 8
8
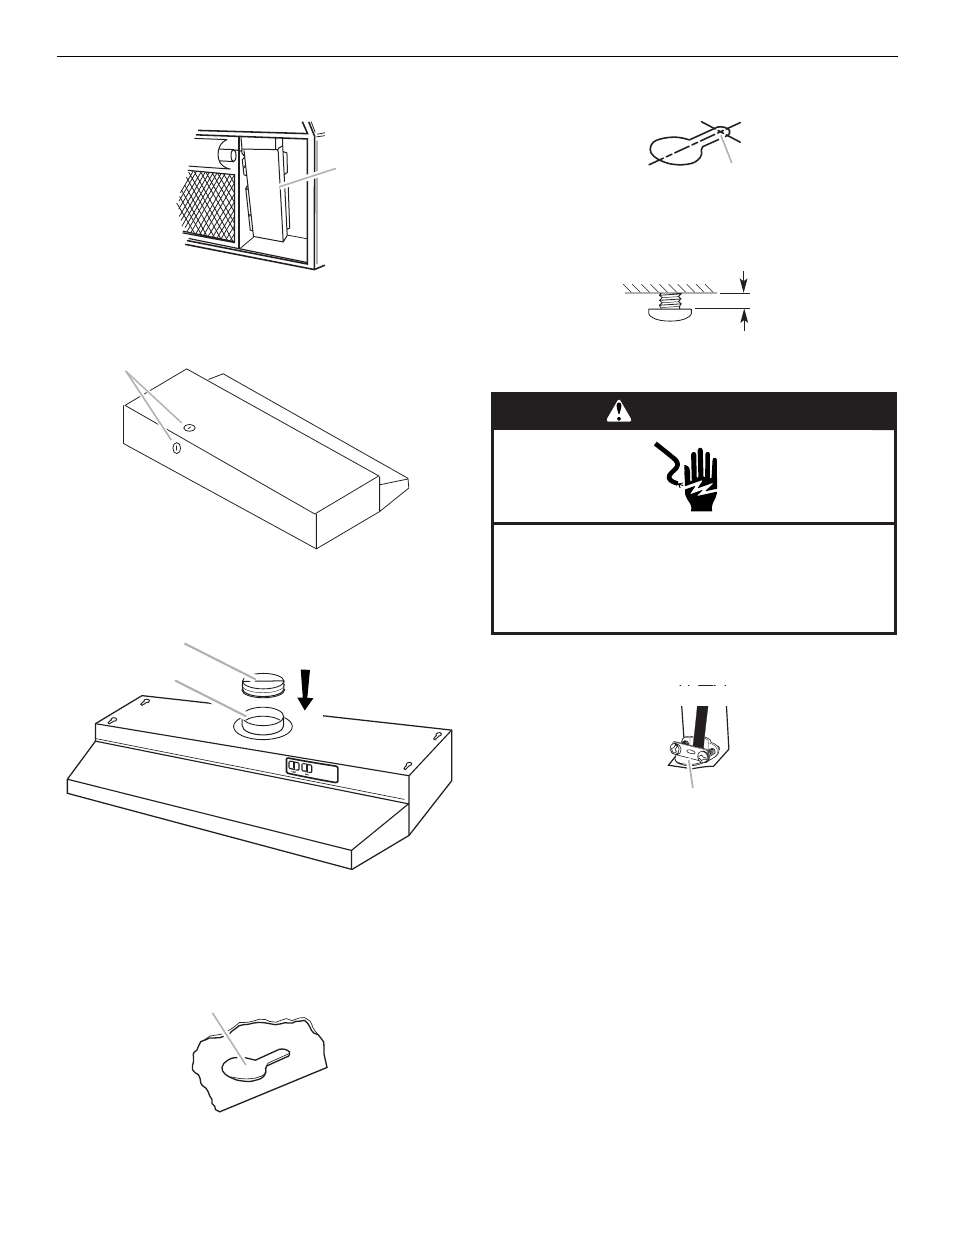
Install Range Hood
1. Remove terminal box cover.
2. Depending on your installation remove either back or top
wiring knockout.
3. Install the 7" (17.8 cm) round damper (supplied) over the
7" (17.8 cm) round discharge collar of the vent hood.
4. Lift the range hood up under cabinet and determine final
location by centering beneath cabinet. Mark on the underside
of cabinet the location of the 4 keyhole mounting slots on the
range hood. Set range hood aside on a covered surface.
5. Use
¹⁄₈" (3 mm) drill bit and drill 4 pilot holes as shown.
6. Install the four #10 x
⁵⁄₈" mounting screws in pilot holes.
Leave about
¹⁄₄" (6.4 cm) space between screw heads and
cabinet to slide range hood into place.
7. For Direct Wire Installations:
■
Install a UL listed or CSA approved strain relief.
■
Pull about 12" (30 cm) of wire through wall or cabinet and
into opening.
For Power Supply Installations:
■
Follow instructions included with power supply cord kit
marked for range hoods.
8. Using 2 people, lift range hood into final position, feeding
electrical wire through wiring opening. Position the range
hood so that the large end of the keyhole slots are over the
screws. Then push the hood toward the wall so that the
screws are in the neck of the slots. Tighten mounting screws
to cabinet, making sure mounting screws are in narrow neck
of slots.
9. Check that the damper rotates up and down freely.
10. Connect ventwork to hood. Seal joints with clamps to make
secure and airtight.
A. Terminal box cover
A. Wiring hole knockouts
A. 7" (17.8 cm) Round damper (supplied)
B. 7" (17.8 cm) Round discharge collar
A. Keyhole slot
A
A
A
B
A
A. Drill pilot hole
A. UL listed or CSA approved strain relief
A
¹⁄₄
"
(6.4 mm)
WARNING
Electrical Shock Hazard
Disconnect power before servicing.
Replace all parts and panels before operating.
Failure to do so can result in death or electrical shock.
A