Installation instructions, Warning, Prepare location – Maytag UXT2036AAB Manuel d'utilisation
Page 7
7
INSTALLATION INSTRUCTIONS
Prepare Location
■
It is recommended that the vent system be installed before
hood is installed.
■
Before making cutouts, make sure there is proper clearance
within the ceiling or wall for exhaust vent.
■
Check your ceiling height and the hood height maximum
before you select your hood.
■
To avoid damage or dirt, place a thick, heavy covering over
countertop, cooktop, or range.
1. Disconnect power.
2. Determine which venting method to use: roof or wall.
3. Select a flat surface for assembling the range hood. Place
covering over that surface.
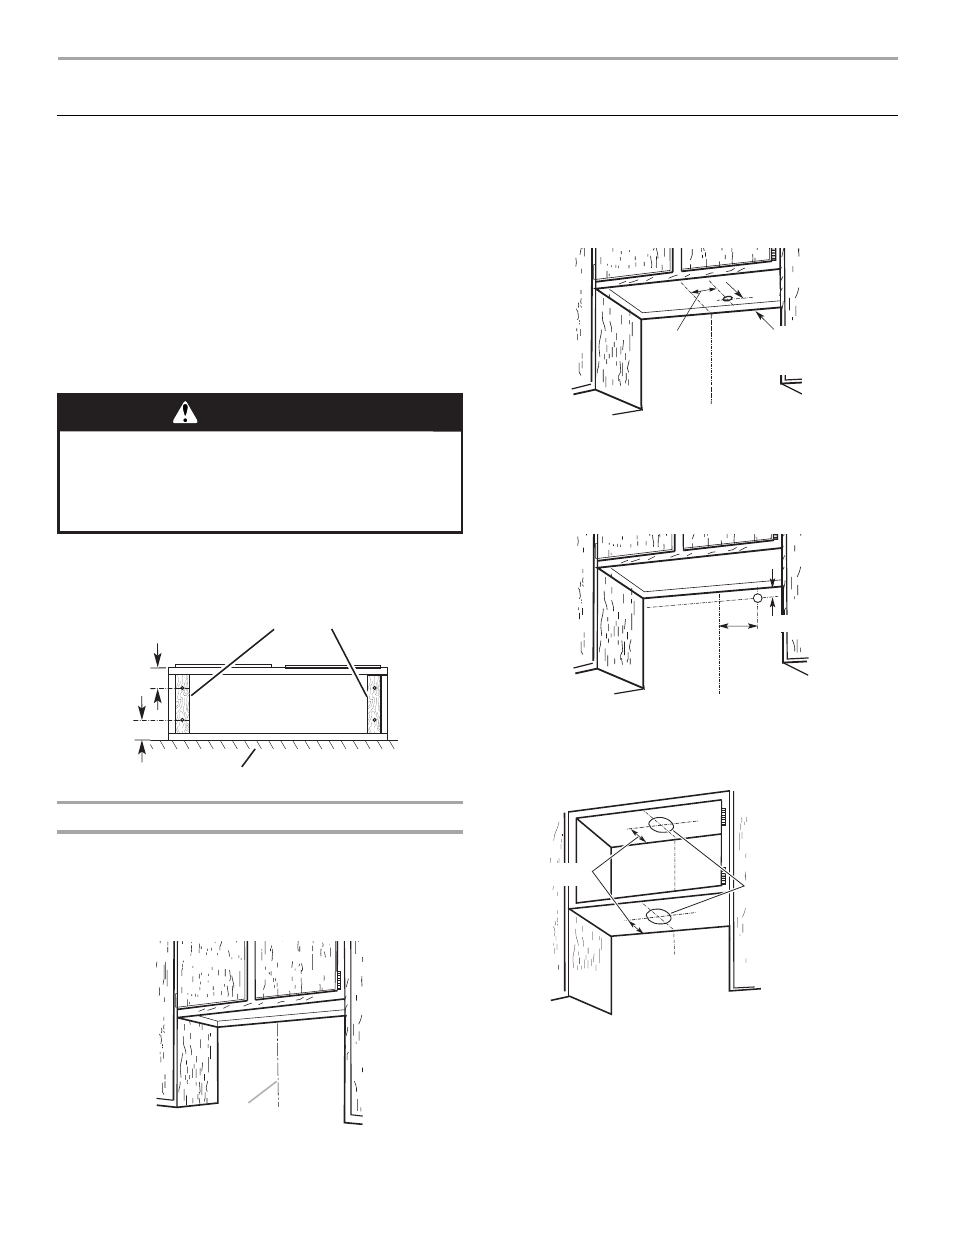
4. If cabinet has recessed bottom, add wood filler strips on each
side. Locate screws to attach filler strips in locations shown.
Determine Wiring Hole Location
Cut only one 1
¹⁄₄" (3.2 cm) diameter wiring access hole.
See Step 2 for wiring hole location instructions. Either wiring hole
can be used.
1. Determine and clearly mark a vertical centerline on the wall
and cabinet in the area the vent opening will be made.
2. To wire through top:
Mark a line 7
¹⁄₂" (19.0 cm) from the right of the centerline on
the underside of the cabinet. Mark the point on this line that is
2" (5.0 cm) from back wall. Drill a 1
¹⁄₄" (3.2 cm) diameter hole
through the cabinet at this point.
To wire through rear wall:
Mark a line 7
¹⁄₂" (19.0 cm) from the right of the centerline on
the underside of the cabinet. Mark the point on this line that
is
³⁄₄" (1.9 cm) from the underside of the cabinet. Drill a
1
¹⁄₄" (3.2 cm) diameter hole through the rear wall at this point.
3. Use saber or keyhole saw to cut a 7" (17.8 cm) diameter
opening.
4. Install vent through the vent opening in upper cabinet or wall.
Complete venting system according to the selected venting
method. See “Venting Requirements” section.
5. Use caulking to seal exterior wall or roof opening around the
cap.
A. Centerline
WARNING
Excessive Weight Hazard
Use two or more people to move and install
range hood.
Failure to do so can result in back or other injury.
Cabinet
bottom
Wall
3" (7.6 cm)
Wood filler strips
(recessed cabinet
bottoms only)
3" (7.6 cm)
A
Centerline
2" (5.1 cm)
from wall,
not cabinet
frame
7
¹⁄₂
"
(19 cm)
7
¹⁄₂
"
(19 cm)
Centerline
³⁄₄
" (1.9 cm)
7
¹
/
₄
" (18.4 cm) diam.
cabinet cutouts
*From wall, not
cabinet frame
*5"
(12.7 cm)