Installing the unit, Step 2 – Sony BRAVIA XR A95K 55" 4K HDR Smart QD-OLED TV Manuel d'utilisation
Page 10
GB
10
Installing the Unit
1
Position the unit so that the lens is parallel to
the screen.
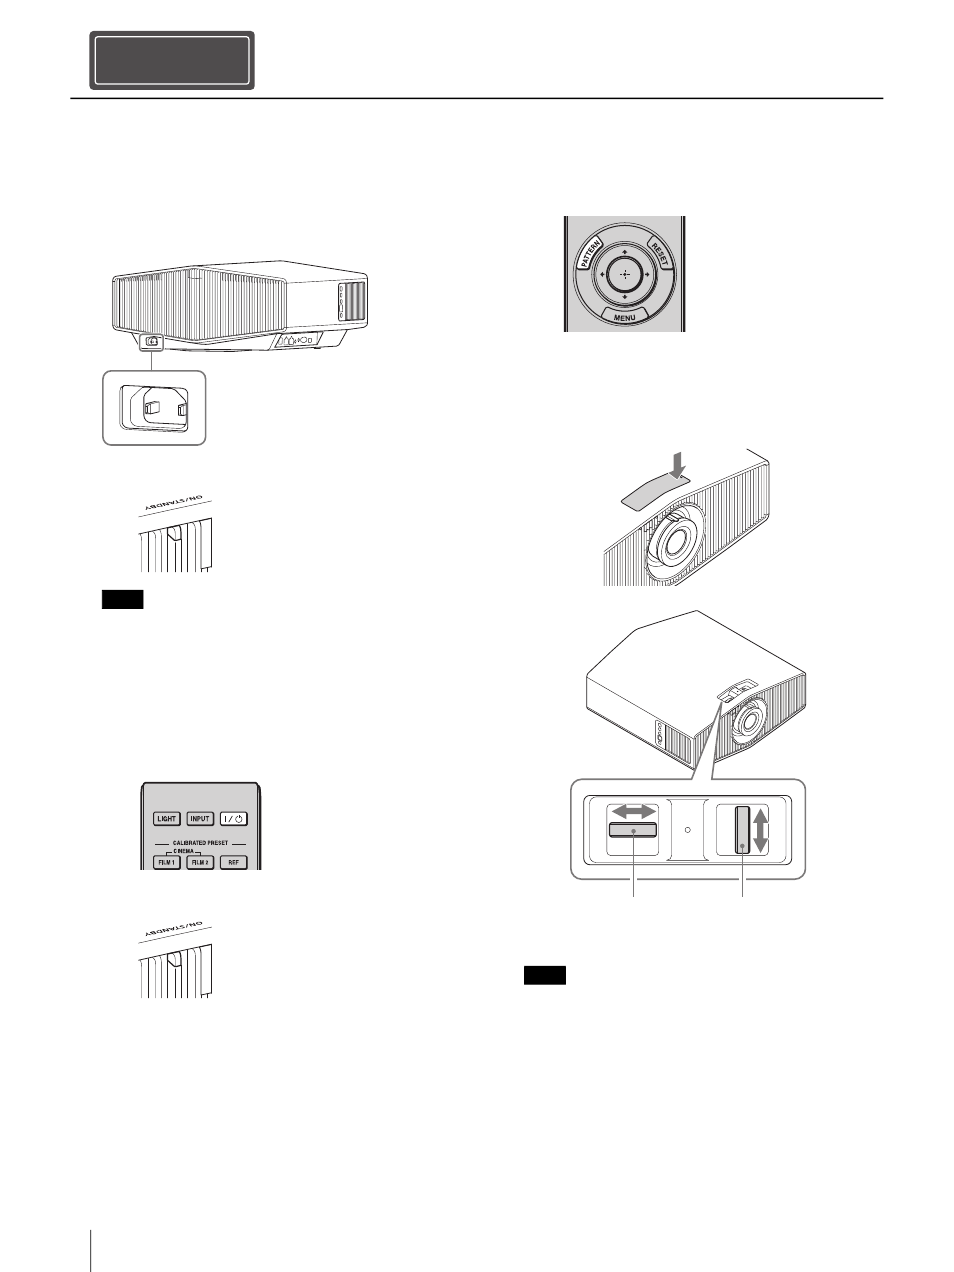
2
After connecting the AC power cord to the
unit, plug the AC power cord into a wall outlet.
After connecting the AC power cord to the unit, the
ON/STANDBY indicator may blink in orange.
You may not be able to control the unit while the
indicator is blinking, but this is not a malfunction. Wait
until it stops blinking and remains lit in red.
3
Press the
/
(On/Standby) button to turn on
the unit.
4
Press the LENS button on the control panel or
the PATTERN button on the remote control to
display a test signal for performing
adjustments.
Open the lid on the top of the unit, then move
both lens shift dials to adjust the picture
position.
After adjusting the picture position, attach the lid to
its original position.
When installing the unit on the ceiling and opening
the lid of the shift dial, the lid may fall. Be careful
when opening and closing the lid, and operating
the dial.
Installing the Unit
Step 2
Note
Rear of the unit
Front of the unit
Lights in red.
Front of the unit
The ON/STANDBY indicator flashes
in green, then it lights in green.
Notes
To adjust the horizontal
position
To adjust the vertical
position
Push to open