Multi-Contact MA231 Manuel d'utilisation
Page 6
Advanced Contact Technology
6 / 8
www.multi-contact.com
17
18
19
16
à la main
by hand
avec PV-MS
with PV-MS
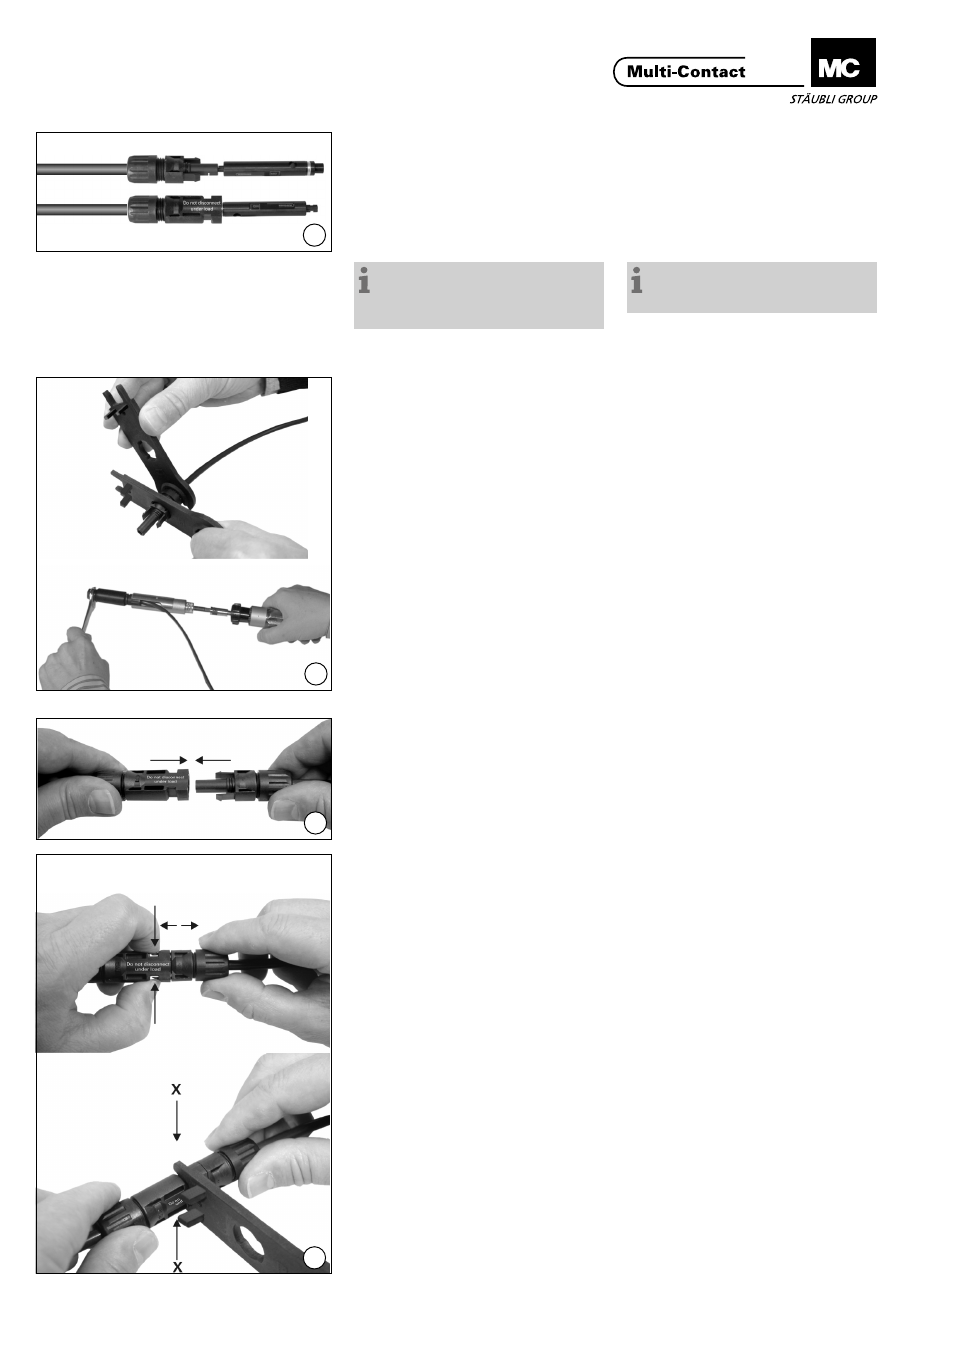
(ill. 16)
Enfichez la fiche de test par le côté
correspondant dans la douille ou la
fiche jusqu’en butée. Si le contact est
monté correctement, le marquage
blanc sur la fiche de test est encore
visible.
(ill. 16)
Insert the appropriate end of the test
pin into the male or female coupler as
far as it will go. If the contact is cor-
rectly located, the white mark on the
test pin must still be visible.
Remarque :
la fiche de test ne peut pas être
utilisée avec des câbles de section
AWG 8 !
Hinweis:
The test plug cannot be used with
an 8 AWG cable!
Les forces ne doivent pas présenter
de déformation visible dans la zone
d’étanchéité de l’isolation. Veuillez
respecter les spécifications du fabri-
cant de câble relatives au rayon de
courbure.
The forces must not create a visible
deformation in the sealing portion of
the insulation.
Refer to cable manufacturers specifi-
cation for minimum bending radius.
(ill. 17)
Serrer manuellement le presse-étoupe
à l‘aide des clés
PV-MS
et
Serrer le presse-étoupe à l‘aide des
outils
PV-WZ-AD/GWD et
PV-SSE-AD4.
En tous les cas:
Le couple de serrage doit être
adapté aux câbles solaires utilisés. Les
valeurs typiques sont de l‘ordre de
3,4 Nm à 3,5 Nm
1)
.
1)
Nous recommandons le calibrage de la clé
dynamométrique avant le début du montage.
(ill. 17)
Screw up the cable gland hand-tight
with the tools
PV-MS
or
tighten the cable gland with the tools
PV-WZ-AD/GWD and PV-SSE-AD4.
In both cases:
The tightening torque must be ap-
propriate for the solar cables used.
Typical values are between 3,4 Nm
and 3,5 Nm
1)
.
1)
We recommend to calibrate the torque wrench
before assembly.
Embrochage / Débrochage
sans clip de sécurité PV-SSH4
Plugging and unplugging the
cable coupler without safety
lock clip PV-SSH4
Embrochage
(ill. 18)
Embrocher le connecteur jusqu‘au
verrouillage. Contrôler le verrouillage
en tirant sur le connecteur.
Plugging
(ill. 18)
Plug the parts of the cable coupler to-
gether until they click in place. Check
that they have engaged properly by
pulling on the cable coupler.
Débrochage
(ill. 19)
Pour déconnecter les contacts, com-
primez les languettes de verrouillage
(X) soit à la main, soit avec l‘outil
PV-MS, et séparez les deux moitiés du
connecteur.
Unplugging
(ill. 19)
To disconnect the contacts, press the
latches (X) together either by hand
or with the tool PV-MS and pull the
halves of the cable coupler apaart.