Multi-Contact MA231 Manuel d'utilisation
Page 5
Advanced Contact Technology
www.multi-contact.com
5 / 8
15
14
12
13
11
Sertissage
Crimping
(ill. 11)
Ouvrir l’étrier (K) et le maintenir.
Insérer le contact dans la zone de sec-
tion appropriée de la pince à sertir.
Tourner les languettes de sertissage
vers le haut. Relacher l’étrier (K). Le
contact est fixé.
(ill. 11)
Open the clamp (K) and hold. Place
the contact in the appropriate cross-
section range.
Turn the crimp lugs upwards. Release
the clamp (K). The contact is fixed.
(ill. 12)
Serrer légèrement la pince pour que
les pattes de sertissage se trouvent
à coup sûr dans la matrice de sertis-
sage.
(ill. 12)
Press the pliers gently together until
the crimp lugs are properly located
within the crimping die.
(ill. 13)
Introduire le câble dénudé jusqu’à ce
que l’isolant bute sur la matrice de
sertissage. Fermer complètement la
pince à sertir.
(ill. 13)
Insert the stripped cable end until the
insulation comes up against the crimp
insert. Completely close the crimping
pliers.
(ill. 14)
Contrôlez le sertissage visuellement.
(ill. 14)
Visually check the crimp.
Remarque:
Pour l’utilisation des pinces à sertir,
voir MA251 sur
www.multi-contact.com
Note:
For directions on the operation of
the crimping tool, please see operat-
ing instructions MA251 at
www.multi-contact.com
Contrôle de l‘assemblage
Assembly check
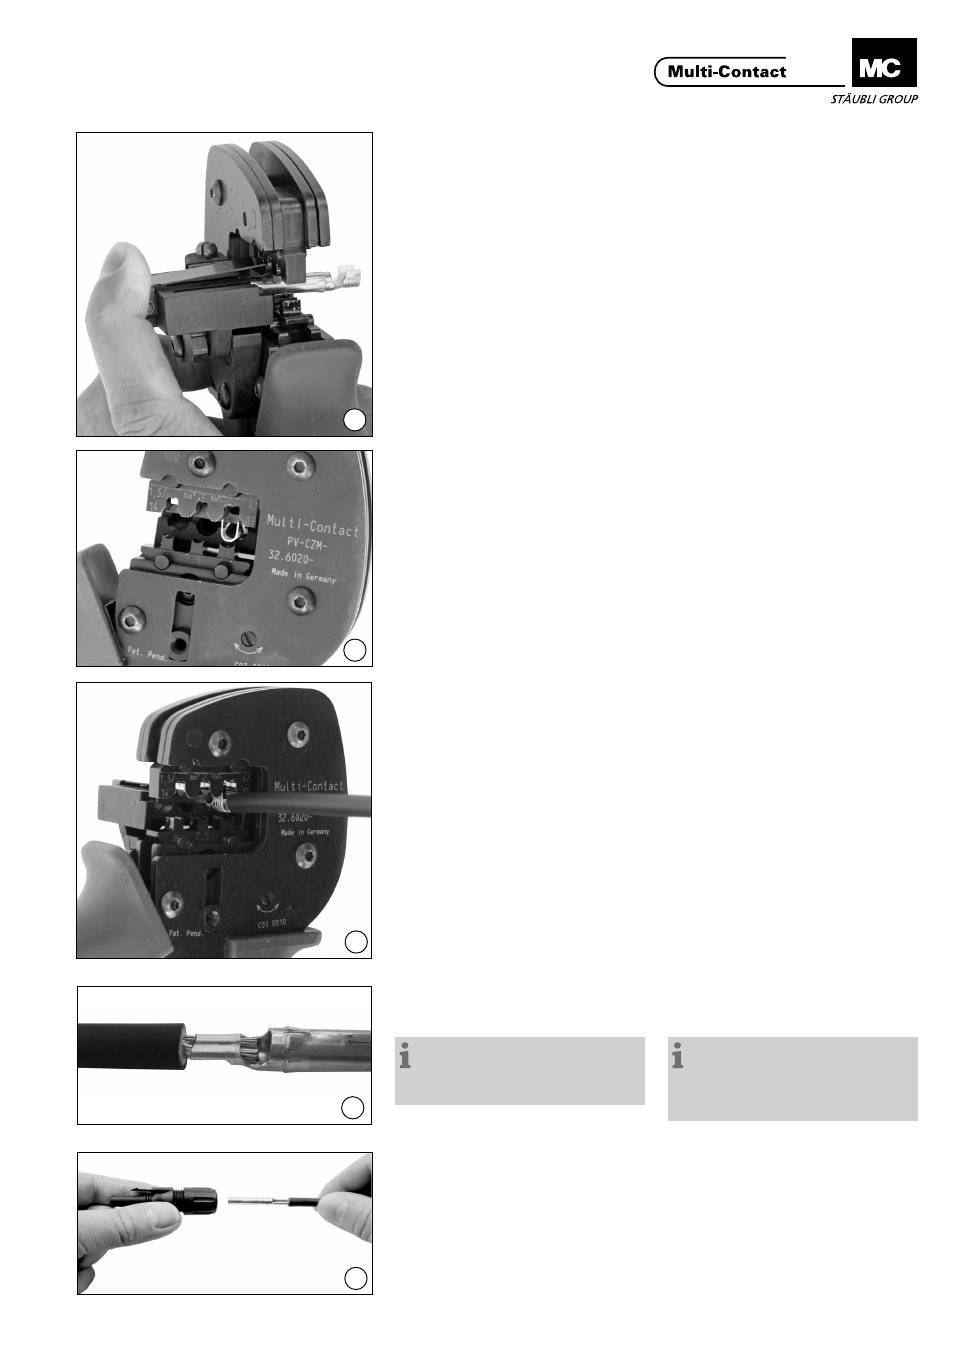
(ill. 15)
Introduisez le contact serti par l’arrière
dans l’isolation de fiche ou de douille
jusqu’à l’enclenchement. Exercez
une légère traction sur le câble pour
contrôler que la pièce métallique est
bien enclenchée.
(ill. 15)
Insert the crimped-on contact into the
insulator of the male or female coupler
until it clicks into place. Pull gently on
the lead to check that the metal part is
correctly engaged.