页面 14, Wall mount installation – Curtis RLC4033A Manuel d'utilisation
Page 14
WALL MOUNT INSTALLATION
INSTALLING
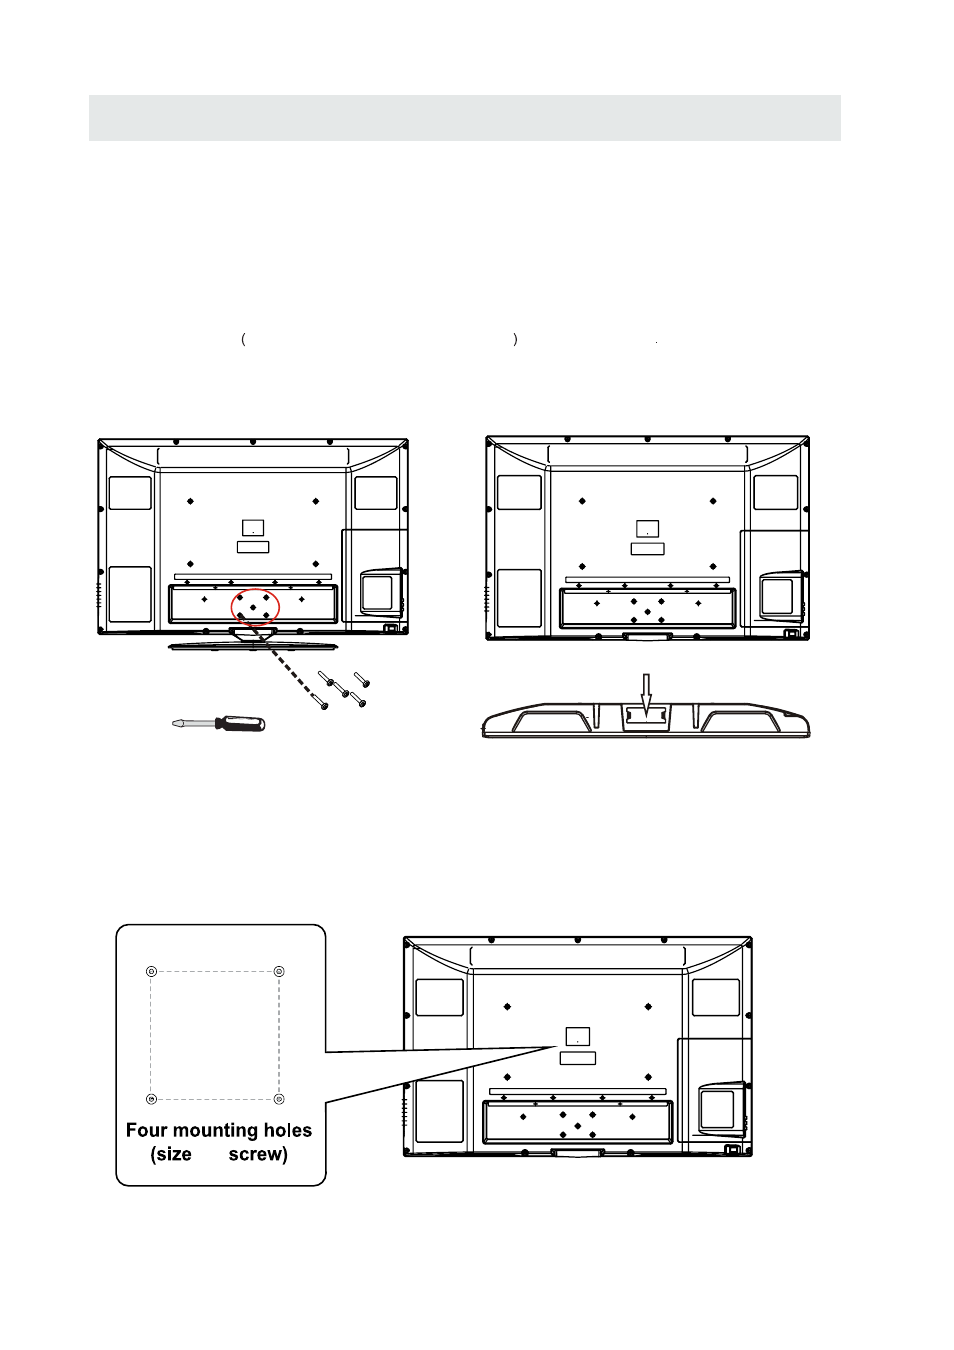
REMOVING THE BASE STAND
WARNING
/
: The LCD Display is very fragile and must be protected at all times when removing the base
Stand
Be sure that no hard or sharp object or anything that could scratch or damage the LCD display comes into
contact with it Do NOT exert pressure on the front of the unit at any time because the screen could crack
1 Disconnect all cables or cords connected to the unit
2 Lay the unit down on a flat surface with the back side facing up Please make sure to place a soft
cushioned material such as a pillow or thick piece of foam beneath the screen
3 To remove the base stand loosen screws off the holes then pull downwards to release
the base stand
4 To install the base stand put the stand into the hole at the bottom of the TV then insert screws to the
holes and tighten.
,
.
.
.
.
.
.
.
.
,
.
.
,
MOUNTING ON THE WALL
NOTE
Remove the base stand before mounting the unit on the wall.
This unit is VESA-compliant, and is designed to be wall-mounted with a VESA-compliant 16” x 8 ”
(400mm x 200mm) mounting kit designed for flat-panel TVs (not supplied). Mount this unit according to
the instructions included in the mounting kit.
Length of screw should not exceed 12 mm.
16”
8”
M6
11
Base cover
- LED2415A LED1526A LED1337A LCD4062A LCD3708A LCD3227A LCD2425A LCD1908A LCD1933A LCD3235A LCDVD2440A LEDVD1339A LEDVD2480A LEDVD2479A LEDVD2480B LCDVD199A LCD4077A LCD4620A LCD4686A LCD4686A-W LCDVD322A LCDVD326A PLCD3271A PLCD3273A-B PLCD3271A-C PLCD4692A PLDED3996A-C2 PLCDV3213A PLCDV3247A-C RLC3209A RLC3255A-B PLDV321300 RLC4062A RLC4686 RLC4688A RLC3708A RLC3273A-B RLC4688A-B RLCVD2480A RLED3219A