Multi-Contact MA074 Manuel d'utilisation
Page 5
Advanced Contact Technology
www.multi-contact.com
5 / 8
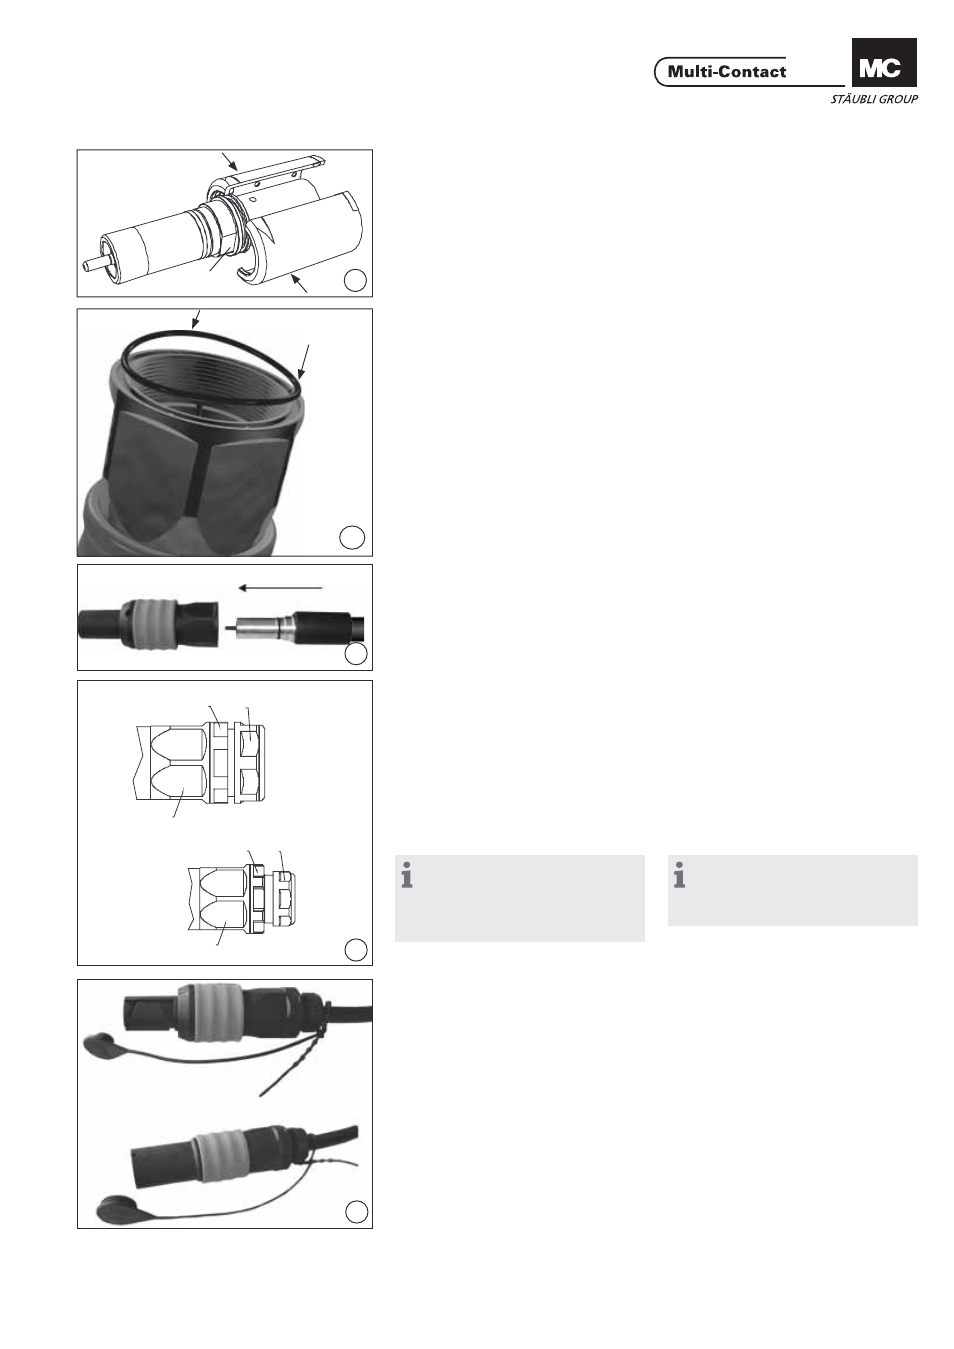
10
11
S W 57
S W 57
M 50
S W 55
S W 57 S W 45
S W 55
M 40
12
13
SW
10a
Montage
Assembly
(ill. 10)
Assembler les demi-coquilles compo-
sant l’entretoise sur la partie en métal
dans la rainure prévue.
(ill. 10)
Push together the half shells of the
distance tube over the metal part in
the groove provided.
(ill. 10a)
Insérer légèrement le joint torique
dans son logement.
(ill. 10a)
Insert the O-ring sligthly in the groove.
(ill. 11)
Introduire le corps de contact et les
demi-coquilles d’entretoise dans le
boîtier isolant et tourner de sorte à
aligner les méplats (SW), ill. 10.
Pousser à fond jusqu’à l’encliquetage.
(ill. 11)
Slip the contact insert and the half
shells of the distance tube into the in-
sualtion and turn until the fl at surfaces
(SW), ill. 10 coincide.
Press in the contact until it engages.
(ill. 12)
Visser le presse-étoupe sur l‘isolation
et serrer au couple approprié. Serrer
ensuite l‘écrou borgne à la clé dyna-
mométrique.
Couple de serrage:
M40 = 14.5Nm
M50 = 20Nm
(ill. 12)
Screw cable gland on to the insulator
and tighten to the appropriate torque.
Then screw on the cap nut by means
of the torque wrench.
Tightening torque:
M40 = 14.5Nm
M50 = 20Nm
Remarque:
Lors du serrage du presse-étoupe,
veiller à ce que les forces soient uni-
formément réparties sur cinq méplats
de l’écrou borgne.
Note:
When tightening the cable gland,
take care that the forces are evenly
distributed over fi ve faces of the nut.
Montage du capuchon
Fitting the protective cap
(ill. 13)
Pour solidariser le capuchon avec le
connecteur, former une boucle avec
la cordelette de fi xation et enfi ler son
extrémité à travers l’oeillet.
(ill. 13)
To attach the cap to the plug connec-
tor with the cord lanyard, form a loop
and push the end of the cord through
the eyelet.