Level washer, Connect inlet hoses to washer, Turn faucets on and check for leaks – Maytag MHWE251YG Installation Manuel d'utilisation
Page 8: Secure drain hose with beaded tie strap, Check levelness of washer, Rock washer to test foot contact
8
LEVEL WASHER
Leveling your washer properly reduces excess noise and
vibration.
NOTE: Installing washer on soft floor surfaces, such as
carpets or surfaces with foam backing, is not recommended.
Remove cardboard from beneath washer.
Slide washer to its final location. Place a level on top edges
of washer, checking each side and front. If not level, tip
washer and adjust feet up or down as shown in steps 17
and 18, repeating as necessary. If washer is against a wall,
move out slightly before tipping back.
Grip washer from top and rock back and forth, making sure all
four feet are firmly on floor. Repeat, rocking washer from side
to side. If washer rocks, go to step 18 and adjust leveling feet.
If all four feet are in firm contact with floor, go to Step 19.
Not Level
LEVEL
Not Level
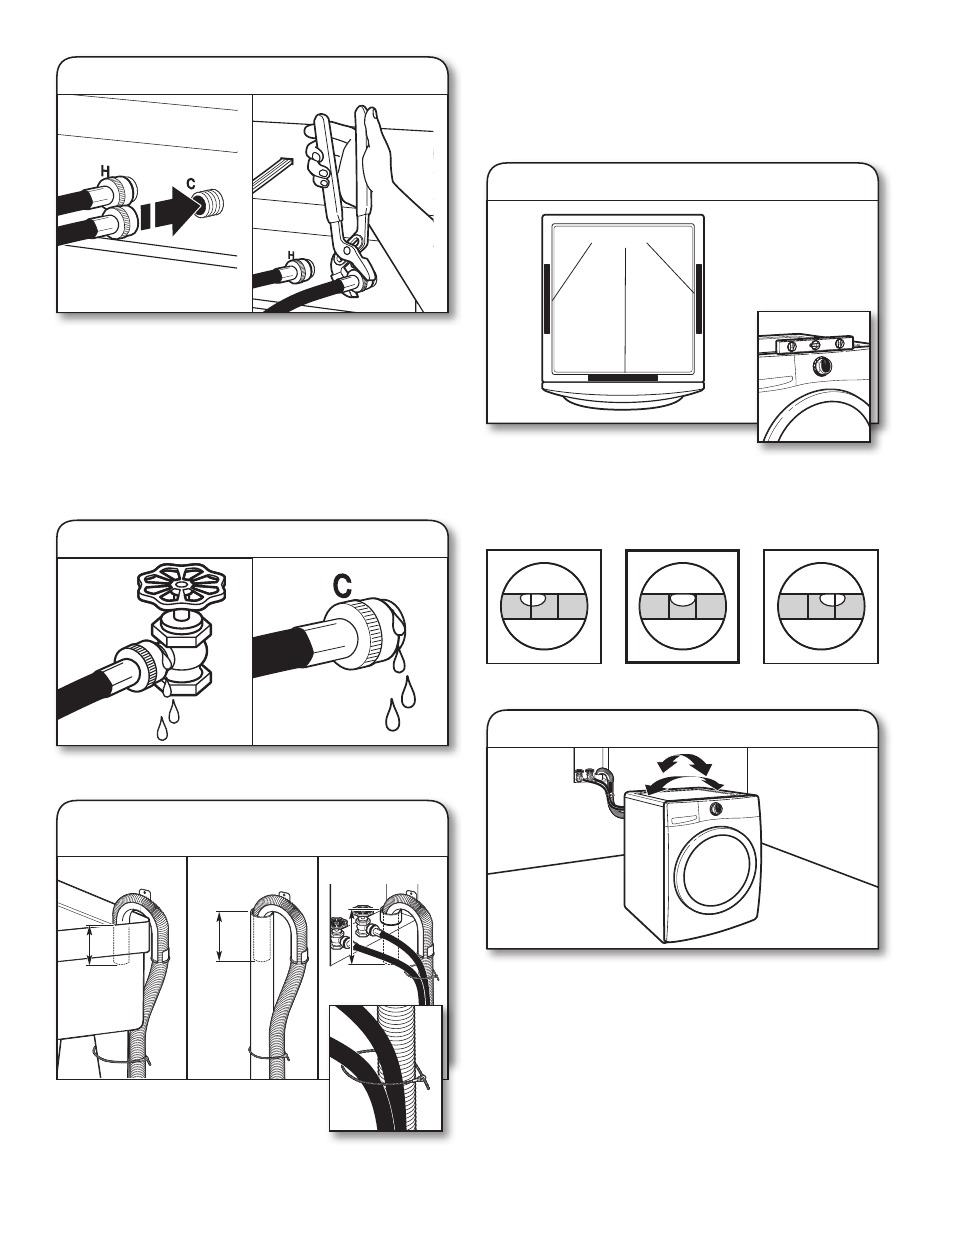
Attach hot water hose to hot water inlet valve marked with a
red valve. Screw coupling by hand until it is snug. Use pliers
to tighten couplings an additional two-thirds turn. Repeat with
cold water inlet valve.
IMPORTANT: To reduce risk of hose failure, replace the hoses
every 5 years. Record hose installation or replacement dates
for future reference.
n
Do not overtighten or use tape or sealants on the valve.
Damage to the valves can result.
n
Periodically inspect and replace hoses if bulges, kinks, cuts,
wear, or leaks are found.
Slowly turn on water faucets to check for leaks. A small
amount of water may enter washer. It will drain later.
13.
Connect inlet hoses to washer
14.
Turn faucets on and check for leaks
15.
Secure drain hose with
beaded tie strap
4
1
/
2
"
(113 mm)
4
1
/
2
"
(113 mm)
4
1
/
2
"
(113 mm)
Laundry Tub
Standpipe
Wall
16.
Check levelness of washer
place level here
17.
Rock washer to test foot contact
Secure drain hose to laundry tub leg, drain
standpipe, or inlet hoses for wall standpipe
with beaded tie strap located in parts bag.
To avoid siphoning, do not seal or put more than
4
1
/
2
" (113 mm) of the drain hose into drainpipe or standpipe.