Nstalling the device, Classification of the device, 1) location of the device – Thermor Allure Manuel d'utilisation
Page 14: 2) how to install the device
13
The device you have just purchased was submitted to many tests and checks ensuring its quality.
We thank you for your choice and trust.We hope you will be fully satisfied.
A few recommendations:
Read the instructions before installing the device.
Power the device off before working on it, and check the power supply voltage.
Store the instructionsfor the future reference after installation.
Classification of the device:
(shown on the information label)
Cat C
: Complies with EU standards for this category.
IP24
: Protected against water projections.
Classe II
: Dual insulation.
I
NSTALLING THE DEVICE
1) Location of the device
- This device was designed to be installed in resi-
dential premises. In any ther case, please call your
distributor.
- Installation must comply with the standards cur-
rently enforced in the country of use.
- Locate the device within minimum distances from
obstacles.
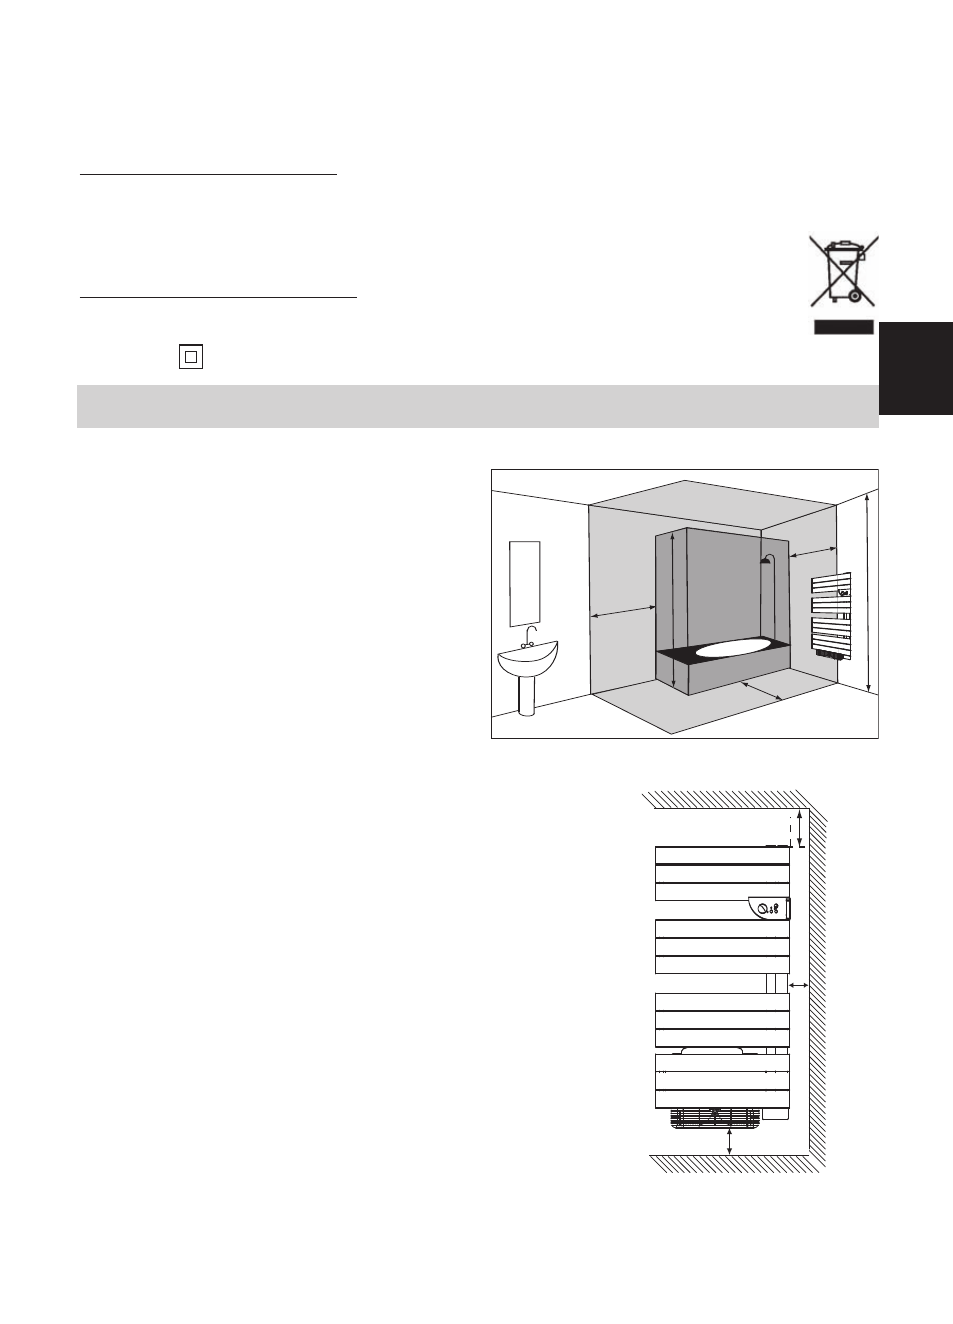
Do not install the device :
In a draft likely to affect its control
(under centralised mechanical ventila-
tion, etc…).
Under a fixed mains outlet.
Inside zones 0 and 1 in bathrooms.
The device is to be installed so that switches and other
controls cannot be touched by a person in the bath or sho-
wer, except in the UK where IEE Regulations 701.512.2 and
701.512.3 apply. These allow the use of IP24 rated products
and their integral controls in Zone 2 and ouside zones.
2) How to install the device
The installation template is printed on the packaging.
1/ Unfasten the carton’s flaps and place it against the wall with the
lower flap folded back and resting flat on the floor. Prick out the
four drill holes though the packaging (without drilling) and then
remove the packaging.
2/ Carefully mark the drilling points with a pencil (draw a cross, 4cm
wide).
3/ Drill the four holes.
4/ Position the four hooks and screw them tight.
5/ Attach the device and lock it in place.
Volume
3
Volume
2
60 cm
60 cm
60 c
m
3
m
2
,2
5
m
Volume
1
150 mm mini
200 mm mini
150 mm mini
GB