Configuring date/time settings, Configuring source settings – Lenco DVL-2494 Manuel d'utilisation
Page 69
English - 68 -
Press “ ” button to set timers on an event. Programme
timer function buttons will be displayed on the
screen.
Adding a Timer
Press
•
YELLOW button on the remote control to
add a timer. The following menu appears on the
screen:
Channel: Changes network type by using “ ” or “ ”.
Timer Type: This feature is unavailable to be set.
Date: Enter a date using the numeric buttons.
Start: Enter a starting time using the numeric
buttons.
End: Enter an ending time using the numeric
buttons.
Duration: Displays duration between the starting and
ending time.
Repeat: Sets a timer to be repeated as Once, Daily or
Weekly. Use “ ” or “ ” buttons to select an option.
Press
•
GREEN button to save the timer. Press RED
button to cancel.
Change/Delete:Controls parental settings on timers.
Editing a Timer
Select the timer you want to edit by pressing “
•
”
or “ ” button.
Press
•
GREEN button. Edit Timer menu screen will
be displayed.
When finished with editing, press
•
GREEN button to
save. You can press
MENU button to cancel.
Deleting a Timer
Select the timer you want to delete by pressing “
•
” or “ ” button.
Press
•
RED button.
Select
•
YES by using “ ” or “ ” buttons to delete the
timer. Select
NO to cancel.
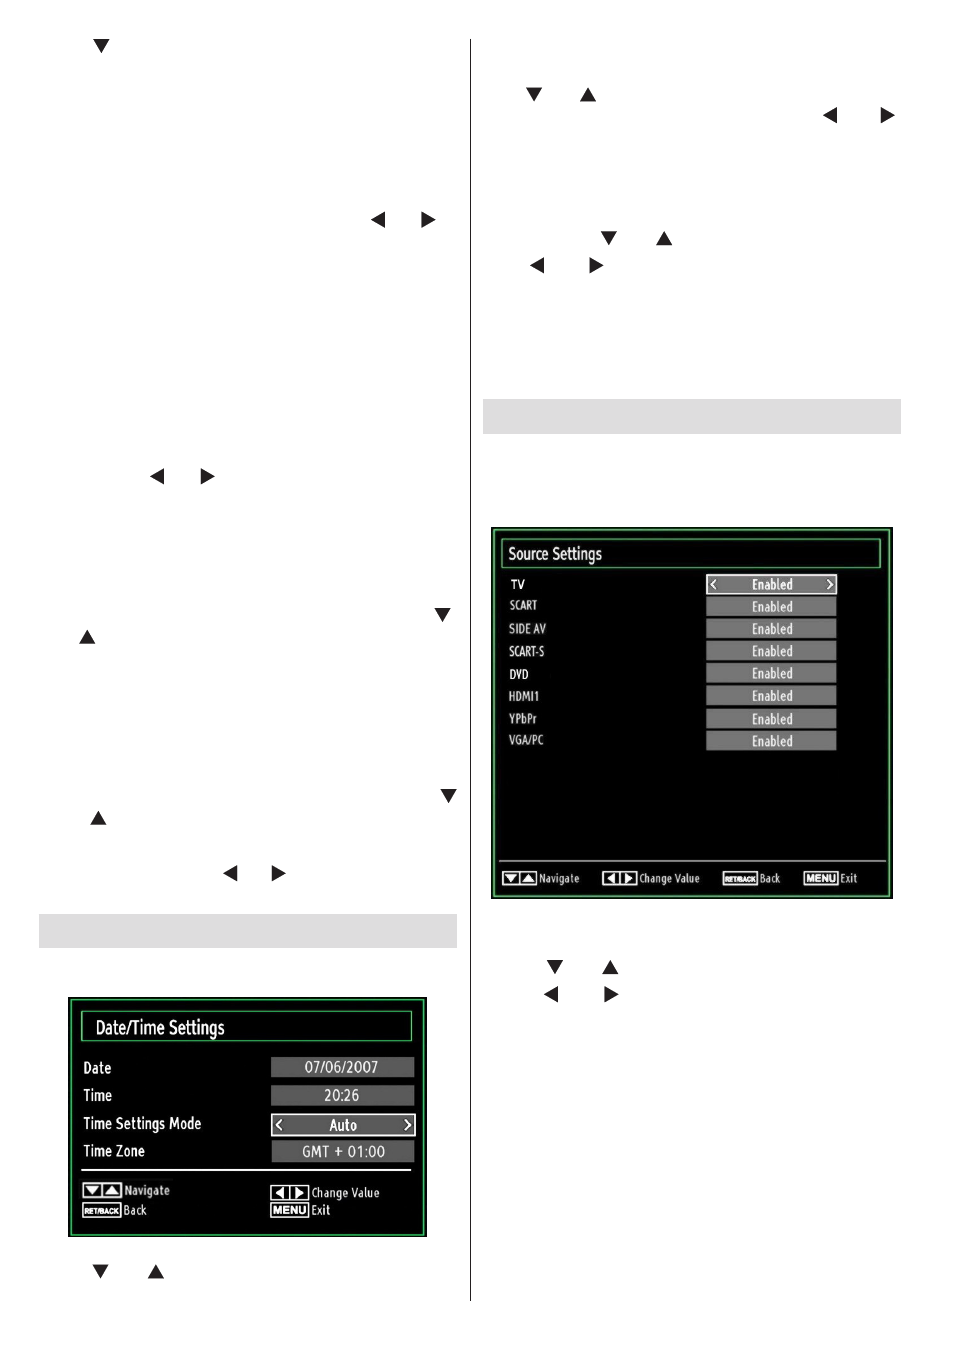
Configuring Date/Time Settings
Select
Date/Time in the Settings menu to configure
Date/Time settings. Press
OK button.
Use “
•
” or “ ” buttons to highlight
Date/Time.
Date,Time,Time Settings Mode and Time Zone Setting
will be available.
Use “ ” or “ ” buttons to highlight the Time Settings
Mode. Time Settings Mode is set using “ ” or “ ”
buttons. It can be set to AUTO or MANUAL.
When AUTO is selected, Date/Time and Time Zone
options will not be available to be set. If MANUAL
option is selected as the Time Zone can be altered:
• By pressing “ ” or “ ” buttons select Time Zone.
Use “ ” or “ ” buttons to change the Time Zone
between GMT-12 or GMT+12. Date/Time on the top
of the menu list will then change according to the
selected Time Zone.
Changes are automatically stored. Press
•
MENU to
exit.
Configuring Source Settings
You can enables or disable selected source options. The
TV will not switch to the disabled source options when
SOURCE button is pressed.
Select
•
Sources in the Settings menu and press OK
button.
Press“
•
” or “ ” buttons to select a source.
Use “
•
” or “ ” button to enable or disable the
selected source. Changes are automatically
stored.
Note : YPbPr mode can be used only when you
connect a device that has a YPbPr output through the
PC input with YPbPr to PC cable (not supplied).