Connecting to a dvd player via hdmi, Connecting the tv to a pc, Using side av connectors – Lenco DVL-2494 Manuel d'utilisation
Page 53: Connecting to a dvd player
English - 52 -
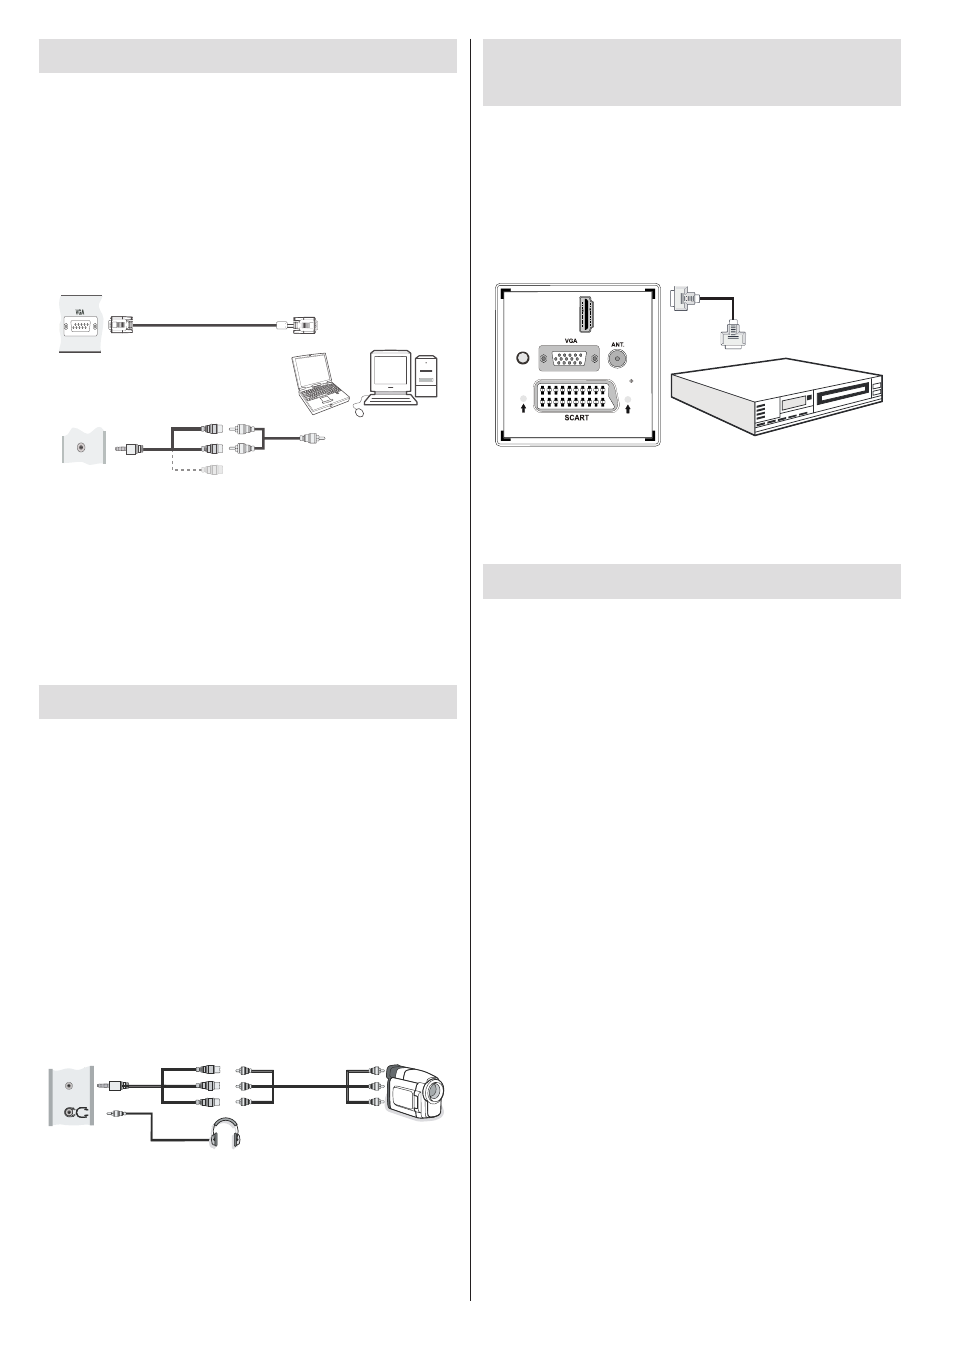
Connecting the TV to a PC
For displaying your computer’s screen image on your
TV, you can connect your computer to the TV set.
Power off both computer and display before making
any connections. Use a 15-pin D-sub display cable
to connect a PC to the TV. When the connection is
made, switch to PC source. See the Input selection
section. Set the resolution that suits your viewing
requirements. Resolution information can be found
in the appendix.
PC Input
(back)
Side AV Input
PC VGA Cable
(not supplied)
PC Audio Cable
(not supplied)
Side Audio/Video
Connection Cable
(supplied)
or
SI
D
E
AV
Note: You should use audio inputs of side AV
connection cable (RED & WHITE) to enable sound
connection when connecting a device to your TV by
using PC input.
Note: If you connect a PC to the TV using HDMI
connection, radio interference may occur. Therefore
this type of connection is not recommended. You
should use VGA connection instead.
Using Side AV Connectors
You can connect a range of optional equipment to your
TV using the side connectors of the TV.
When connecting a camcorder or camera , you should
•
use the
SIDE AV socket. To do this, you must use the
supplied
video/audio connection cable. First, plug
single jack of the cable to the TV’s
AV IN socket
(side). Afterwards, insert your camera cable’s (not
supplied) connectors into the plural part of the
video/
audio connection cable. Colours of the connected
jacks should match. See illustration below.
Afterwards, you should switch to the
•
Side AV source.
See the section Input selection in the following
sections for more information.
Camera
Side AV Connection
Cable (supplied)
AV Cable
(not supplied)
Headphone
SI
D
E
AV
To listen the TV sound from headphones, you
•
should connect headphones to your TV by using the
HEADPHONE jack as illustrated above.
Connecting to a DVD Player
via HDMI
Please refer to your DVD player’s instruction book
for additional information. Power off both the TV and
the device before making any connections.
Note: Not all cables shown in the illustration are
supplied.
If your DVD player has an
•
HDMI socket, you can
connect via
HDMI for better video and audio quality.
H
M
I 1
D
SPDIF
Coax. UT
O
External device
(not
supplied)
HDMI Cable
When you connect to DVD player as illustrated above,
•
switch to the connected
HDMI source. See, Input
Selection section for more information on changing
sources.
Connecting to a DVD Player
If you want to connect a DVD player to your TV, you
can use the connectors of the TV set. DVD players
may have different connectors. Please refer to your
DVD player’s instruction book for additional information.
Power off both the TV and the device before making
any connections.
Note: Cables shown in the illustration are not
supplied.
If your DVD player has an
•
HDMI socket, you can
connect via
HDMI. When you connect to a DVD player
as illustrated below, switch to the HDMI source. See
“Input Selection” section.
DVD players can also be connected through
•
COMPONENT SOCKETS. YPbPr can be used only
when you connect a device that has a YPbPr output
through the PC input with YPbPr to PC cable (YPbPr
cable is not supplied).
You may also connect through the SCART sockets.
•
Use a SCART cable as shown below.
Note: These three methods of connection perform the
same function but in different levels of quality. It is
not necessary to connect by all three methods.