MAAX CS 05 Manuel d'utilisation
Page 19
19
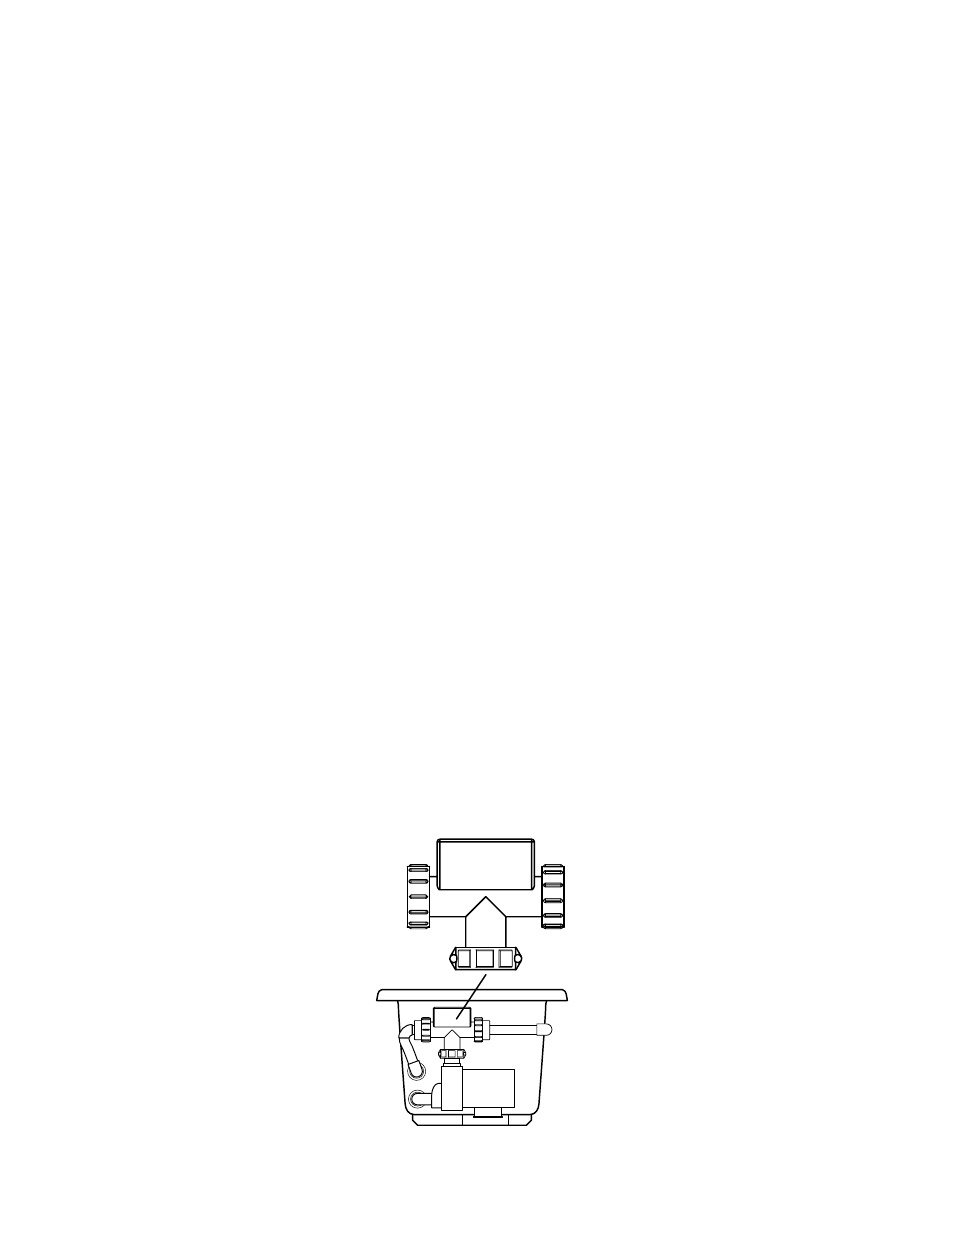
IN-LINE HEATER OPERATING
Available with whirlpool or combined system only.
for electrical connection, refer to general information
section in this guide and to Wiring instructions section.
make sure that the water heater pipe connectors are
firmly tightened (by hand only).
this water heater is equipped with a pressure interrupter
and requires a minimum of 10 gallons per minute water
circulation in order to function.
note: the thermostat is pre-set and not adjustable.
CHROMATHERAPY LIGHT (OPTION)
available with regular units (without system).
to ensure ventilation and easy servicing, leave the light
fixture free of fiberglass or foam insulation, etc., on the
underside of the bathtub. (see fig. 15a)
UTILISATION DU CHAUFFE-EAU
Offert avec système tourbillon ou combo seulement.
Pour les connexions électriques, se référer aux sections
renseignements généraux et instructions relatives au
câblage du guide.
s’assurer que les raccords des tuyaux au chauffe-eau
sont bien serrés (à la main seulement).
Le chauffe-eau est doté d’un interrupteur à pression et
nécessite une circulation d’eau de 10 gallons par minute
afin de pouvoir fonctionner.
note : Le thermostat est préréglé et ne peut être modifié.
LUMIÈRE DE CHROMOTHÉRAPIE (OPTION)
offerte avec les unités standard (sans système).
Pour faciliter la ventilation et l’entretien, ne pas obstruer
le dispositif d’éclairage de fibre de verre, de mousse
isolante ou de tout autre matériau (voir fig. 15a).
fig. 16
REPLACING CHROMATHERAPY LIGHTBULB
(see fig. 15b)
1. remove the lens with unscrewing tool. aligning the
notches of the lens with that of the tool.
2. Verify the o-ring is not damaged and is properly in
place.
3. Pull the bulb to remove and press gently on the new
bulb.
4. screw the lens with the tool.
REMPLACEMENT AMPOULE
CHROMOTHÉRAPIE
(Voir la figure 15b)
1. enlever la lentille en la dévissant avec l’outil. aligner
les encoches de la lentille avec celle de l’outil.
2. Vérifiez que le joint torique n’est pas endommagé et
qu’il est correctement placé.
3. tirer sur l’ampoule pour l’enlever et presser sans
forcer sur la nouvelle ampoule.
4. Visser la lentille avec l’outil.