MAAX APEX 96 8 FT Manuel d'utilisation
Page 8
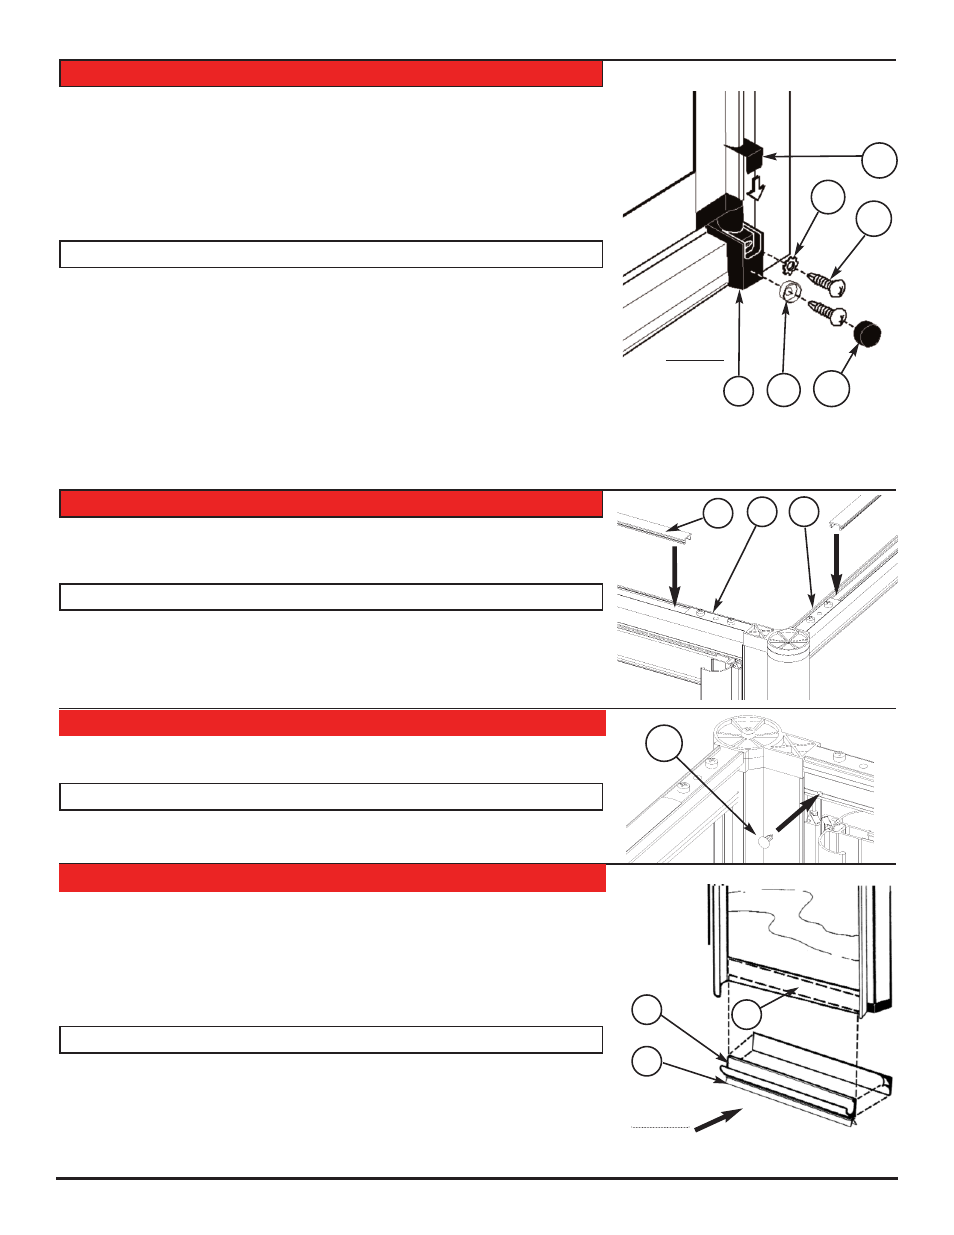
a- Put door in place in its frame (according to selected orientation) and fix both piv-
ots (R) in pre-drilled holes with a screw (BB) and a lock washer (AA).
b- Verify hinge seal (O) position. Adjust, if needed, door closing with pivots (R) location.
d- Cover pivot with pivot snap cap (HH).
e- Drill with apropriate drill bit in both top and bottom pivots (R), screw in place with
screw (BB) and washer snap cap (EE), cover with snap cap (DD) as shown.
a- Remettez la porte en place dans son cadre (conformément à l’orientation
choisie) puis fixez-la dans les pivots (R) et les trous pré-percés avec une vis (BB) et
une rondelle de bloquage (AA).
b- Vérifiez la position du déflecteur souple de charnière (O). Ajustez, au besoin, la fer-
meture de la porte avec la position des pivots (R).
d- Couvrez le pivot avec son capuchon (HH).
e- Percez avec la mèche appropriée et vissez dans les pivots du haut et du bas (R)
avec une vis (BB) et rondelle (EE), couvrez d’un capuchon de finition (DD) tel qu’il-
lustré.
a- Cut clear PVC snap cap strip (P) to approriate lenght (if needed).
b- Install the snap cap strip into the top of the door frame (E) and on the side panel (B).
a- Coupez la bande de PVC (P) à la longueur appropriée (au besoin).
b- Installez la bande de finition sur le dessus du cadre de la porte (E) et sur le panneau
latéral (B).
a- Insert the two finishing plugs (GG) in both non-occupied holes of the door frame.
a- insérez les bouchons de finition (GG) dans les deux trous non utilisés du cadre.
a- Measure and cut the drip shield (I).
b- Moisten and insert rubber drip seal (M) into the bottom drip shield (I). Cut if needed.
c- Peel the backing and stick drip shield in place on the inside of bottom of door (G).
Angle the drip shield downwards towards the pivot side of the door. The drip seal
(M) should touch the threshold.
a- Mesurez et coupez la gouttière inférieure (I).
b- Mouillez et insérez le déflecteur de plastique (M) dans la gouttière du bas (I).
Coupez si nécessaire.
c- Pelez l’autocollant et collez la gouttière en place sur le bas de la porte (G) à l’in-
térieur de la douche, en l’inclinant vers le côté du pivot (voir illustration). Le
déflecteur de plastique (M) doit toucher au seuil.
STEP 8 - DOOR
ÉTAPE 8 - PORTE
ÉTAPE 11 - GOUTTIÈRES
STEP 11 - DRIP SHIELD
ÉTAPE 10 - BOUCHONS DE FINITION
STEP 10 - PLUGS
ÉTAPE 9 - BANDE DE FINITION
STEP 9 - SNAP CAP STRIP
8
I
Interior
Intérieur
M
GG
AA
HH
R
BB
EE DD
Interior
Intérieur
B
E
P
G