MAAX APEX 96 8 FT Manuel d'utilisation
Page 6
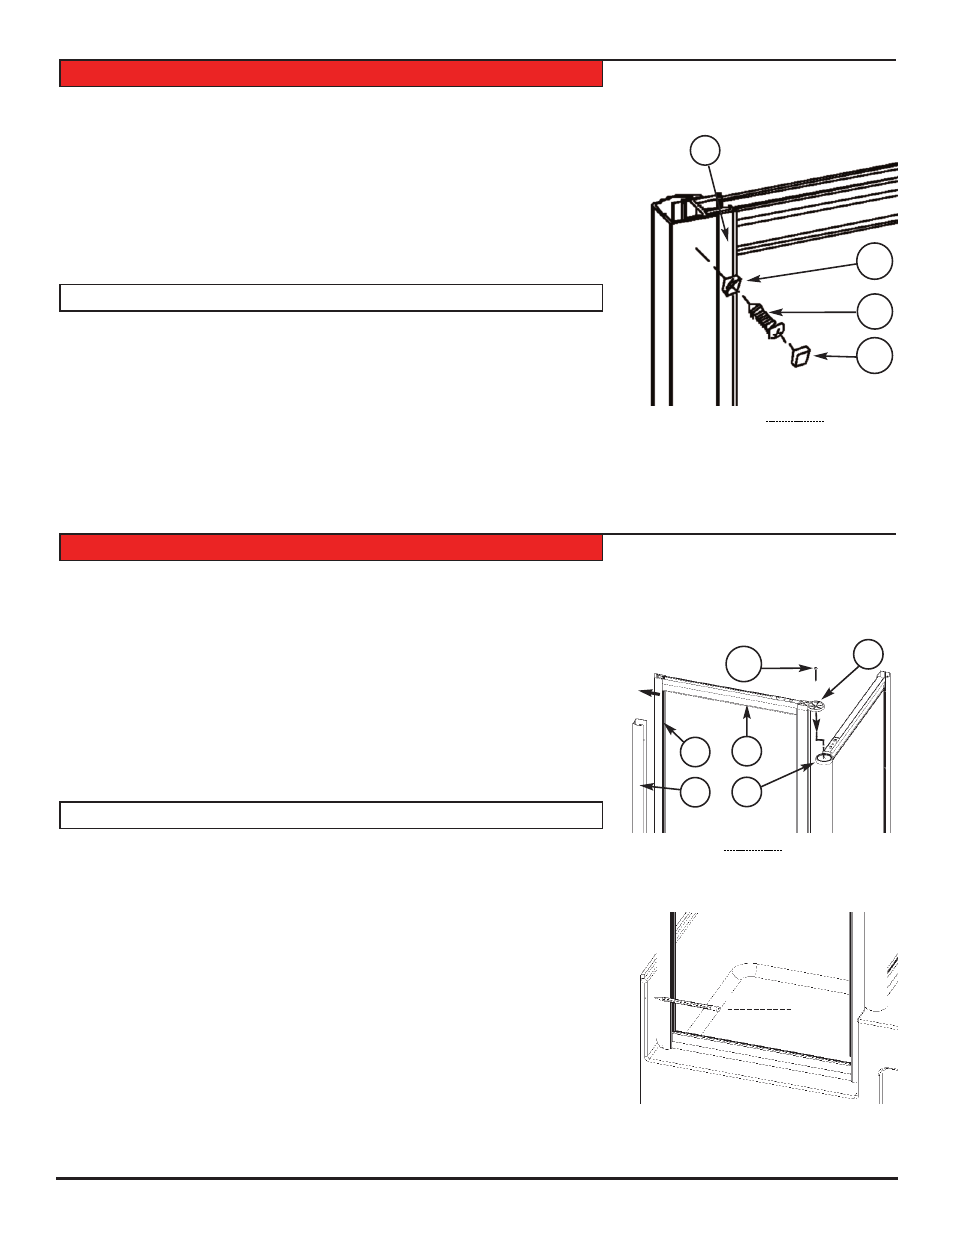
Ensure the side panel is level before continuing
a- Drill through the first wall (only) of the side frame (D) and the wall jamb (A) at three
locations, top, bottom and center, use a 7/64” drill bit.
b- Secure panel with three screws (BB) and three washers (EE).
c- Cover screws with snap caps (DD)
S’assurer que le panneau est nivelé avant de continuer.
a- Percez à travers la première paroi (seulement) du cadre (D) du panneau à l’endroit
ou le montant mural est percé ( utilisez une mêche 7/64”).
b- Fixez en place avec trois vis (BB) et trois rondelles (EE).
c- Couvrez les vis avec les capuchons de finition (DD).
a- Place the longer wall jamb (A) over the side frame (D) of the door as shown.
b- Place door frame on the panel with the lock top (K) over the lock
bottom (L). Fig A
Note: Place door frame for the door to open towards the outside of the shower.
c- Temporarily secure the door frame with the previously removed screw (CC).
d- Assure the door frame is parallel with the shower base and mark the location of the
wall jamb. Fig B
a- Placez le plus long des montants muraux (A) sur le cadre de côté de porte (D) tel
qu’illustré.
b- Placez le cadre de la porte sur le panneau en superposant le pivot de fixation
supérieur (P) du cadre sur le pivot de fixation inférieur (Q). Fig A
N.B: Placez le cadre de porte de façon à ce que la porte ouvre vers l’extérieur de la
douche.
c- Fixez temporairement avec la vis (CC) retirée antérieurement.
d- Vérifiez le parallélisme du panneau latéral et du cadre de porte avec la base et mar-
quez la position du montant sur le mur. Fig B
STEP 5.2 - SECURING PANEL
ÉTAPE 5.2 - FIXATION DU PANNEAU
ÉTAPE 6 - INSTALLATION DU CADRE DE LA PORTE
STEP 6 - DOOR FRAME INSTALLATION
6
D
EE
BB
DD
K
CC
E
Fig A
Fig B
Interior
Intérieur
L
A
D
Marker
Marqueur
Exterior
Extérieur