Multi-Contact MA201 Manuel d'utilisation
Page 6
Advanced Contact Technology
6 / 12 www.multi-contact.com
17
18
19
20
21
Montage des contacts
Installation of the contacts
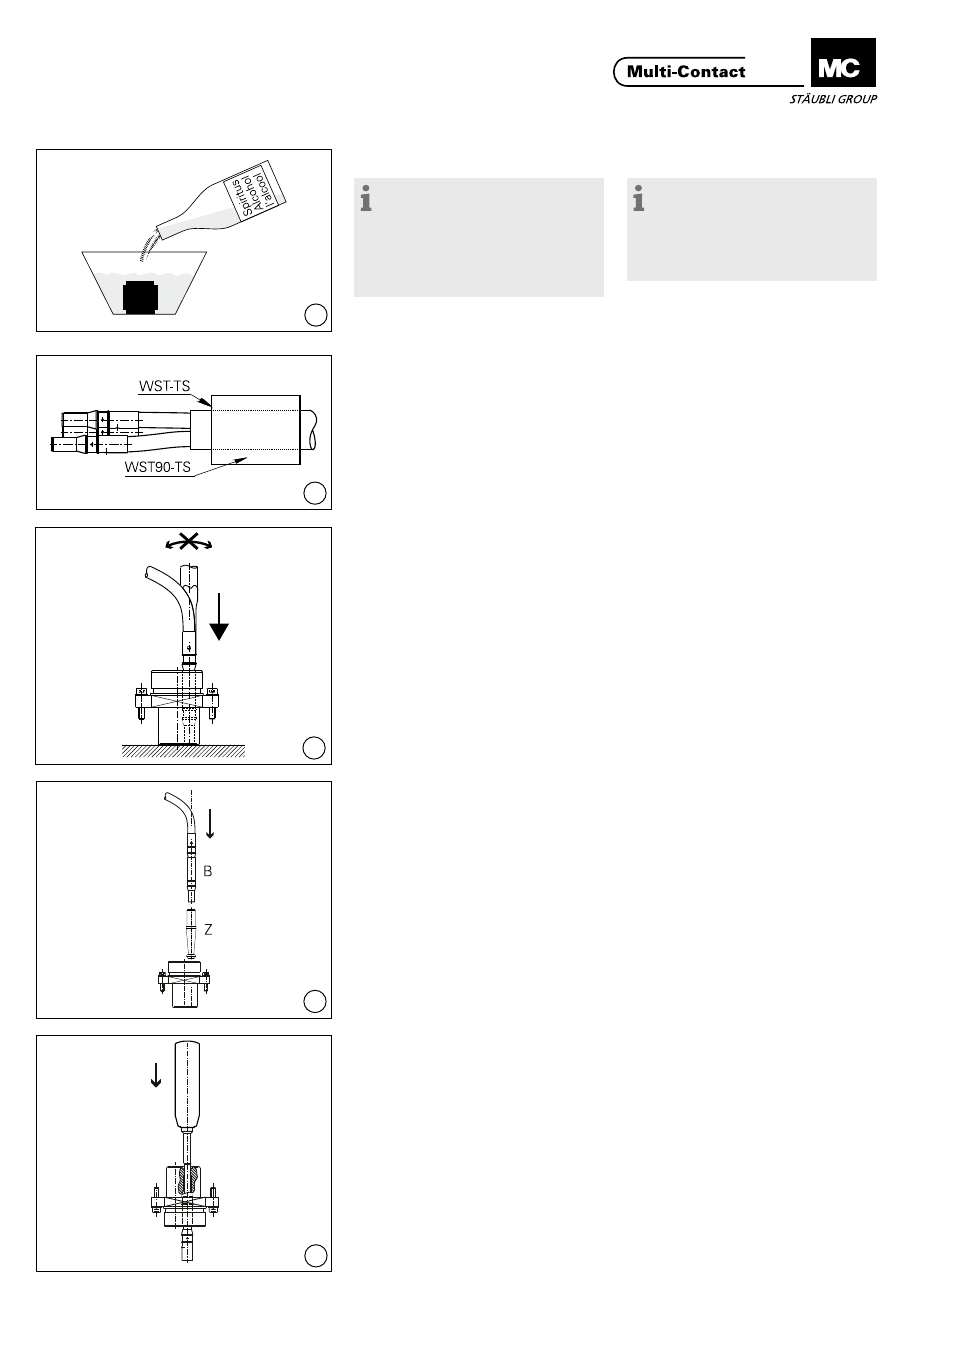
Remarque (ill. 17):
Pour faciliter le montage des
contacts, il est indispensable de plon-
ger au préalable les corps isolants
dans de l‘alcool industriel, mais ne
pas utiliser de substances grasses
(pas de talc).
Note (ill. 17):
To facilitate installation immerse
the insulation carrier in industrial
alcohol before inserting the contacts.
Do not use any grease or talcum
powder.
(ill. 18) uniquement pour TID-B/...
Lecaséchéant,enfilerlemanchon
thermorétractable sur le câble�
(ill. 18) for TID-B/... only
Whenapplicable,placeunshrunken
form shroud on the cable�
(ill. 19)
Insérer à la main, par la face arrière du
support isolant (coté raccordement),
les contacts dans leur logement
respectif� A l‘aide de l‘outil approprié
(ME-WZ6,18.3016ouME-WZ11/38,
18�3021) emmancher les contacts
dans leur logement respectif par la
face arrière du corps isolant jusqu‘à
leur parfaite mise en place� Pour ce
faire, il est recommandé de placer le
corps isolant sur une surface plane et
de manipuler l‘outil perpendiculaire-
ment à cette surface�
(ill. 19)
Insert contacts by hand into the
contact holes of the insulator from the
connector side (larger hole diameter)�
Press in the contacts with insertion
tool(ME-WZ6,18.3016or
ME-WZ11/38,18.3021)untilcontact
can be heard engaging�
It is advisable to place insulator on a
flatbench.
Besuretokeeptoolstraightwhen
installing or removing contacts�
(ill. 20)
Pour TSB250/...
Insérez la douille avec protection au
toucher dans les logements “U” et
“V”� Pour la mise en place, positionner
d’abordlecônedecentrage(Z)
MEK-WZ-12surladouille(B).
(ill. 20)
For TSB250/...
Insert socket with touch protection in
the contact holes “U” and “V”� To in-
sertthecentringcone(Z)MEK-WZ-12
firstplugintothesocket(B).
(ill. 21)
Lors d‘une réparation, les contacts
seront extraits du corps isolant avec
l‘outil de démontage (voir Tab� 2)
(ill. 21)
In the case of repairs contacts are ex-
tracted and replaced with the extrac-
tion tool (see Tab� 2)�