Multi-Contact MA066 Manuel d'utilisation
Page 3
Advanced Contact Technology
www.multi-contact.com
3 / 4
1
3
2
4
6
46
17
17
5
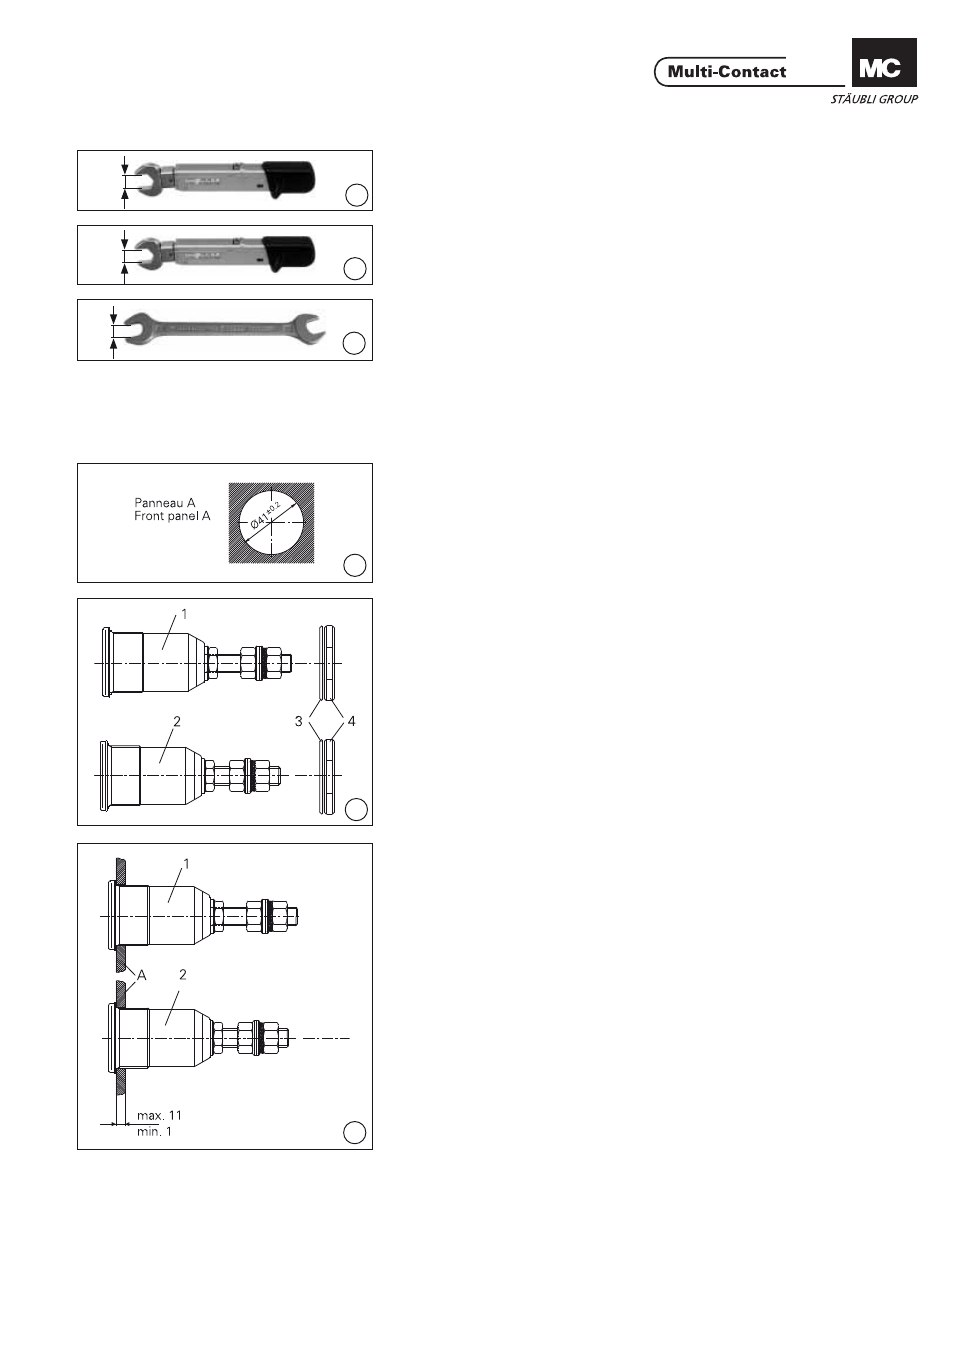
Outillage nécessaire
Tools required
(ill. 1)
Clé dynamométrique 46mm, 200Nm
(ill. 1)
Torque spanner 46mm A/F, 200Nm
(ill. 2)
Clé dynamométrique 17mm, 10Nm.
(ill. 2)
Torque spanner 17mm A/F, 10Nm
(ill. 3)
Clй а fourche 17mm
(ill. 3)
Open-end spanner 17mm A/F
1. Montage du connecteur
1. Connector assembly
(ill. 4)
Percer le panneau A selon le plan de
perçage.
(ill. 4)
Drill front panel A according to drilling
plan.
(ill. 5)
Démonter l‘écrou à 6 pans (4) et la
bague en PUR (3) de la douille (1) ou
de la broche (2). Glisser la bague de
couleur (si disponible) sur la
broche/fi che.
(ill. 5)
Remove ring nut (4) and PUR ring (3)
from socket (1) or plug (2). If present,
slip the colour ring onto the
socket/plug.
(ill. 6)
Introduire la douille (1) ou la broche (2)
dans le panneau (A).
(ill. 6)
Insert socket (1) or plug (2) into front
panel (A).