Install range hood – Maytag UXT5536AAS Manuel d'utilisation
Page 9
9
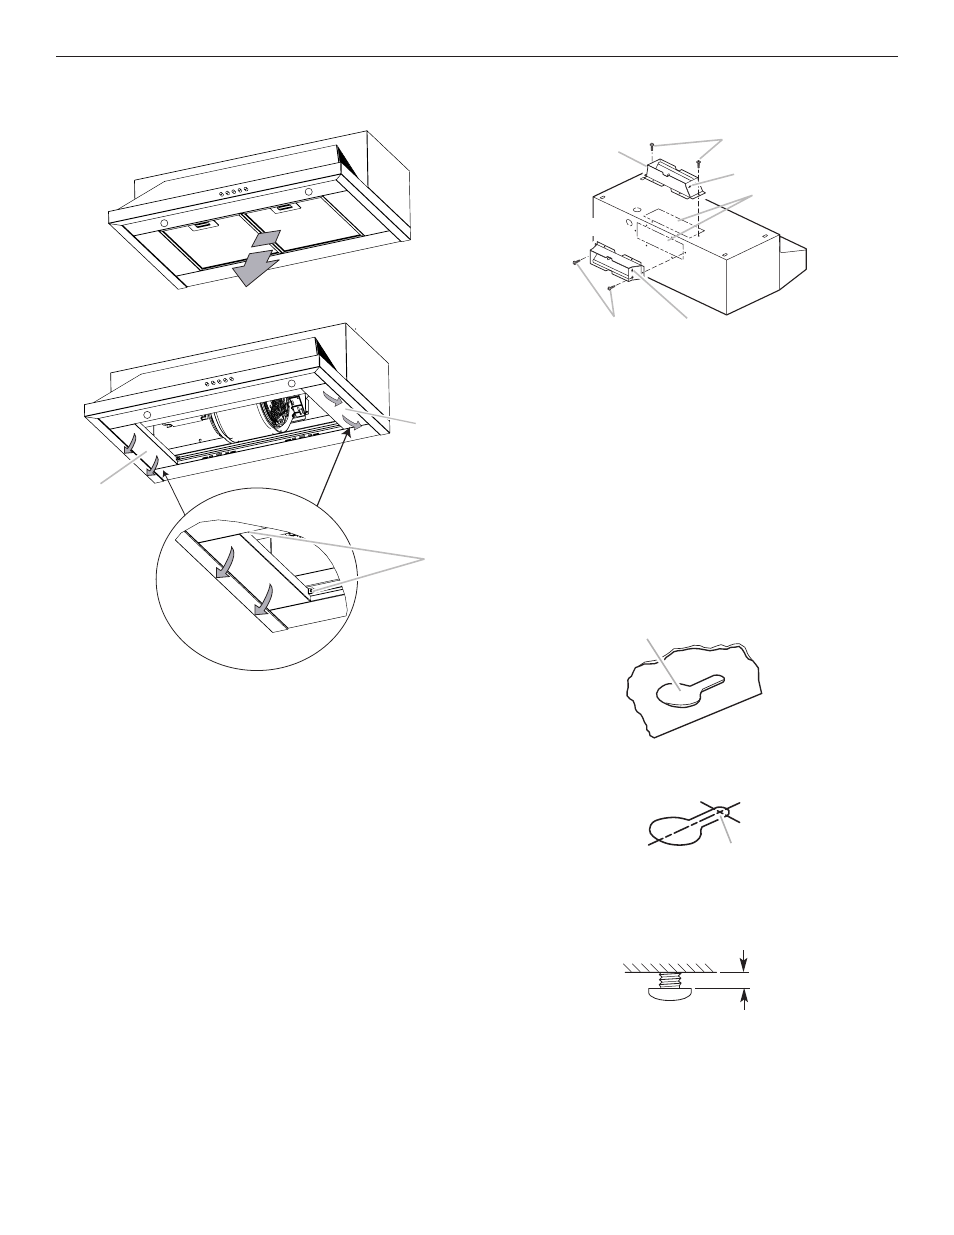
Install Range Hood
1. Remove the grease filters. See the “Range
Hood Care” section.
2. Remove mounting screws and lateral supports.
3. For vented installations:
■
Depending on your installation, remove either top
or rear rectangular vent knockout. If using round
vent, remove top rectangular knockout.
NOTE: Do not remove rectangular knockouts
if installation of range hood is to be non-venting
(recirculating).
■
Make sure damper pivot is nearest to top/back
edge of range hood.
■
Remove tape from damper flap.
NOTE: The exhaust adaptor/damper can be
installed up to 1" (2.5 cm) on either side of the
hood center to accommodate off-center ductwork.
■
If using rectangular vent, attach rectangular damper/vent
connectors to the range hood using sheet metal screws.
■
If using round vent, attach vent transition piece
(purchased separately) to range hood top using
sheet metal screws.
NOTE: If the wall cap is directly behind the vent
connector, the dampers in the connector and
wall cap must not interfere with each other.
Remove the vent connector damper if they interfere.
4. Lift the range hood up under cabinet and determine
final location by centering beneath cabinet. Mark on
the underside of cabinet the location of the 4 keyhole
mounting slots on the range hood. Set range hood
aside on a covered surface.
5. Use
1
/
8
" (3 mm) drill bit and drill 4 pilot holes as shown.
6. Install the 4 - #10 x
5
/
8
" mounting screws in pilot holes.
Leave about
1
/
4
" (6.4 mm) space between screw heads
and cabinet to slide range hood into place.
A
A
B
A. Lateral supports
B. Mounting screws
A
B
C
D
C
B
E
A. Vertical vent
B. Sheet metal screws
C. Hinge pin
D. Vent knockouts
E. Horizontal vent
A
A. Keyhole slot
A
A. Drill pilot hole
¹⁄₄
"
(6.4 mm)