Complete installation – Maytag MTW5805TW Manuel d'utilisation
Page 12
12
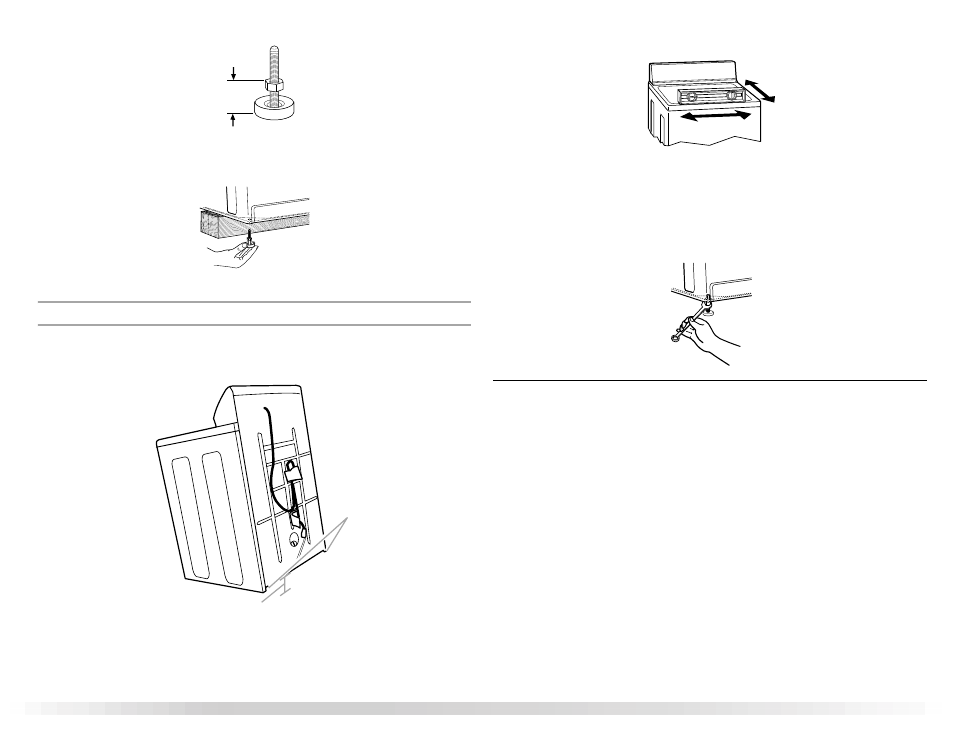
2. Screw the locknut onto each foot to within 1" (2.5 cm) of the foot base.
3. Screw the feet into the threaded holes at the front corner of the washer until the nuts
touch the washer. Twist the feet to install.
NOTE: Do not tighten the nuts until the washer is level.
4. Tilt the washer back and remove the wood block. Gently lower the washer to the floor.
Steps in Final Location
1. Slide the washer to its final location.
2. Tilt the washer forward until the rear of the washer is at least 4" (10.2 cm) off the floor. You
may hear the self-adjusting rear feet click into place. Lower the washer to the floor.
3. Check the levelness of the washer by placing a level on the top edges of the washer, first
side to side, then front to back.
4. If the washer is not level, move the washer out slightly, tip back, prop up the front of the
washer with the wood block and adjust the feet up or down as necessary by twisting the
feet. Turn the feet clockwise to raise the washer or counterclockwise to lower the washer.
Repeat steps 1 through 4 until washer is level.
5. After the washer is in its final location and level, use a
⁹⁄₁₆" or 14 mm open-end wrench to
turn the nuts counterclockwise on the feet tightly against the washer cabinet.
IMPORTANT: If the nuts are not tight against the washer cabinet, the washer may vibrate.
Complete Installation
1. Check the electrical requirements. Be sure that you have the correct electrical supply and
the recommended grounding method. See “Electrical Requirements.”
2. Check that all parts are now installed. If there is an extra part, go back through the steps to
see which step was skipped.
3. Check that you have all of your tools.
4. Check that the yellow shipping materials were completely removed from the lower back
of the washer.
5. Dispose of/recycle all packaging materials.
6. Check that the water faucets are on.
7. Check for leaks around faucets and inlet hoses.
A. Self-adjusting feet
1"
(2.5 cm)
A
4"
(10.2 cm)