Multi-Contact MA106 Manuel d'utilisation
Page 4
Advanced Contact Technology
4 / 8
www.multi-contact.com
6
7
8
9
10
11
Préparation du câble
Preparation of the cable
(ill. 6)
Couper le câble 2 à la longueur pré-
vue.
(ill. 6)
Cut the cable 2 to the desired nominal
length.
Montage
Assembly
(ill. 7)
Glisser le câble 2 à travers l‘isolant
3. Pour le cordon SLK418-L/6kV AM
enfi ler d‘abord la bague de marquage
4 KT-6kV AM sur le câble 2.
(ill. 7)
Feed cable 2 through insulator 3. With
lead SLK418-L/6kV AM the mark-
ing sleeve 4 KT-6kV AM should be
mounted prior to the insulator.
(ill. 8)
Dénuder le câble sur la longueur
L = 6mm avec la pince à dénuder.
(ill. 8)
Strip cable insulation to length L =
6mm with cable stripper.
(ill. 9)
Souder le câble 2 dans la fi che 1. Lors
de la soudure la température ne doit
pas être excessive à cause du téton
isolant. Température de soudure:
max.: +350° C.
La fi che et la zone de soudure doivent
être exemptes de coulures liées à la
soudure.
(ill. 9)
Solder cable 2 in plug 1. When solder-
ing the plug should not get too hot
because of the plastic head. Solder.
temp. + 350° C max.
Plug and solder area should be free
from excess solder.
Recommandation:
Utiliser un bloc avec un perçage Ø
4,2 mm pour maintenir la fi che 1 lors
de la soudure..
Recommendation:
For soldering purposes a block
with a drilled hole Ø 4,2mm should
be used to hold the plug 1 in posi-
tion.
(ill. 10)
Poser la fi che avec le câble dans la
pince à sertir PZK 3 (Pos. 10), position-
ner le siffl et de soudure vers le haut,
puis sertir jusqu‘en butée. Attention à
la dernière dent de sapin de la fi che.
(ill. 10)
Crimp the plug and cable in Pos. 10 of
the PZK 3 crimping pliers,
paying attention that the solder cup
is facing up-wards and that the crimp
is positoned behind the last captive
taper edge.
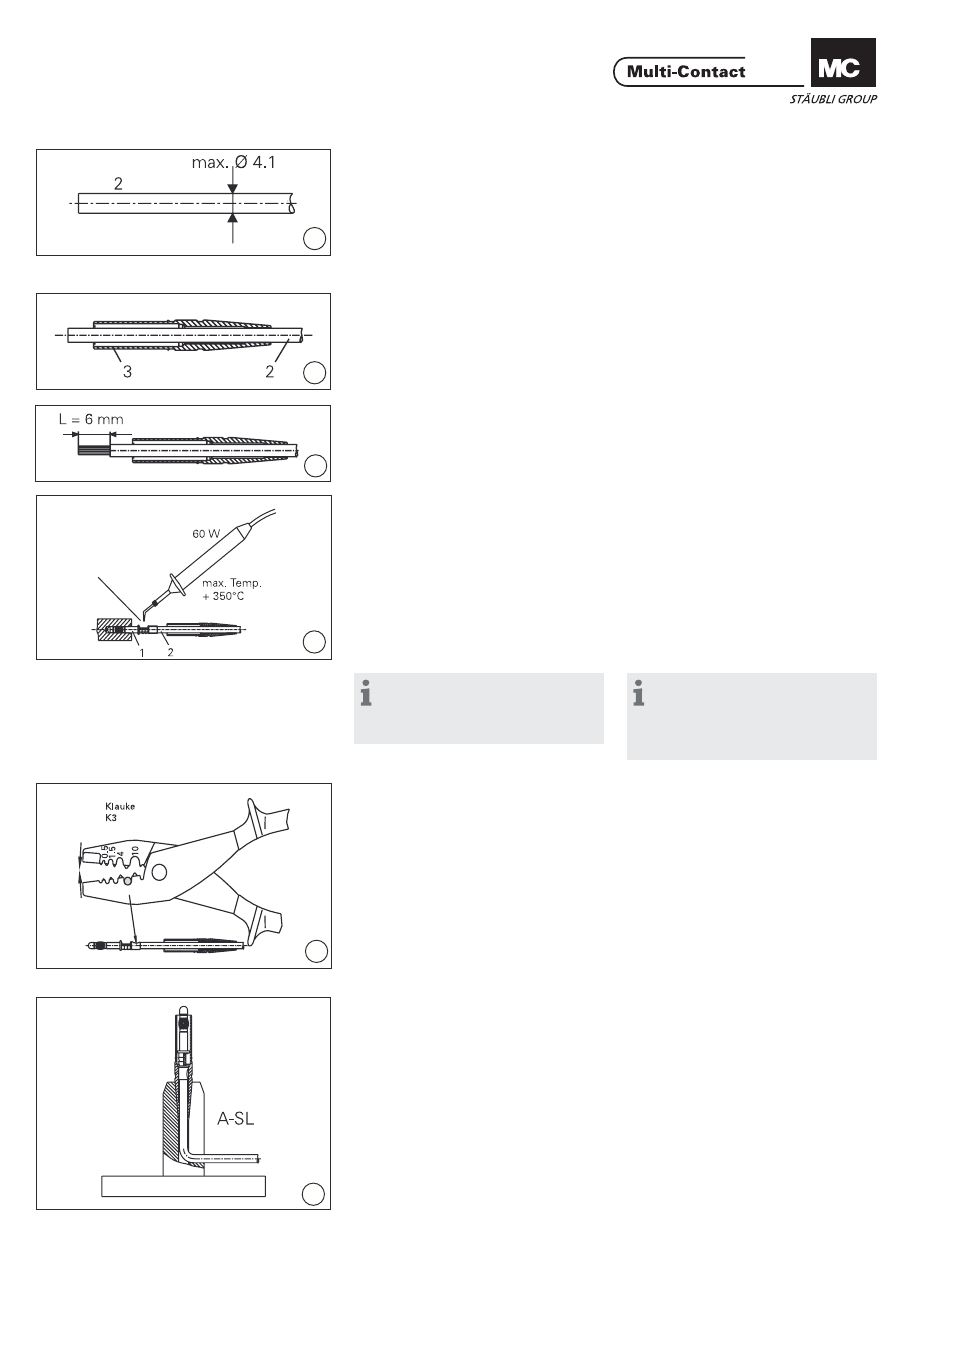
(ill. 11)
Introduire manuellement fi che et
câble dans le corps isolant et placer
l‘ensemble dans l‘outil de montage
A-SL.
(ill. 11)
Insert by hand the plug and cable into
insulator and then place into auxiliary
tool A-SL.