Multi-Contact MA303 Manuel d'utilisation
Page 5
Advanced Contact Technology
www.multi-contact.com
5 / 8
13
12
15
16
14
Sertissage
Crimping
Attention
Avant de sertir, enfiler le presse-
étoupe et le boîtier arrière sur le
câble�
Attention
Slip the cable gland and back
section of housing on the cable
before crimping�
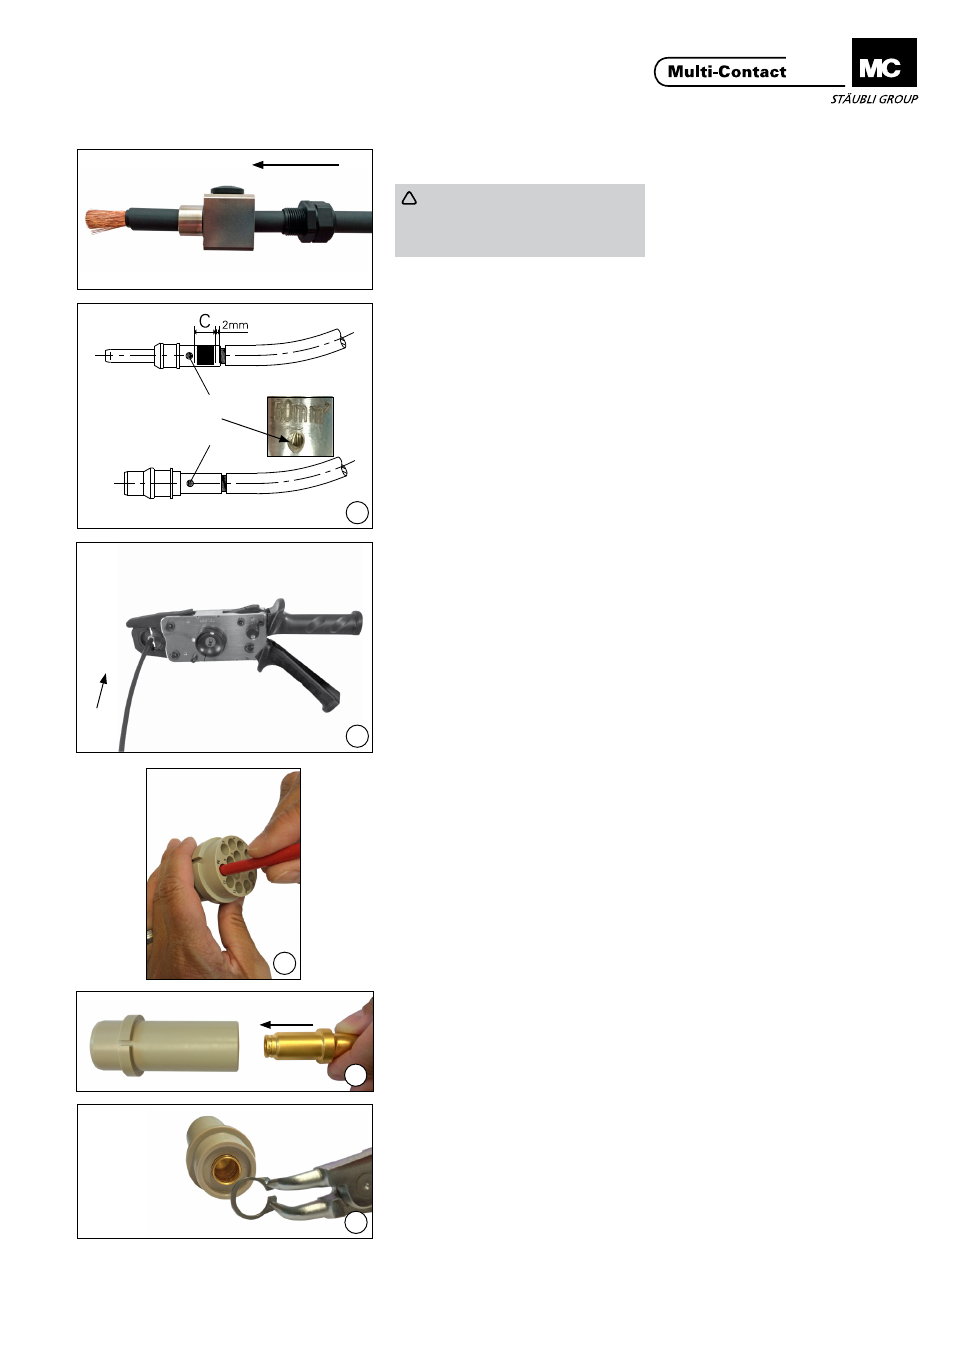
(ill. 12)
Veiller à bien respecter la zone de
sertissage (C)� Introduire le câble le fыt
а sertir jusqu’en butée� Le câble doit
être visible dans l’orifice de contrôle.
(ill. 12)
After inserting the crimping sleeve in
the tool, use crimp zone (C)�
Fully insert lead into the crimping
sleeve� Wire must be visible in the
control hole�
Remarque:
Pince à sertir adéquate et matri-
ces, voir Tab. 3, page 4/8
Note:
Adequate crimping pliers and dies,
see Tab. 3, page 4/8
(ill. 13)
Sertir tout en maintenant le conduc-
teur en position dans le fût� Le
conducteur doit être visible dans
l’orifice de contrôle avant et après le
sertissage�
(ill. 13)
Crimp the wire, pushing it gently into
the sleeve while doing so� Wire must
be visible in the control hole before
and after the crimping�
Assemblage
Assembly
(ill. 14)
Pour contacts Ø 1 / 1,6 / 3 et 6 mm
Insérer à la main, le contact dans le
support de contact, jusqu’à ce qu’il se
clipse�
(ill. 14)
For contacts Ø 1 / 1,6 / 3 and
6 mm
Insert the contact by hand in the con-
tact carrier until it engages�
(ill. 15)
Pour contacts Ø 10 mm
Insérer le contact dans le support de
contact�
(ill. 15)
For Ø 10 mm contacts
Insert the contact in the contact
carrier�
(ill. 16)
Bloquer le contact par l’avant à l’aide
du circlip�
(ill. 16)
Lock the contact in the front with the
circlip�
Orifice de contrôle
Control hole
Exemple avec la pince à sertir pour
câbles 6 à 35 mm
2
Example with crimping pliers for 6 to
35 mm
2
cables