Multi-Contact MA090 Manuel d'utilisation
Page 3
Advanced Contact Technology
www.multi-contact.com
3 / 4
1
2
3
4
5
6
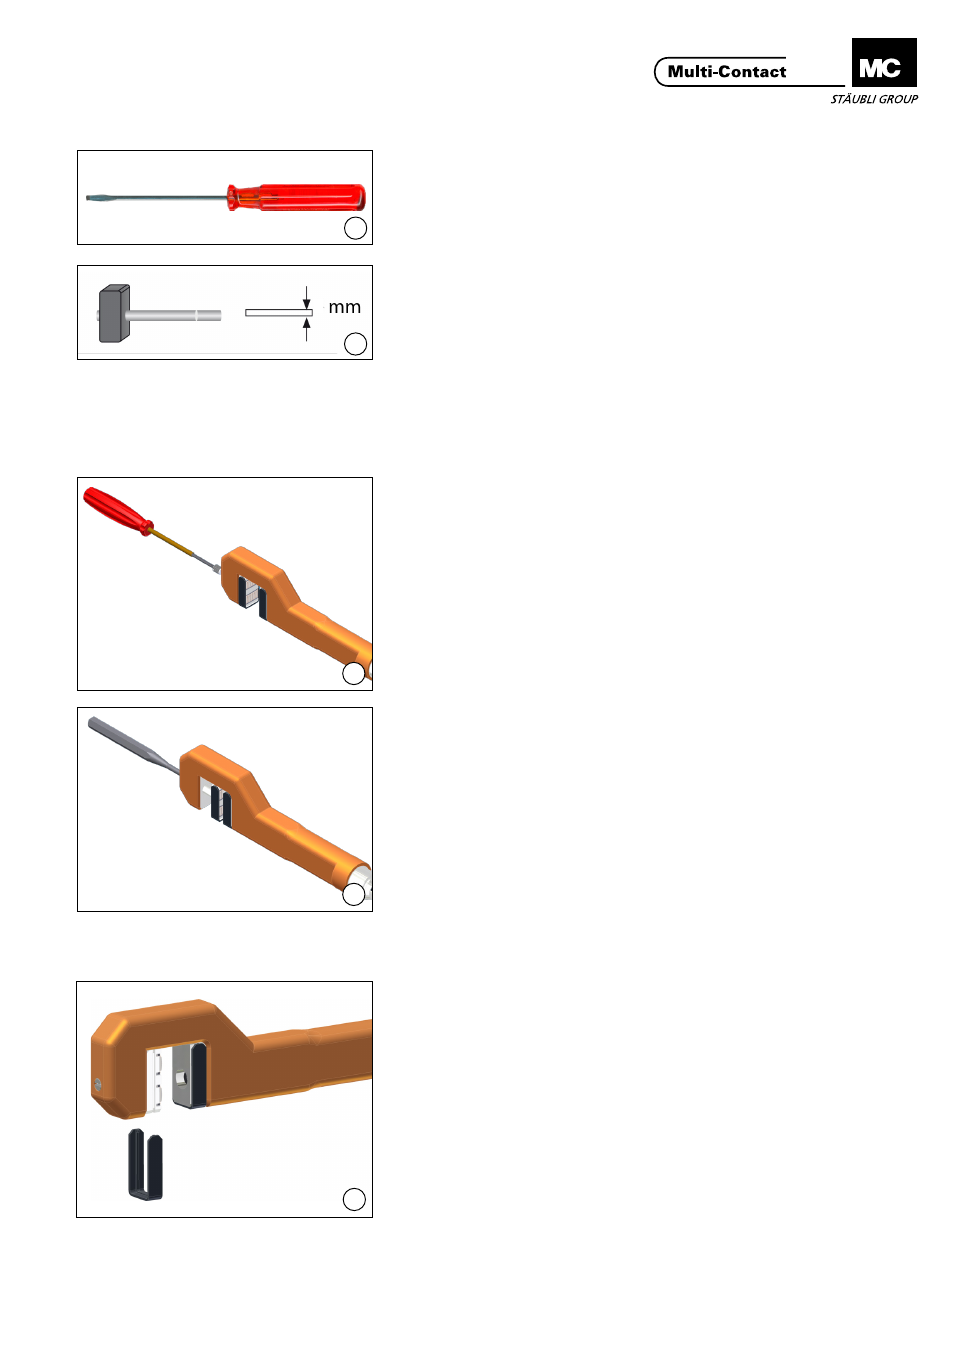
Outillage nécessaire
Tools required
(ill. 1)
Tournevis taille 5
(ill. 1)
Screwdriver size 5
(ill. 2)
MarteauetpoinçonØ6 mm
(ill. 2)
HammerandpunchØ6 mm
Montage
Assembly
Le bloc de guidage doit être vissé vers
l’arrière jusqu’en butée à l’aide de
l’outil FSA20-WZ�
The guide block must be screwed in
completely using tool FSA20-WZ�
(ill. 3)
Dévisser la vis sans tête M8x10 avec
le tournevis�
(ill. 3)
Unscrew the M8x10 grub screw using
the screwdriver�
(ill. 4)
Faire passer le poinçon par l’ouverture
et éjecter le thermobloc interchan-
geable� Au besoin, le faire sortir en
donnant de légers coups de marteau�
Insérerlenouveauthermoblocinter-
changeable et refermer l’ouverture
avec la vis sans tête�
(ill. 4)
Guide the tapered punch through
the opening and push out the inter-
changeableblock.Ifnecessary,force
it out by gently banging on the punch
with a hammer� Push in the new
interchangeable block and close the
opening again using the grub screw�
Note:
Contrôler le positionnement sûr de
l’isolation.
Note:
Check that the insulation fits
properly.
Montage de l‘isolant
Assembly of the insulation
(ill. 5)
Note:
Veiller à ce que le ressort soit bien
dans la rainure et le clip de fixation
bien enclenché.
(ill. 5)
Note:
Make sure that the spring is lying
correctly in the groove and that the
catches snap properly into place.
L’isolation est utilisée pour le ther-
mobloc interchangeable et le bloc de
guidage�
The insulation is used for both the
interchangeable block and the guide
block�