Retrofit installation – Greenheck SP-110-VG and SP-80-VG Multi-Speed (IOM) Manuel d'utilisation
Page 7
WARNING
Before removing existing fan, switch power off at
service panel and lock the service disconnecting
means to prevent power from being switched on
accidentally. When the service disconnecting means
cannot be locked, securely fasten a prominent
warning device, such as a tag, to the service panel.
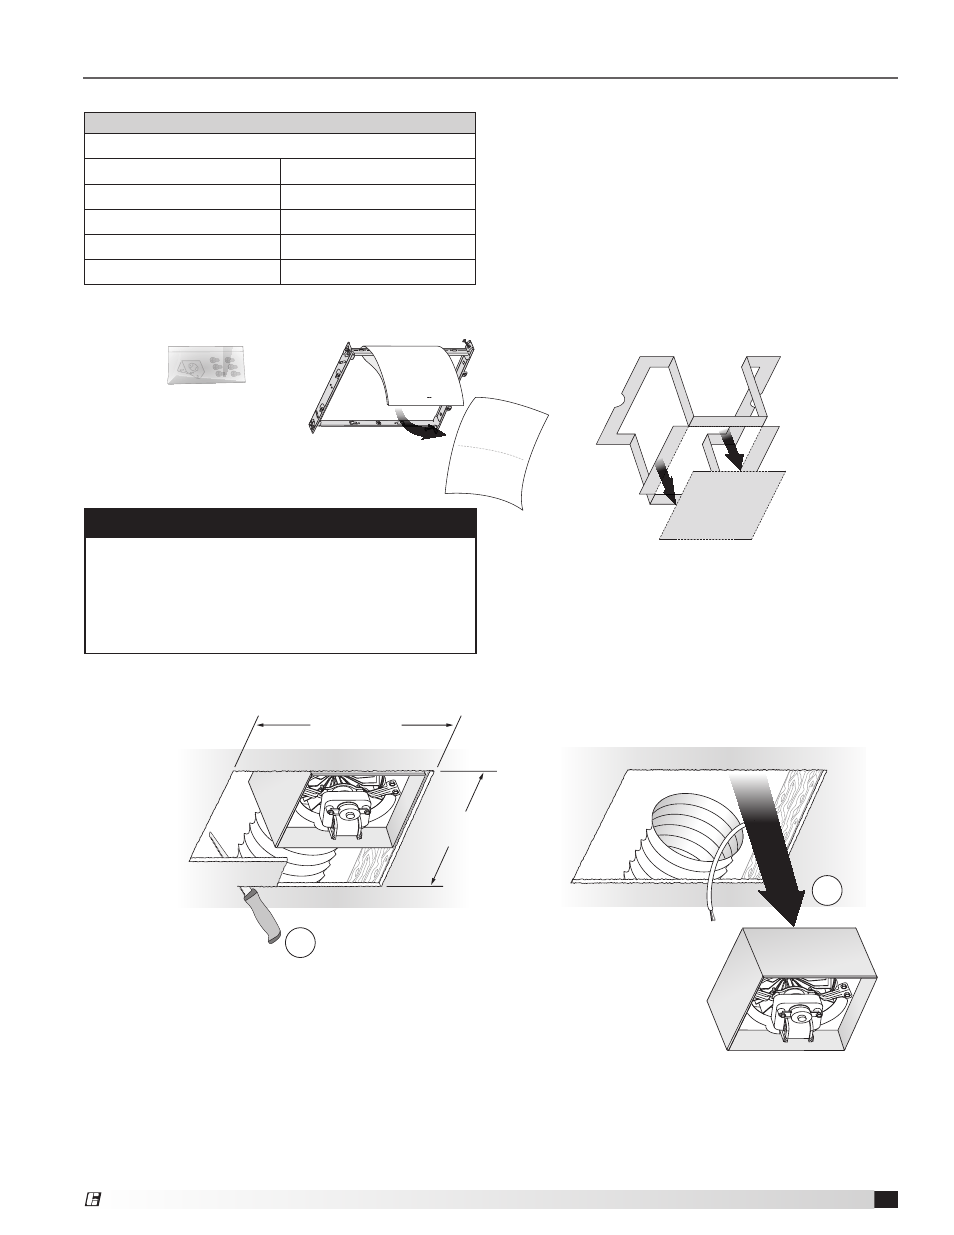
12" (30.5 cm)
1
2
Retrofit Installation
Parts Bag holds
Knockout Plate
and six (6)
screws
Existing ductwork and
wiring left in place
11" (27.9 cm)
parallel with joists
Examine the existing wiring to make sure it is not
damaged. If any damage is found,
DO NOT CONTINUE INSTALLATION of this product.
Contact a qualified person(s) for repair.
Remove
Instruction
Sheet
Punch out Mask from
packaging. See Step 12.
1 - Remove Packaging
2 - Switch Off Power
4 - Examine Wiring
3 - Enlarge Ceiling Opening and Remove Existing Fan
Materials needed
• Tape to seal duct connections
• Existing rigid duct will require the addition of a short
length of flexible duct
• Electrical wiring and supplies per local code
requirements
Tools needed
Power screwdriver with a Phillips bit
Phillips screwdriver
Ruler
Flathead screwdriver
Pencil
Pliers
Drywall saw
Wire insulation stripper
Claw hammer or pry bar
Wire cutter
Utility knife
7
SP Ceiling Exhaust Fans
®