Assembly – Baja Motorsports DR150 Assembly Guide Manuel d'utilisation
Page 8
8 — English
©
2010 Baja, Inc. All Rights Reserved.
ASSEMBLY
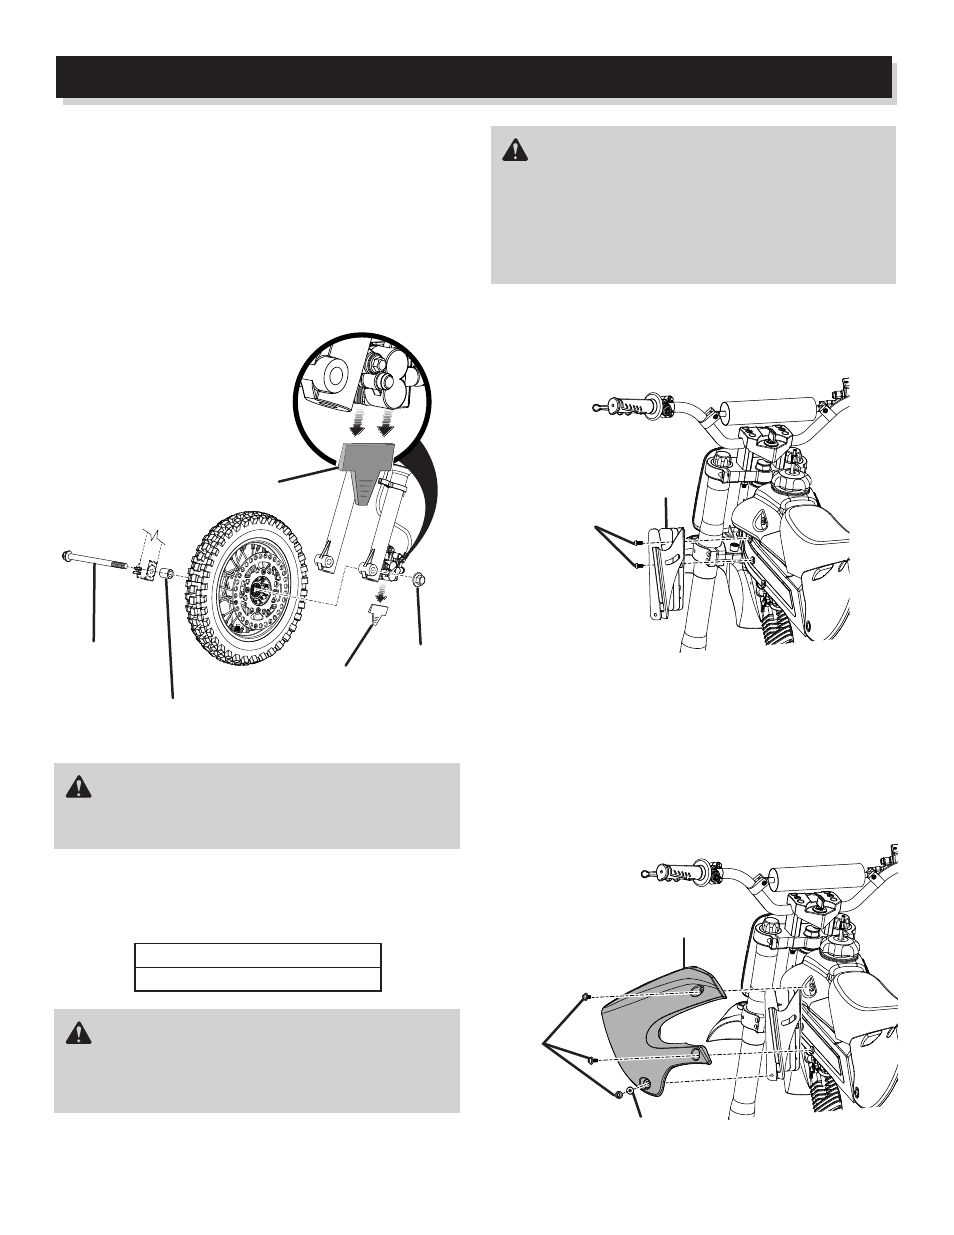
INSTALLING FRONT WHEEL
Remove plastic plug from brake calipers.
Place the front wheel in the correct position between the
steering forks.
Starting from the right side (opposite the chain) of the dirt
bike, slide the axle bolt through the fork, wheel spacer,
wheel with brake hub, and other side of fork.
Install the nut and tighten securely. Torque to 26-33 ft.lbs.
(35-45 Nm).
WARNING:
Strictly adhere to all torque wrench tightening specifica-
tions. Failure to do so could cause serious personal injury.
Check the air pressure of the tires and inflate as needed
to the proper amount.
NOTE: Tire pressure should only be measured or
adjusted when tires are cold.
Recommended Pressure
15-18 psi (103-124 kPa)
WARNING:
Check the tire pressure carefully while inflating. Too much
air in the tire could cause the tire to burst, causing serious
personal injury.
INSTALLING AIR VENTS AND SIDE PANELS
Align air vent with holes in dirt bike frame. Install screws
as shown and tighten securely.
WARNING:
Maintaining correct air pressure in the tires is very impor-
tant. Too little pressure could allow the tire to rotate off
the wheel rim. Too much pressure could cause the tire to
burst. Failure to maintain correct air pressure in the tires
could cause problems with vehicle operation and stability,
causing serious personal injury.
PLASTIC
PLUG
PLASTIC
PLUG
NUT
WHEEL
SPACER
AXLE
BOLT
Align side panel with holes in dirt bike frame and air vent.
Where the side panel attaches to the dirt bike frame, install
screws and tighten securely.
At the hole where the side panel attaches to the air vent,
place washer on screw, then insert screw and tighten
securely.
Repeat on opposite side to install other air vent and side
panel.
AIR VENT
SCREWS
AIR
VENT
WASHER
SIDE
PANEL
SCREWS
SIDE
PANEL