Assembly – Baja Motorsports DR150 Assembly Guide Manuel d'utilisation
Page 6
6 — English
©
2010 Baja, Inc. All Rights Reserved.
ASSEMBLY
WARNING:
Strictly adhere to all torque wrench tightening specifica-
tions. Failure to do so could cause serious personal injury.
WARNING:
Do not attempt to modify this product or create acces-
sories not recommended for use with this product. Any
such alteration or modification is misuse and could result
in a hazardous condition leading to possible serious
personal injury.
WARNING:
To prevent accidental starting that could cause serious
personal injury, always disconnect the engine spark plug
wire from the spark plug when assembling parts.
WARNING:
If any of the assembly steps have already been com-
pleted, verify the assembly was completed correctly, the
piece is securely tightened, and torque specifications are
correct, then proceed to the next step in the assembly
process. Use of a product that may have been improperly
assembled could result in serious personal injury.
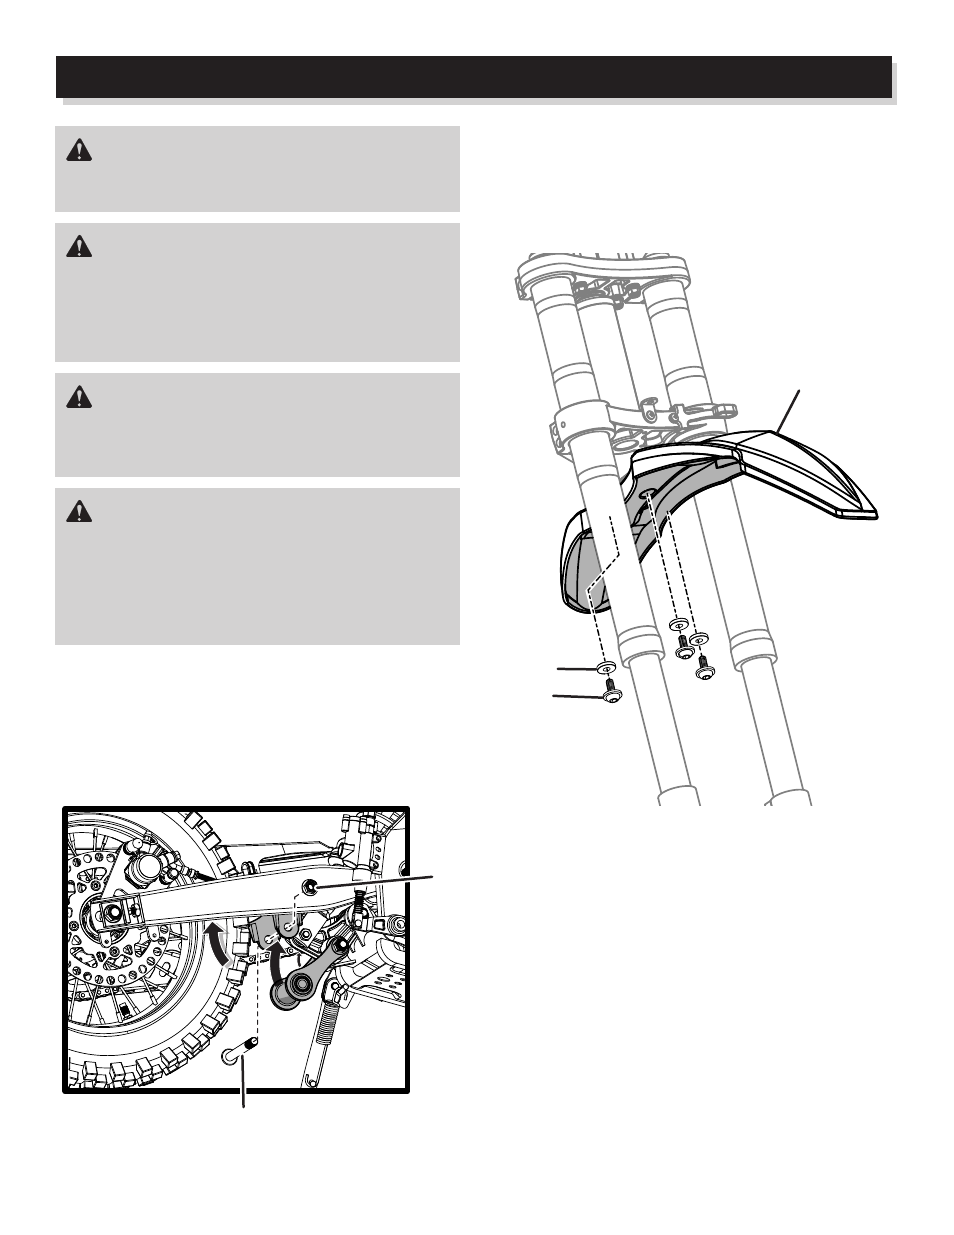
INSTALLING FRONT FENDER
Align the holes in the front fender with the holes in the dirt
bike frame as shown.
Insert bolts through washers, then through fender and
frame. Tighten securely.
INSTALLING REAR SHOCK
Remove the nut and bolt from the frame as shown.
Lift up the rear of the dirt bike and align the rear shock
with the holes in the frame.
Reinstall the bolt and nut. Torque to 11.1-14.8 ft.lbs. (15-
20 Nm).
NUT
BOLT
BOLT
WASHER
FRONT
FENDER