Chapter 3 : starting – Analog Way XTD825 Manuel d'utilisation
Page 8
STUDIO SCAN XTD825 / 625™
PAGE 8
Chapter 3 : STARTING
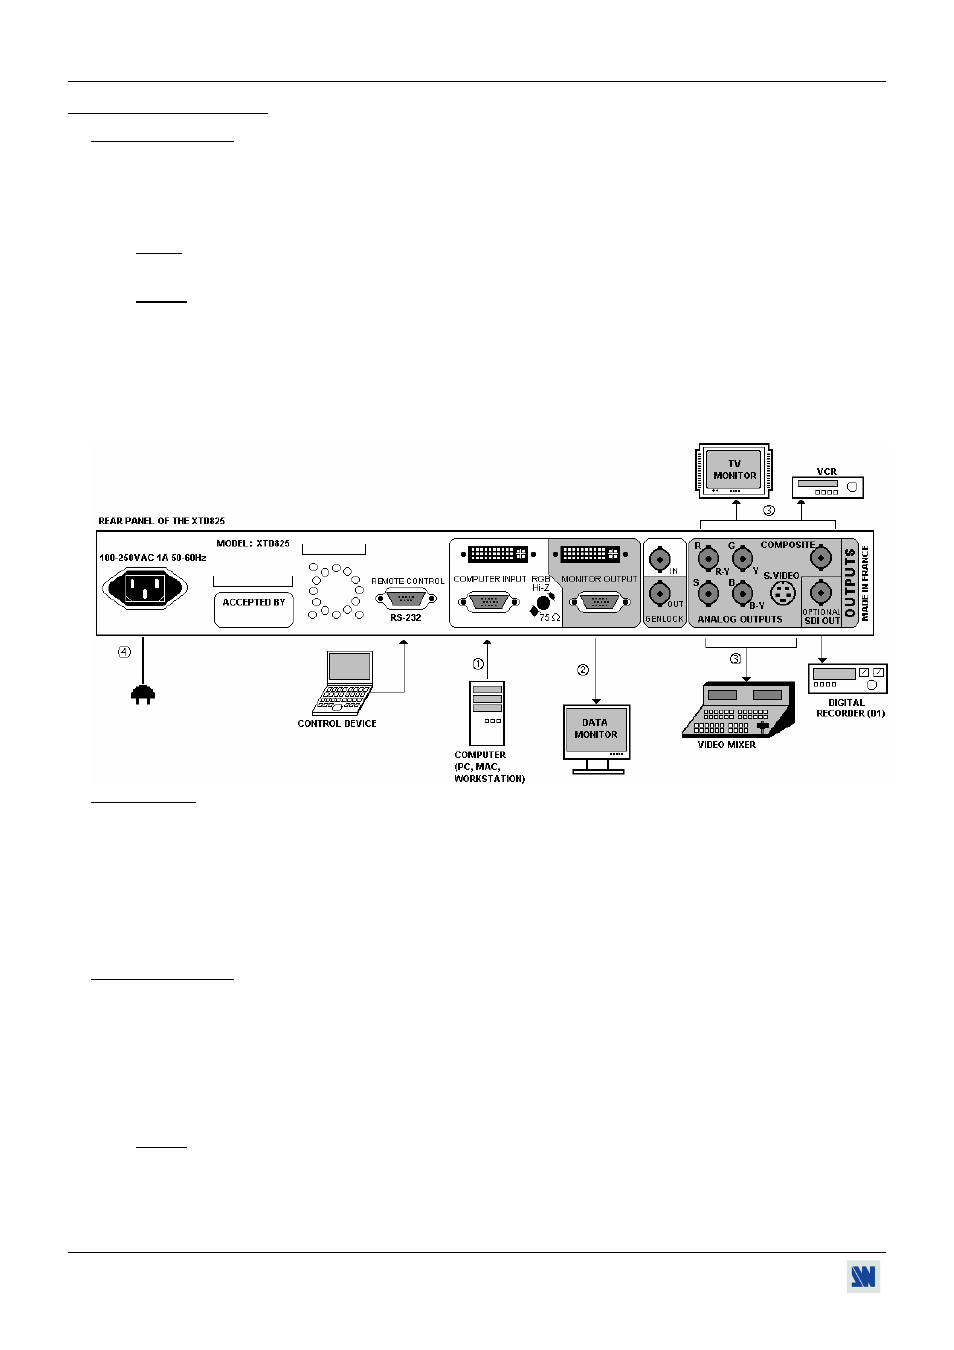
3-1. CONNECTIONS
c Connect your computer (Workstation, PC or MAC) to the "COMPUTER INPUT" connector (HD15 or DVI-I
female) of the XTD825/625.
d Connect your DATA monitor to the "MONITOR OUTPUT" connector (HD15 or DVI-I female) of the
XTD825/625.
NOTE: Set the RGB Hi-Z/75 Ω button on Hi-Z if you connect a monitor on the "MONITOR OUTPUT" connector.
If not set it on 75 Ω.
NOTE: It's not possible to view the digital computer source (DVI-I input) onto a monitor connected to the analog
monitor output (HD15 output). It's not possible to view the analog computer source (HD15 input) onto a
monitor connected to the digital monitor output (DVI-I output).
e Connect your display device (TV monitor, VCR, digital recorder...) to the outputs (ANALOG or SDI) of the
XTD825/625.
f Connect the AC Mains cable to the XTD825/625 and power "ON" the Main Switch (on front panel).
g Turn ON the display device (TV monitor...), the DATA monitor and finally the Computer.
3-2. SETTINGS
c We recommend to reset the device to all of its DEFAULT VALUE with the LCD menu # 4-4, before proceeding.
d For the XTD825 versions with optional DVI input, select the input type (analog or DVI) with the LCD menu # 1-2.
e Select an output standard with the LCD menu # 2-2.
f Select an output rate with the LCD menu # 2-3.
g Select the type of the RGB/YUV output with the LCD menu # 2-4.
3-3. ADJUSTMENTS
c Select the UNDERSCAN mode with the front panel button (UNDER LED is ON).
d Adjust the position & size with the front panel buttons to fill the image in the full screen.
e Select the needed mode (OVER or ZOOM) with the front panel button. If you select ZOOM, adjust the horizontal
and vertical size of the image with the front panel buttons.
f Make the others adjustments, if necessary, available in LCD menu # 3 (black level, RGB level, flicker level,
horizontal smooth...). Valid all the LCD adjustments with ENTER.
NOTE: The STUDIO SCAN XTD825 / 625
™
is provided with 40 NON-volatile image memories. Each of these
memories contains the input format parameters and all of the image adjustments (position, size...). When
the 40 memories are used, each new memorization erases the oldest memory.