2c-3 install projector body (extension pipe), 1 install projector, 2c-1 install projector body (extension pipe) – Crimson JR3XL Manuel d'utilisation
Page 6: 2c-2 install projector body (extension pipe)
6
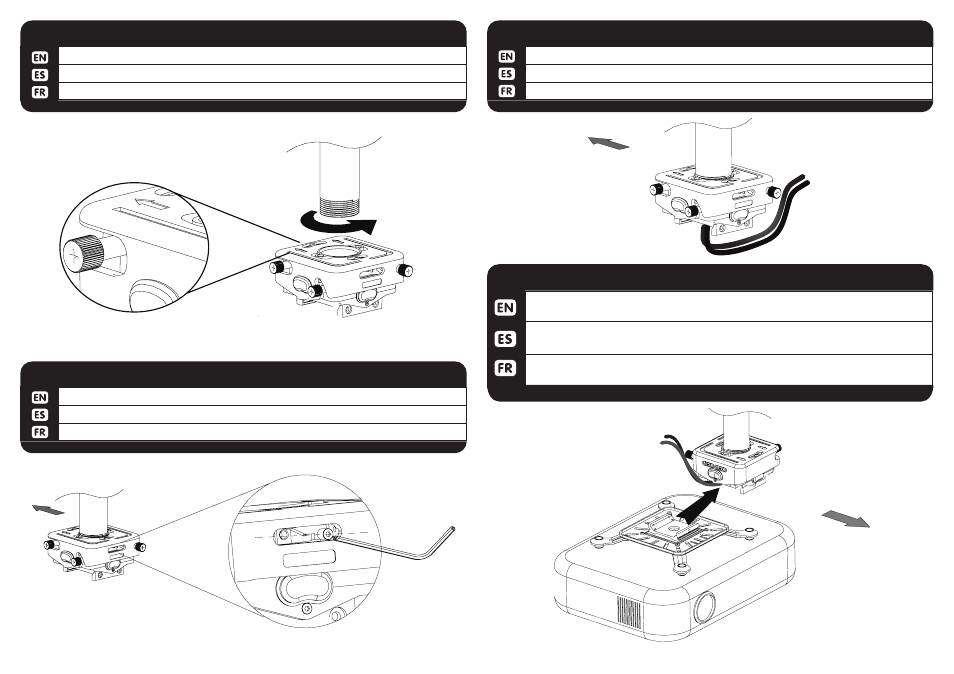
2c-3 INSTALL PROJECTOR BODY (EXTENSION PIPE)
Run the wiring through the pipe and through the JR3 body.
Ejecute el cable a través del tubo ya través del cuerpo JR3.
Exécuter le câblage à travers le tube et à travers le corps JR3.
Screen
Slide the universal plate into the JR3 body from right to left (while facing screen). Hold
the wires up to prevent interference.
Deslizar la placa universal en el cuerpo JR3 de derecha a izquierda (mientras se
enfrenta a la pantalla). Mantenga los cables para prevenir interferencias.
Glisser la plaque universelle dans le corps JR3 de droite à gauche (en faisant face
écran). Maintenir les fils en place pour éviter les interférences.
3-1
INSTALL PROJECTOR
Screen
JR3XL-0001
2c-1 INSTALL PROJECTOR BODY (EXTENSION PIPE)
Thread the JR3 body (X) on the extension with the arrows pointing to the screen.
Enhebrado del JR3 cuerpo (X) en la extensión con las flechas apuntando a la pantalla.
Enfilez le corps JR3 sur (X) l’extension avec les flèches pointant à l’écran.
Screen
(M)
Extension
pipe
Arrow points to screen
2c-2 INSTALL PROJECTOR BODY (EXTENSION PIPE)
Tighten the locking set screw.
Apriete el tornillo de bloqueo.
Serrer la vis de blocage.