Warning – Crimson JR3XL Manuel d'utilisation
Page 5
5
JR3XL-0001
Screen
Arrow points to screen
INSTALL PROJECTOR BODY (CONCRETE)
B
Use a 4mm - 5/32” wood bit to make a 65mm / 2.5” deep hole on marks.
Utilice un 4 mm - 5 / 32“ poco de madera para hacer un 65mm / 2.5” hoyo profundo
en materia de marcas.
Utilisez un 4mm - 5 / 32” bits du bois pour faire un 65mm / 2.5” trou profond sur les marques.
INSTALL PROJECTOR BODY (WOOD JOIST)
2a-2
Attach projector ceiling interface with wood screws (A).
Utilice los tornillos de madera (A) para fijar el límite máximo de interfaz del proyector
a la viga de madera.
Utilisez des vis à bois (A) pour fixer la plaque de plafond à la poutre en bois.
INSTALL PROJECTOR BODY (WOOD JOIST)
2a-3
drill depth
65mm / 2.5”
drill diameter
4mm
5/32”
Screen
Arrow points to screen
(A)
2b-1
!
!
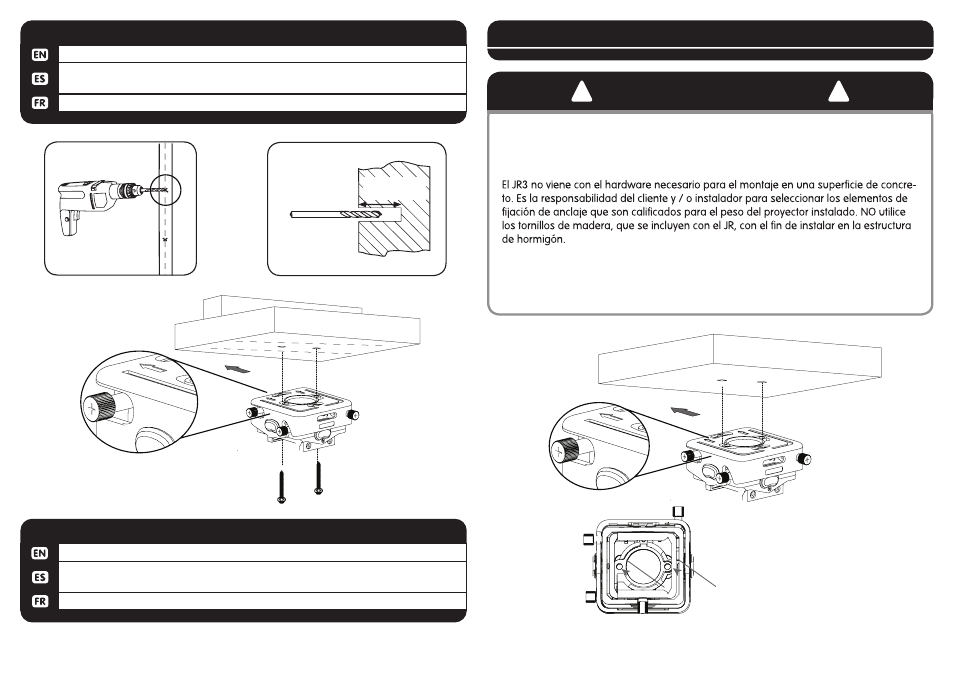
WARNING !
The JR3 does not come with hardware required for mounting to a concrete surface.
It is the responsibility of the customer and/or installer to select the anchoring fasten-
ers that are rated for the weight of the installed projector. Do NOT use the provided
wood screws for attaching to concrete structure.
Le JR3 pas avec le matériel nécessaire pour le montage sur une surface en béton. Il est
de la responsabilité du client et / ou l'installateur pour sélectionner les attaches
d'ancrage qui sont prévus pour le poids du projecteur installé. NE PAS utiliser les vis à
bois fournies avec le JR, à installer dans la structure en béton.