Fig.8, Fig.7 – Medal Sports WMC1324809 Manuel d'utilisation
Page 10
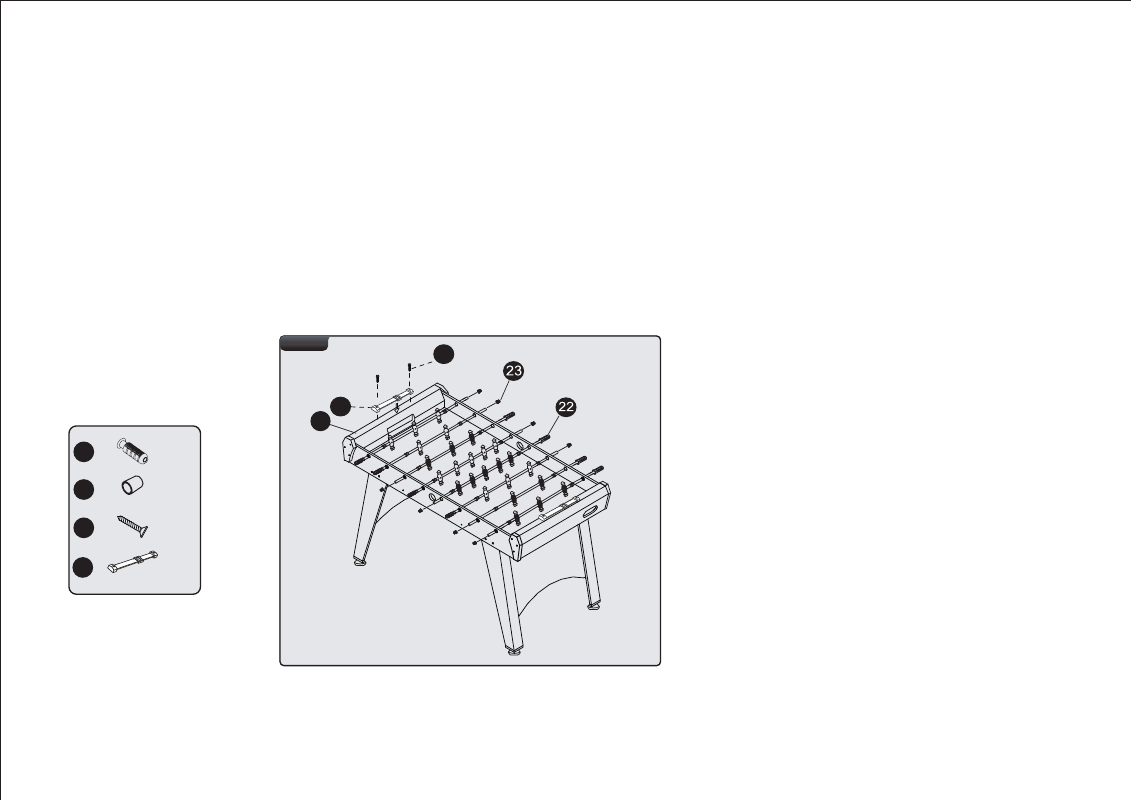
FIG.8
17. Place the Handles (#22) onto the Rods top which has a
hole. And then place the Rod End Caps (#23) onto the
other side of the Rods.
18. Attach the Scorer (#30) to the End Apron (#2) using
two Screws (#29) per Scorer.See FIG. 8.
9
FIG.7
12. Slide the Rods (#15-17) through the Rod Bushings (#A2) on one Side Apron (#1) in the order as shown in Fig.7.
Note: The player Rods have a hole at their end where the Handles will go.
13. Place the Rod Washer (#20), Foam Bumpers (#21) and Players (#18 and #19) onto the Player Rods (#15, #16 and #17)
in the order as shown in Fig.7 and 7A.
14. Now insert the Player Rods through the Rod Bushings (#A2) on the opposite Side Apron (#1).
15. Attach the Players (#18 or #19) to the Rods using one Screw (#12) and one Nut (#28) per Player.
See FIG.7B.
16. Attach the Corner (#24 or #25) to the Side Aprons using two Screws (#13) and one Screws(#31) per Corner.
See FIG.7.
Note: The goalie should be at the left side of each player.
X 8
22
X 8
23
X 4
29
X 2
30
FIG. 8
29
30
2
YOU ARE NOW READY TO PLAY!