Étape 9 - installation des patins, Step 9 - plastic guides installation – MAAX BANFF 60 Manuel d'utilisation
Page 8
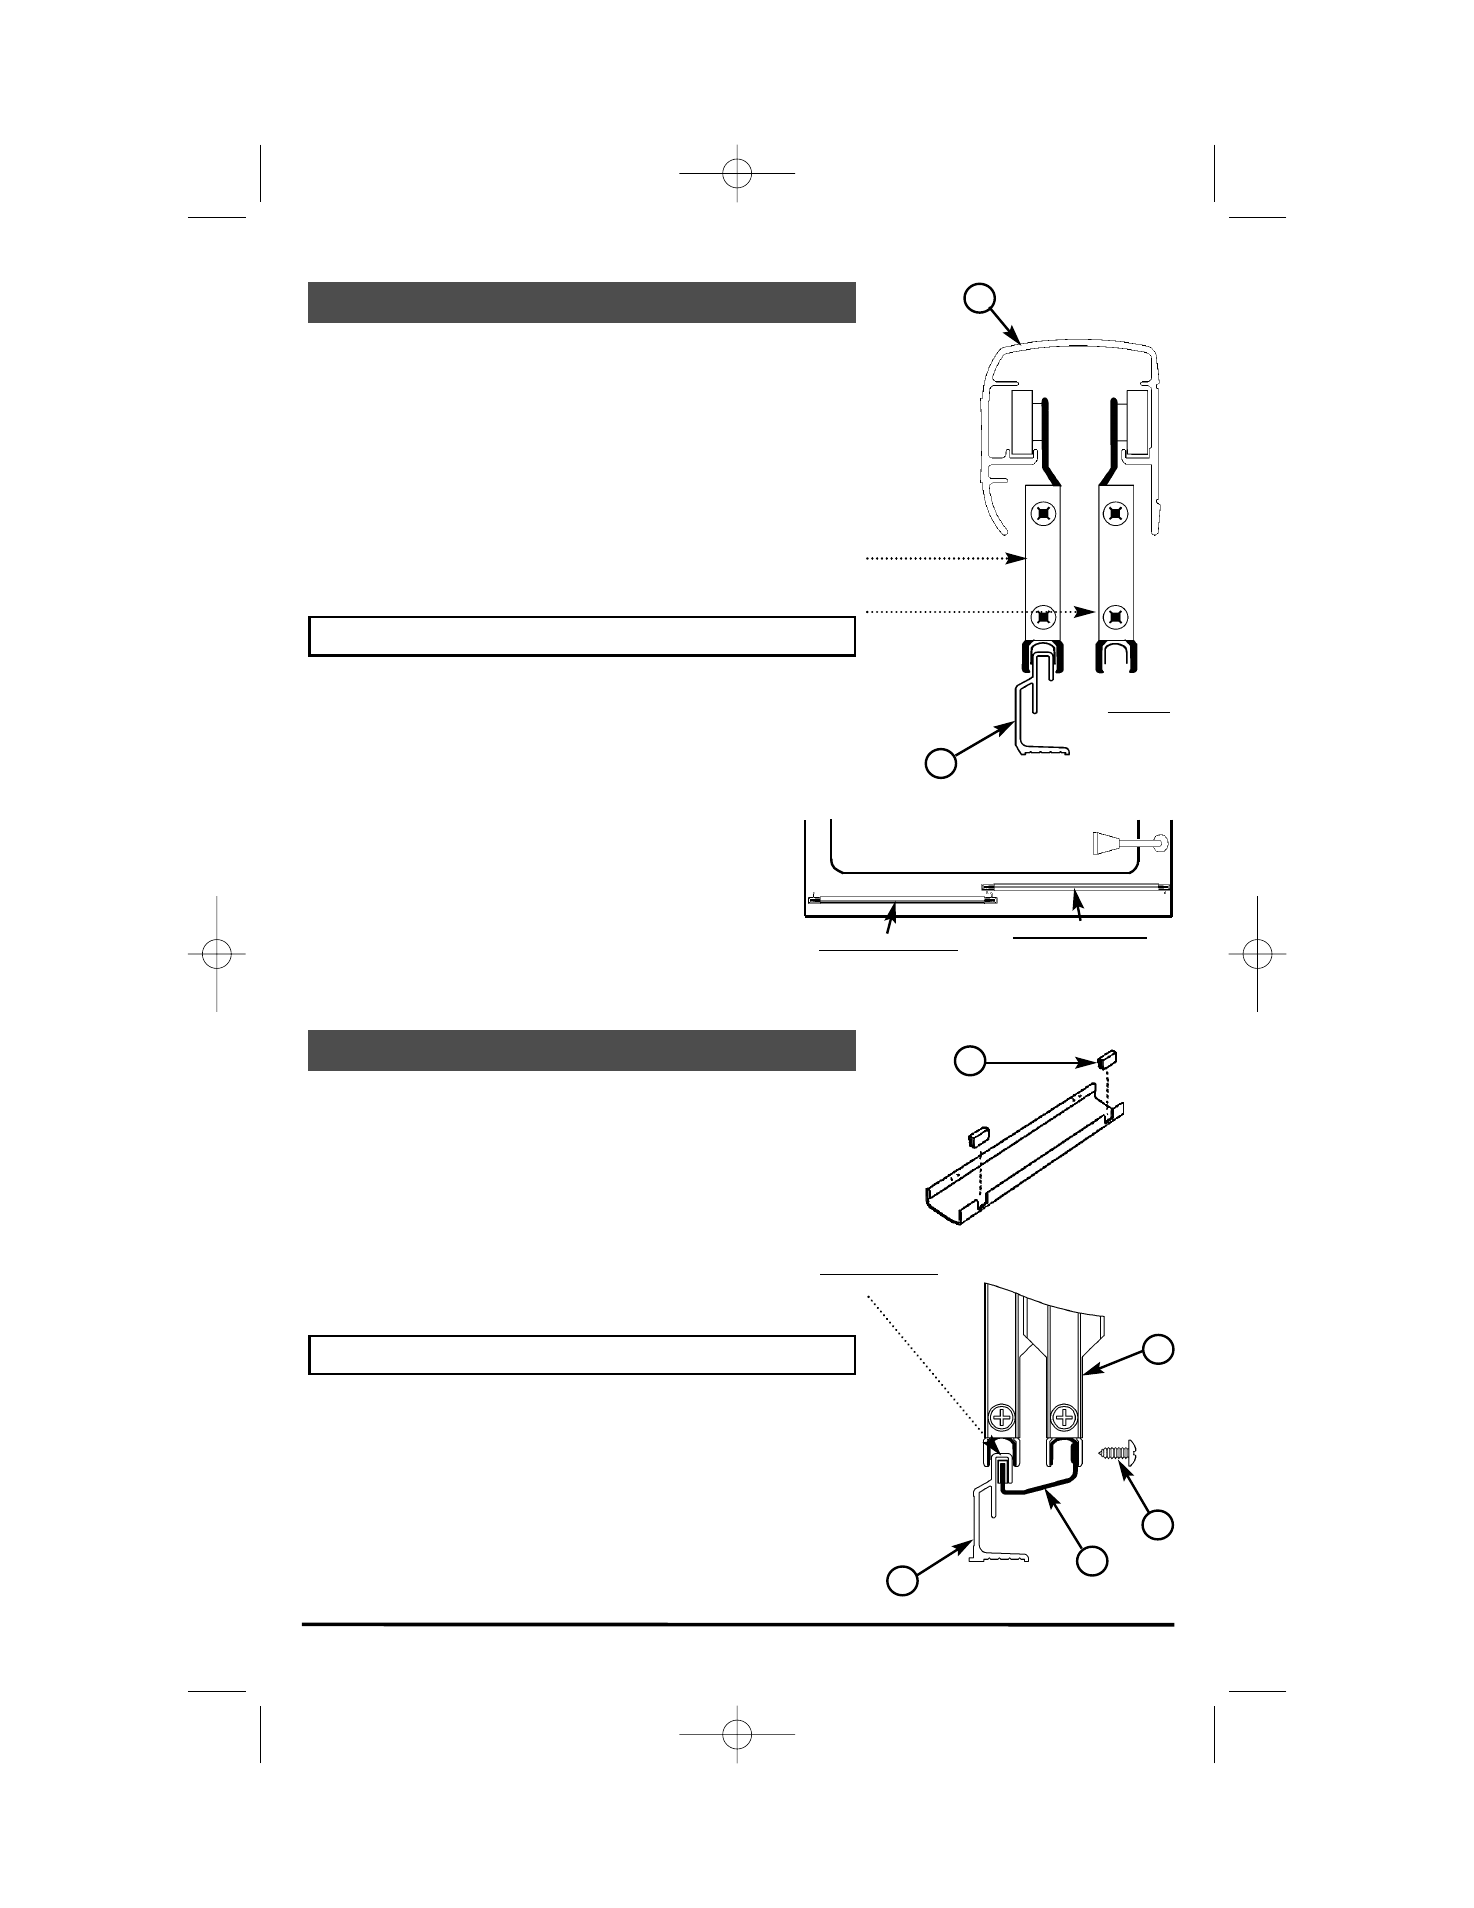
ÉTAPE 8 - Installation des panneaux
STEP 8 - Panels installation
I.
De l’intérieur du bain, accrochez le panneau extérieur (celui
avec les fentes au centre des cadres de côtés sur le rail du
haut (B), puis déposez-le de façon à ce qu’il soit à cheval
sur le rail du bas (C).
II. Accrochez le panneau intérieur du côté de la pomme de
douche tel qu’illustré.
III. Ajustez l’équerrage et le roulement des panneaux si requis,
à l’aide des roulettes, tel que mentionné à l’étape 7.
ÉTAPE 9 - Installation des patins
STEP 9 - Plastic guides installation
# 10049479-050323
8
I.
From inside the tub, hang the exterior panel (with the towel
bar notches in the side frame so that its rollers rest in the
header (B) groove. Raise the panel slightly to position it
onto the bottom track (C).
II. Install interior panel on the side closest to the
shower head as shown on illustration.
III. If required, adjust rolling of panels by repositioning
the rollers as mentioned earlier in step 7.
I.
Insert the two plastic guides (II) into the slots provided on
the retainer (FIG. A).
II. Hook the retainer (I) into the upper channel of the bottom
track (C), and then into channel of the bottom frame (E) of
the interior panel (FIG. B).
III. Secure with screws (CC).
I.
Insérez les patins (II) dans les fentes de l’étrier (FIG. A).
II. Accrochez l’étrier (I) dans la voie de glissement supérieur
du rail du bas (C) et ensuite dans le rebord cadre du bas
(E) du panneau intérieur (FIG. B).
III. Vissez en place à l’aide des vis (CC).
B
C
Panneau intérieur
Interior panel
Panneau extérieur
Exterior panel
Intérieur
Inside
I
E
II
CC
C
Voie supérieure
Upper channel
Fig. A
Fig. B
Panneau extérieur
exterior panel
Panneau intérieur
interior panel
copie10049479-050323 2 Panneaux Manhattan.qxd 3/28/2005 7:25 AM Page 8